Parking Stall Assignments
Once your parking locations and stalls are set up, the next step is to connect them to individual units. Pluto Systems offers two assignment paths — pre-assignment, where stalls are directly linked to units by staff, and option sale, where stalls are sold to purchasers as a sales option during the deal process. This guide walks through both approaches so you can choose the right method for your workflow.
In this guide, we will cover:
- Navigating to the Parking & Storage page.
- Bulk assigning stalls to multiple units at once.
- Assigning a single stall to a specific unit.
- Selling parking stalls as options through the Options tab or the New Deal workflow.
- Unassigning stalls when changes are needed.
How We Got Here
Your organization has created parking locations (lots or parkades) and generated stalls within them through the Workbench. The parking locations are associated with one or more projects, and your units are ready to receive stall assignments. If you haven't set up your parking inventory yet, see the Parking Lots, Parkades & Parking Stalls guide first.
Pre-Assignment vs. Option Sale
Before diving into the steps, it's important to understand the two ways a stall can be linked to a unit:
| Method | When to Use | What Happens |
|---|---|---|
| Pre-Assignment | Stalls are included with the unit at no extra charge, or assigned by staff before sale. | The stall is linked directly to the unit. No sales option is created. |
| Option Sale | Stalls are sold as a purchasable upgrade during the deal process. | A sales option is created with a price, and the stall is simultaneously assigned to the unit. |
Both methods result in the stall being assigned to the unit, but option sales also create a financial record (sales option) tied to the deal.
On the Parking & Storage page, stalls assigned via an option sale display a "Sold as Option" badge next to the assignment. Pre-assigned stalls show only the unit number.
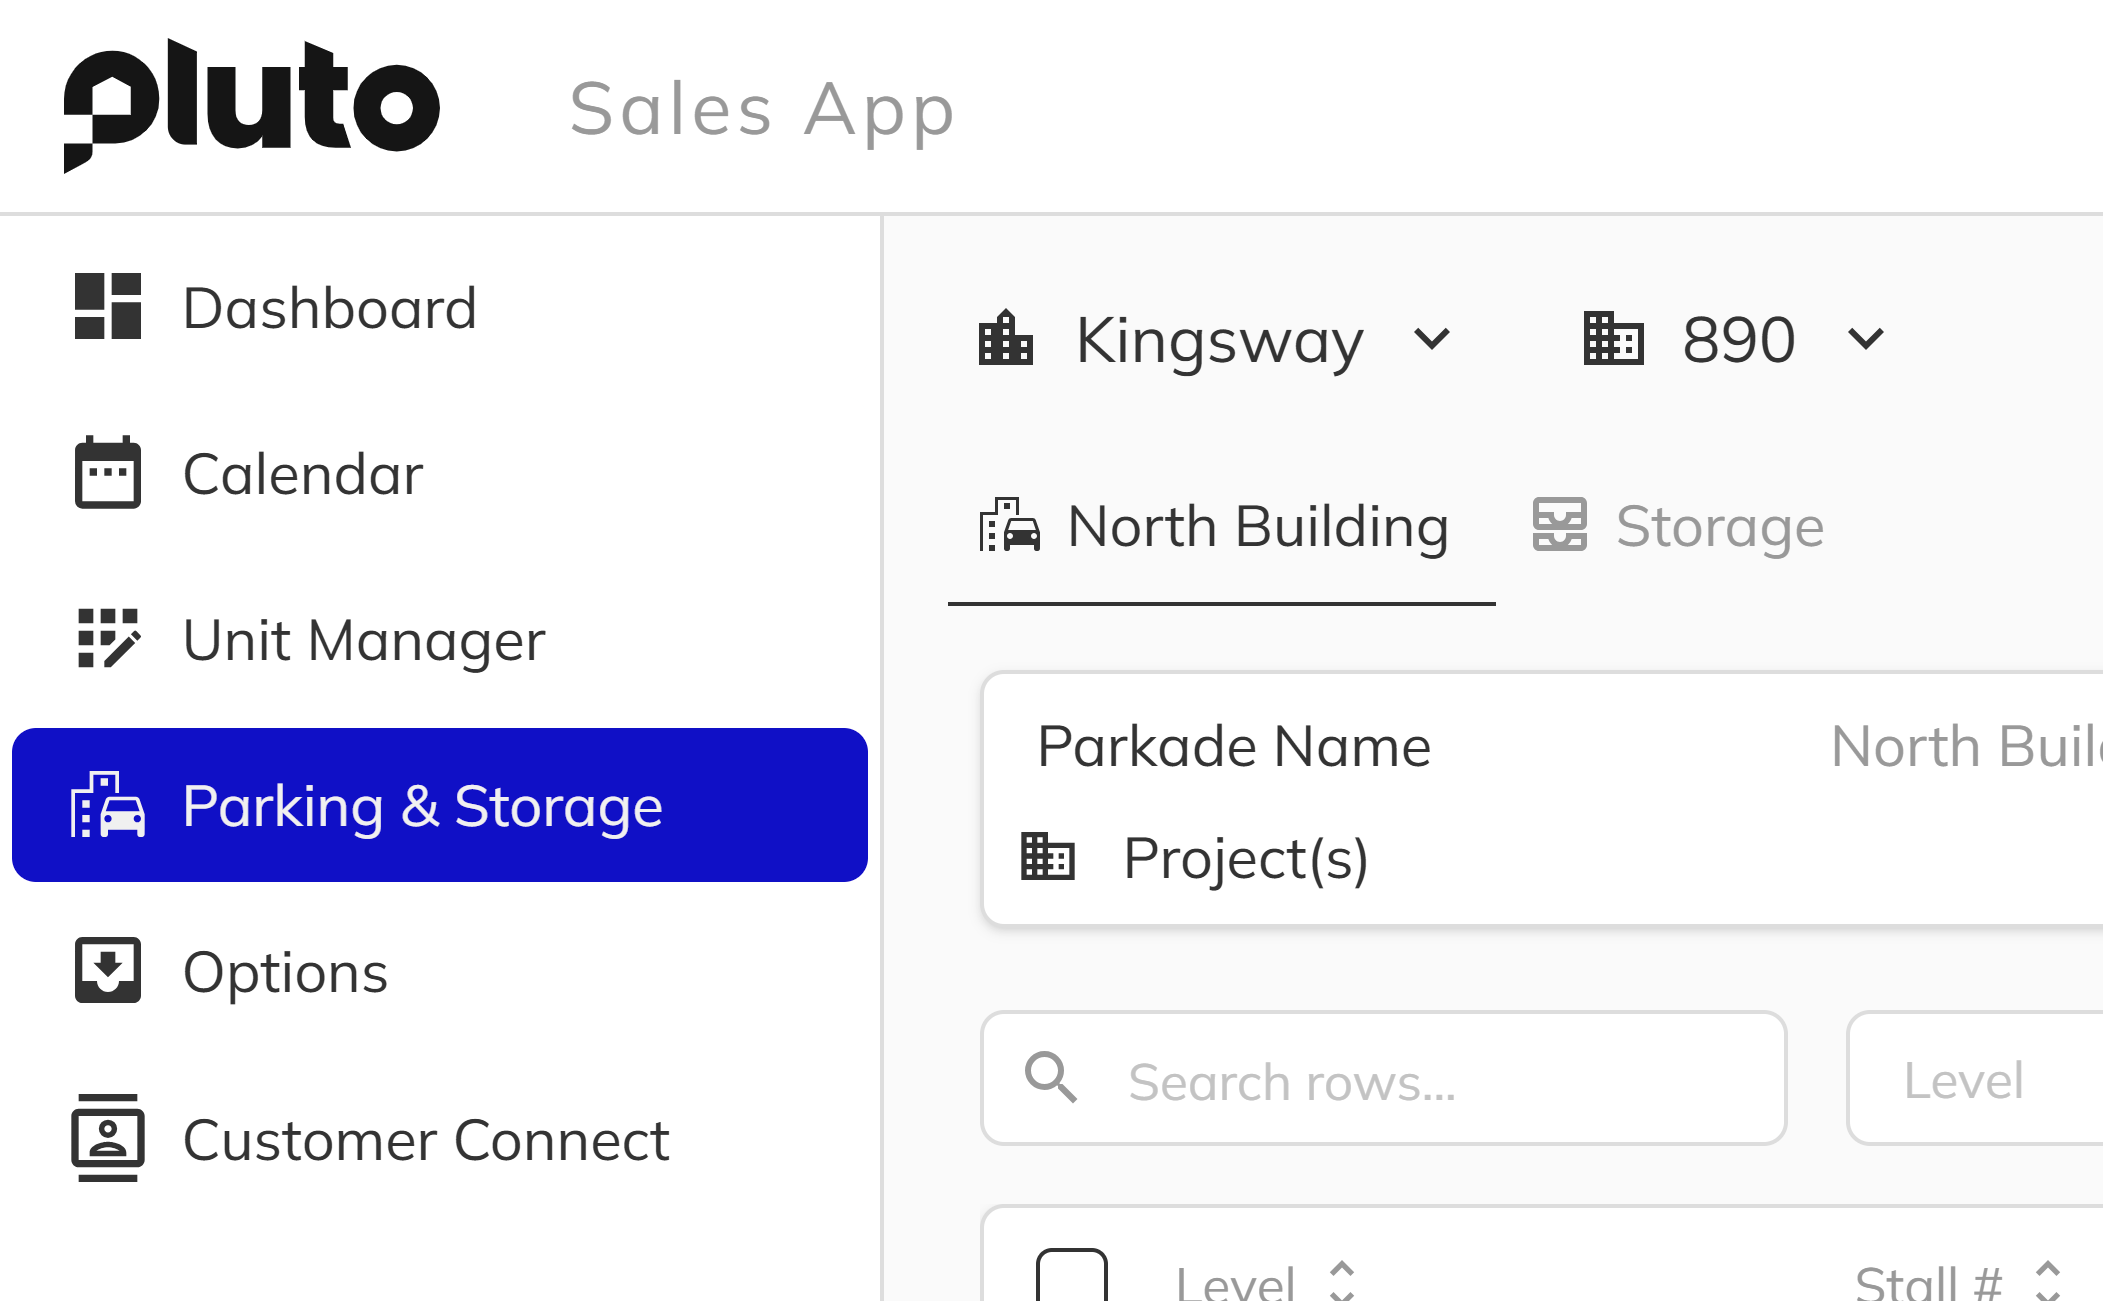
Getting to the Parking & Storage Page
1. Navigate to Parking & Storage
Open the Pluto app side menu and click on Parking & Storage. Select the Community and Project you want to work with. You will see the stalls grid showing all parking stalls for the selected parking location, along with their current assignment status.
Bulk Assigning Parking Stalls
Bulk assignment is the fastest way to link stalls to units when you need to assign many at once — ideal for initial project setup or when a new building is released.
1. Open the Bulk Assign Dialog
From the Parking & Storage page, click the Action dropdown. Click the Assign stall menu item to open the bulk assignment dialog. The dialog title shows the project name, and a badge displays the number of available (unassigned, non-public) stalls.
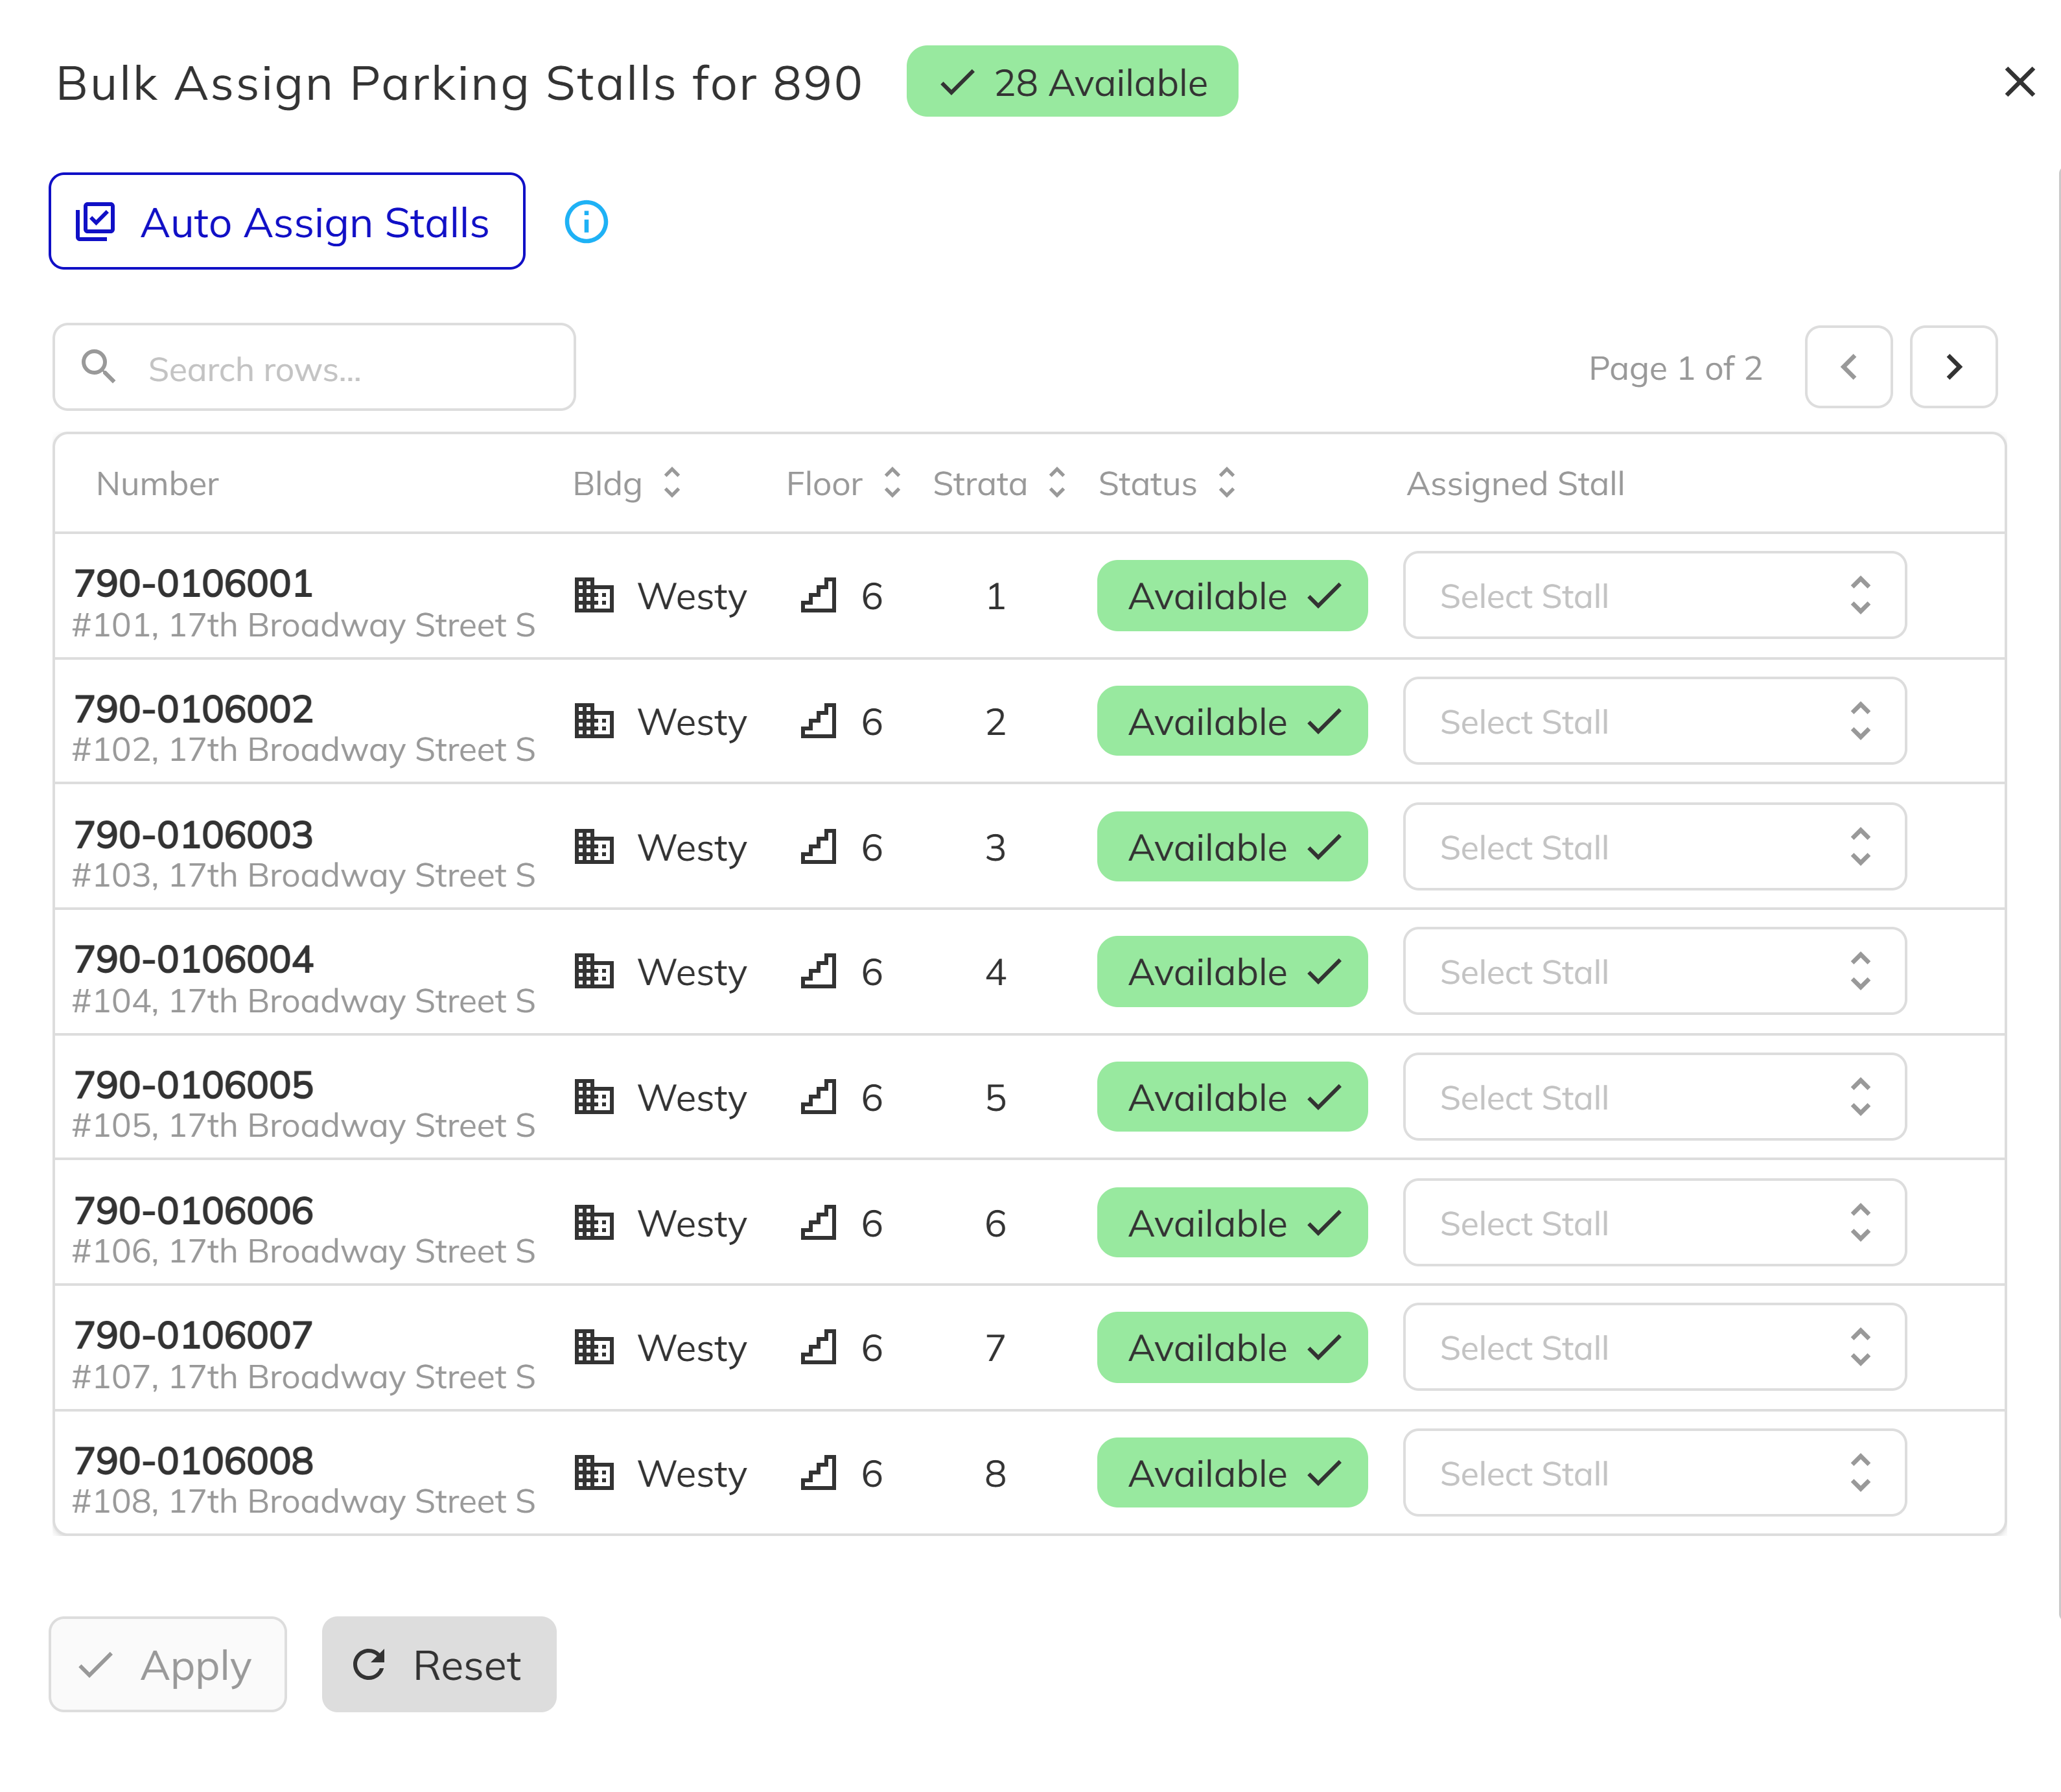
2. Match Stalls to Units
The dialog displays a grid of all units in the project. For each unit that does not already have an assigned stall, an Assigned Stall dropdown appears. Select a stall from the dropdown to pair it with that unit. The dropdown only shows stalls that are available — public stalls and stalls already assigned to other units are excluded.
Units that already have stalls assigned (either pre-assigned or sold as an option) show their current assignment as a pill and cannot be reassigned from this dialog.
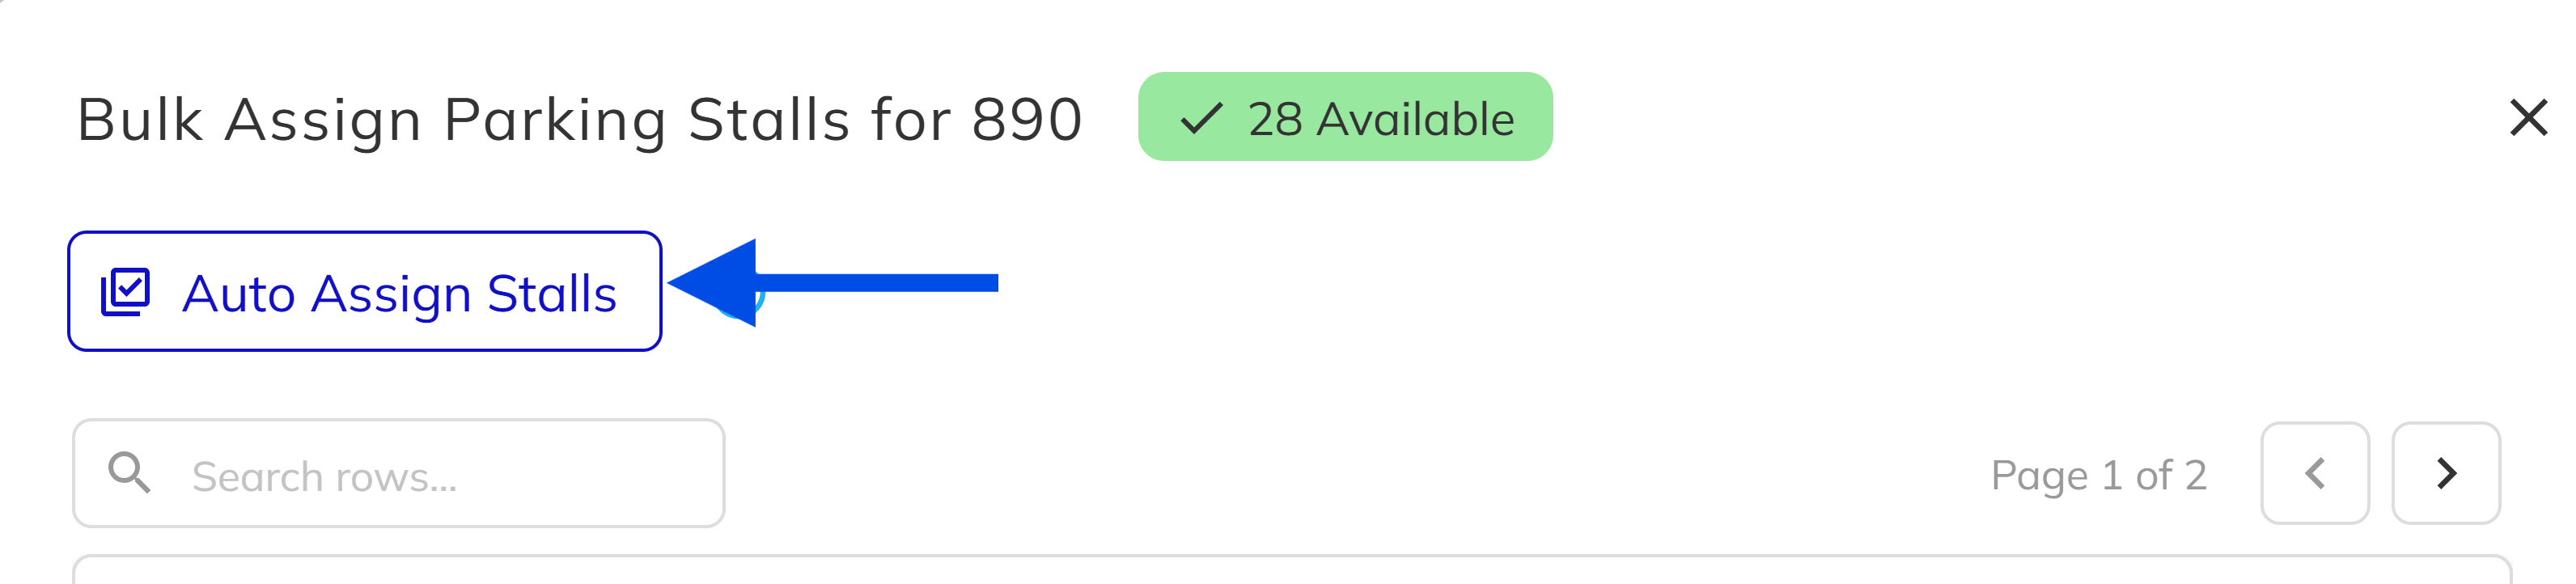
3. Auto Assign Stalls
If your stalls and units follow a sequential pattern, click the Auto Assign Stalls button to let the system automatically pair available stalls to unassigned units in order. Stalls are matched by stall number and units by unit number, both in ascending order. This is especially useful when stall numbering aligns with unit numbering.
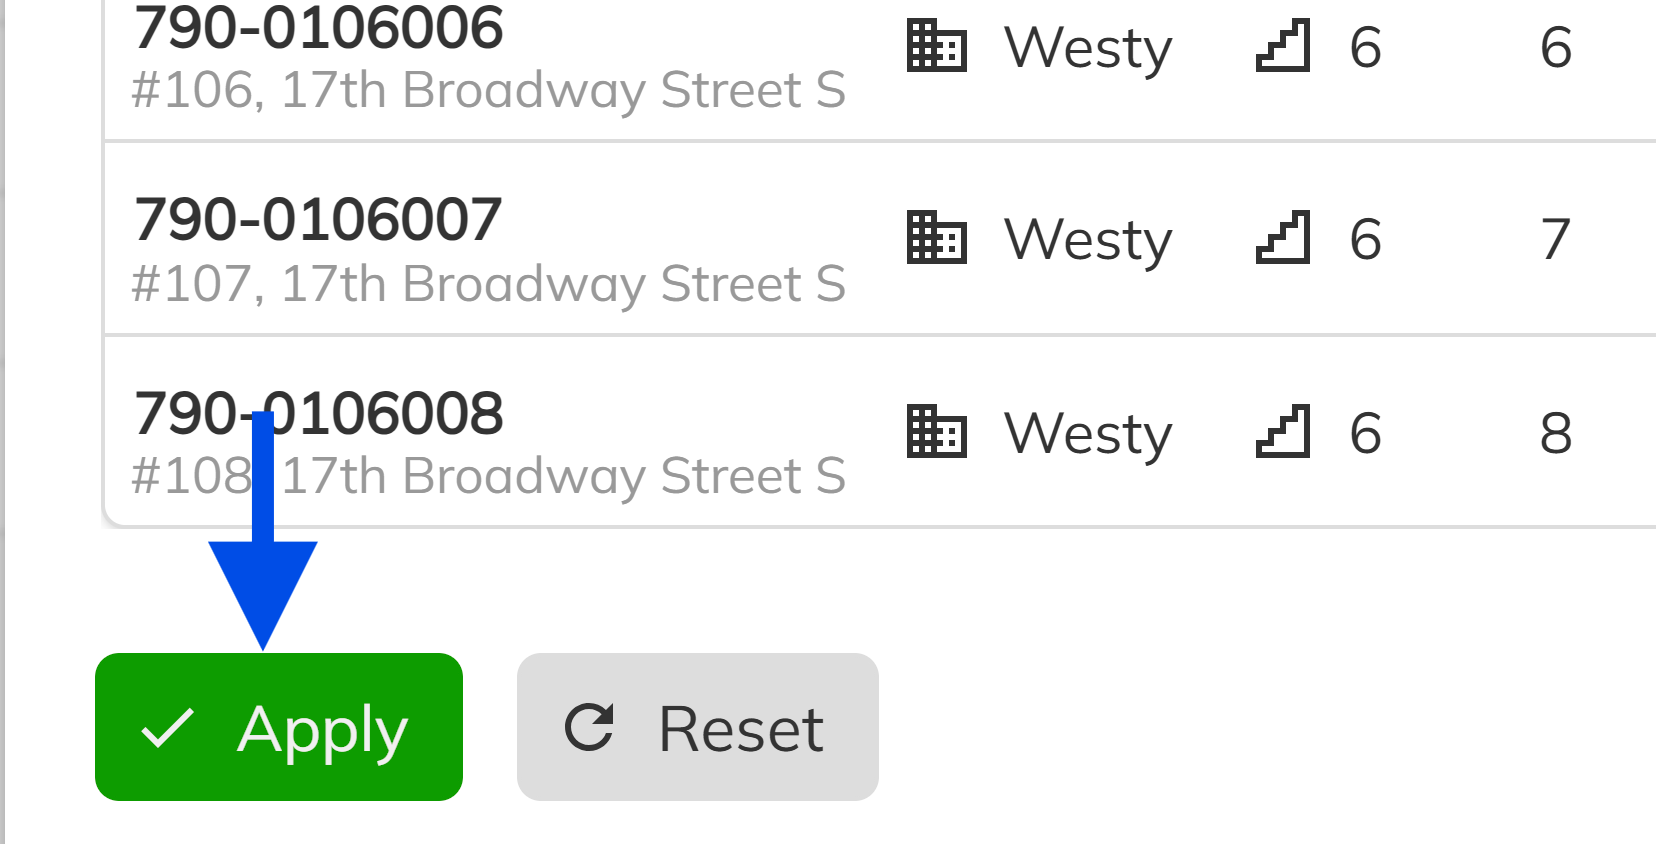
4. Apply the Assignments
Review the pairings in the grid, then click Apply to save all assignments at once. The stalls are now pre-assigned to their respective units and will appear throughout the platform wherever parking information is displayed.
Stalls assigned through the bulk assign dialog are considered pre-assigned — no sales option is created. If you need to track the stall as a purchasable option with a price, use the option sale workflow described below.
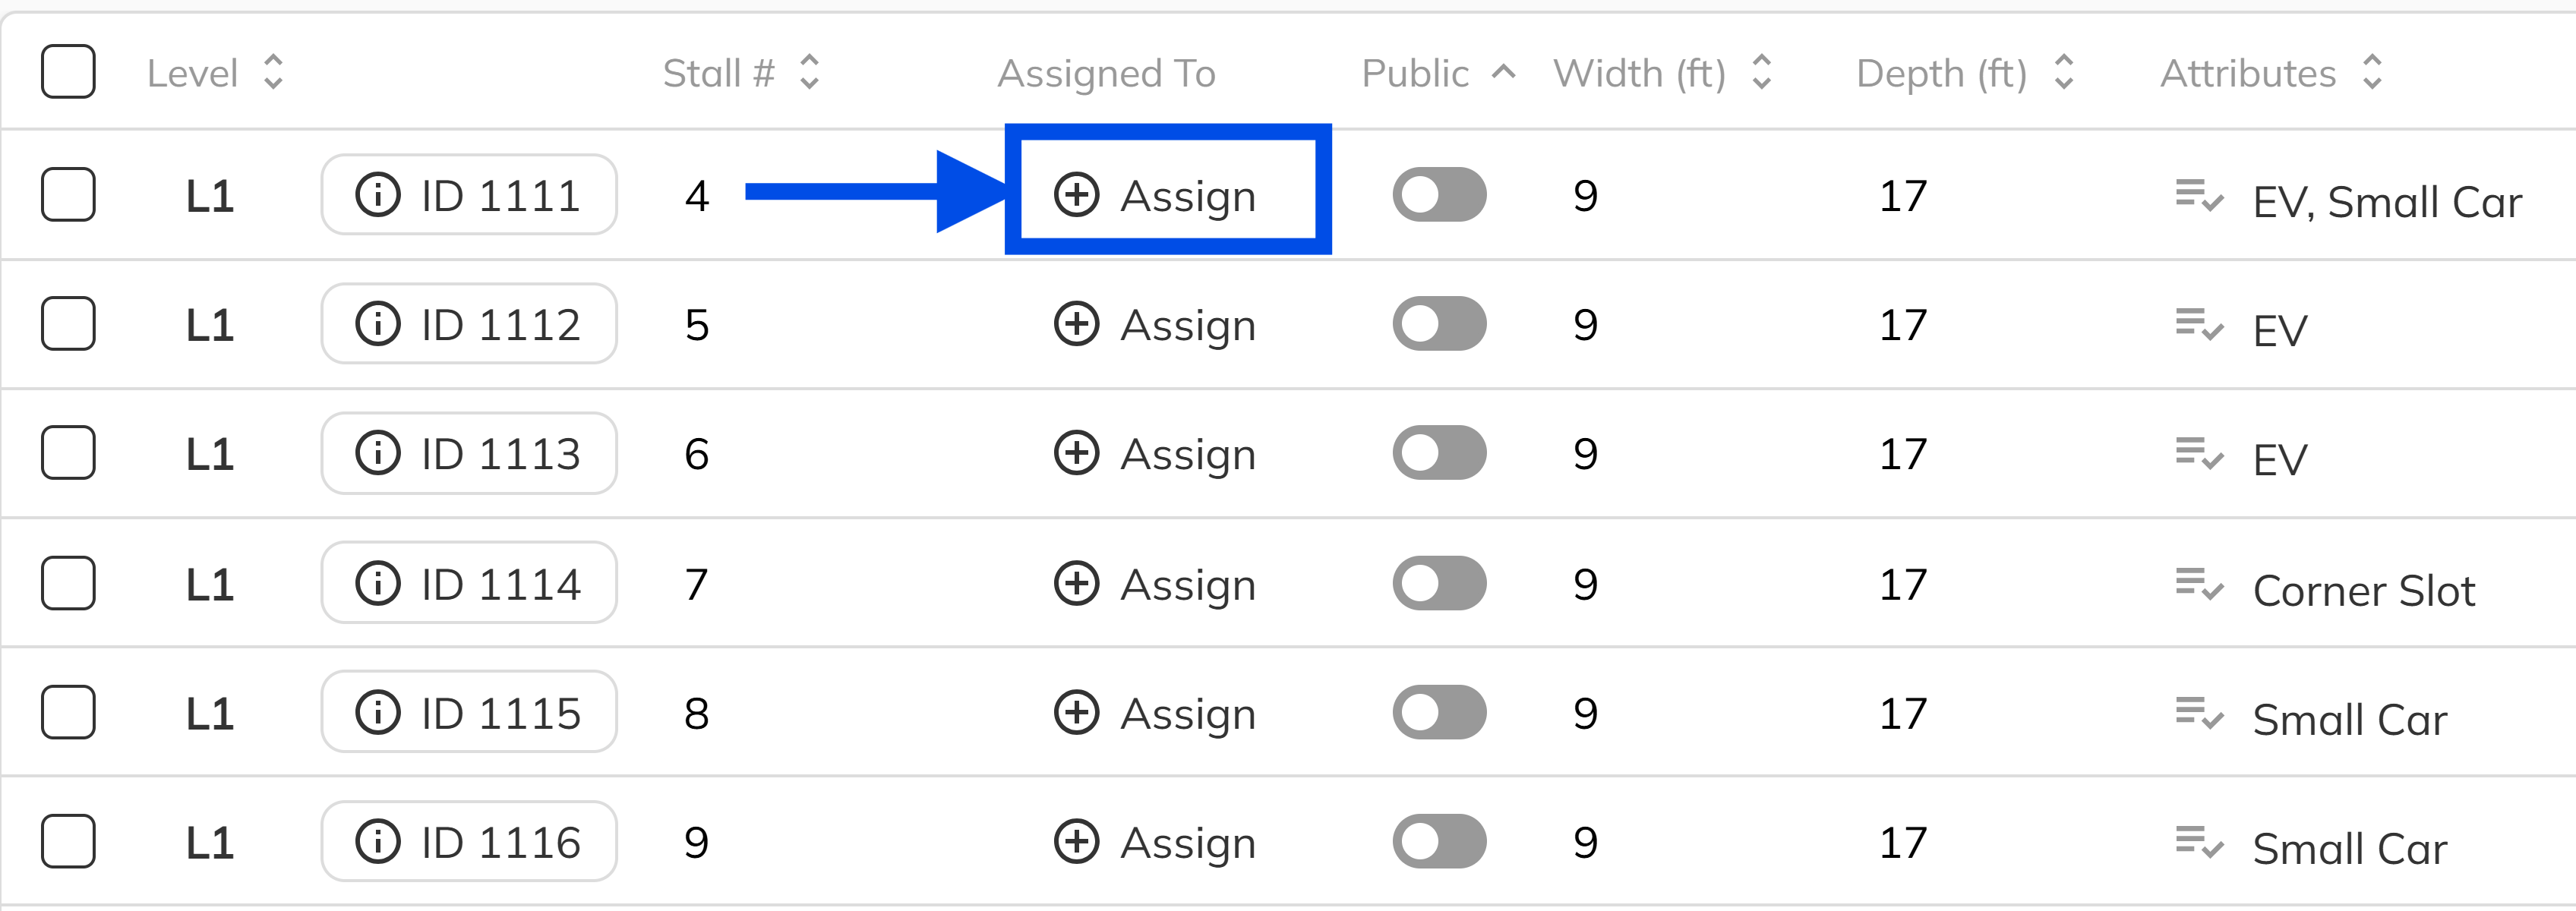
Assigning a Single Stall
When you need to assign or reassign just one stall, use the individual assign dialog.
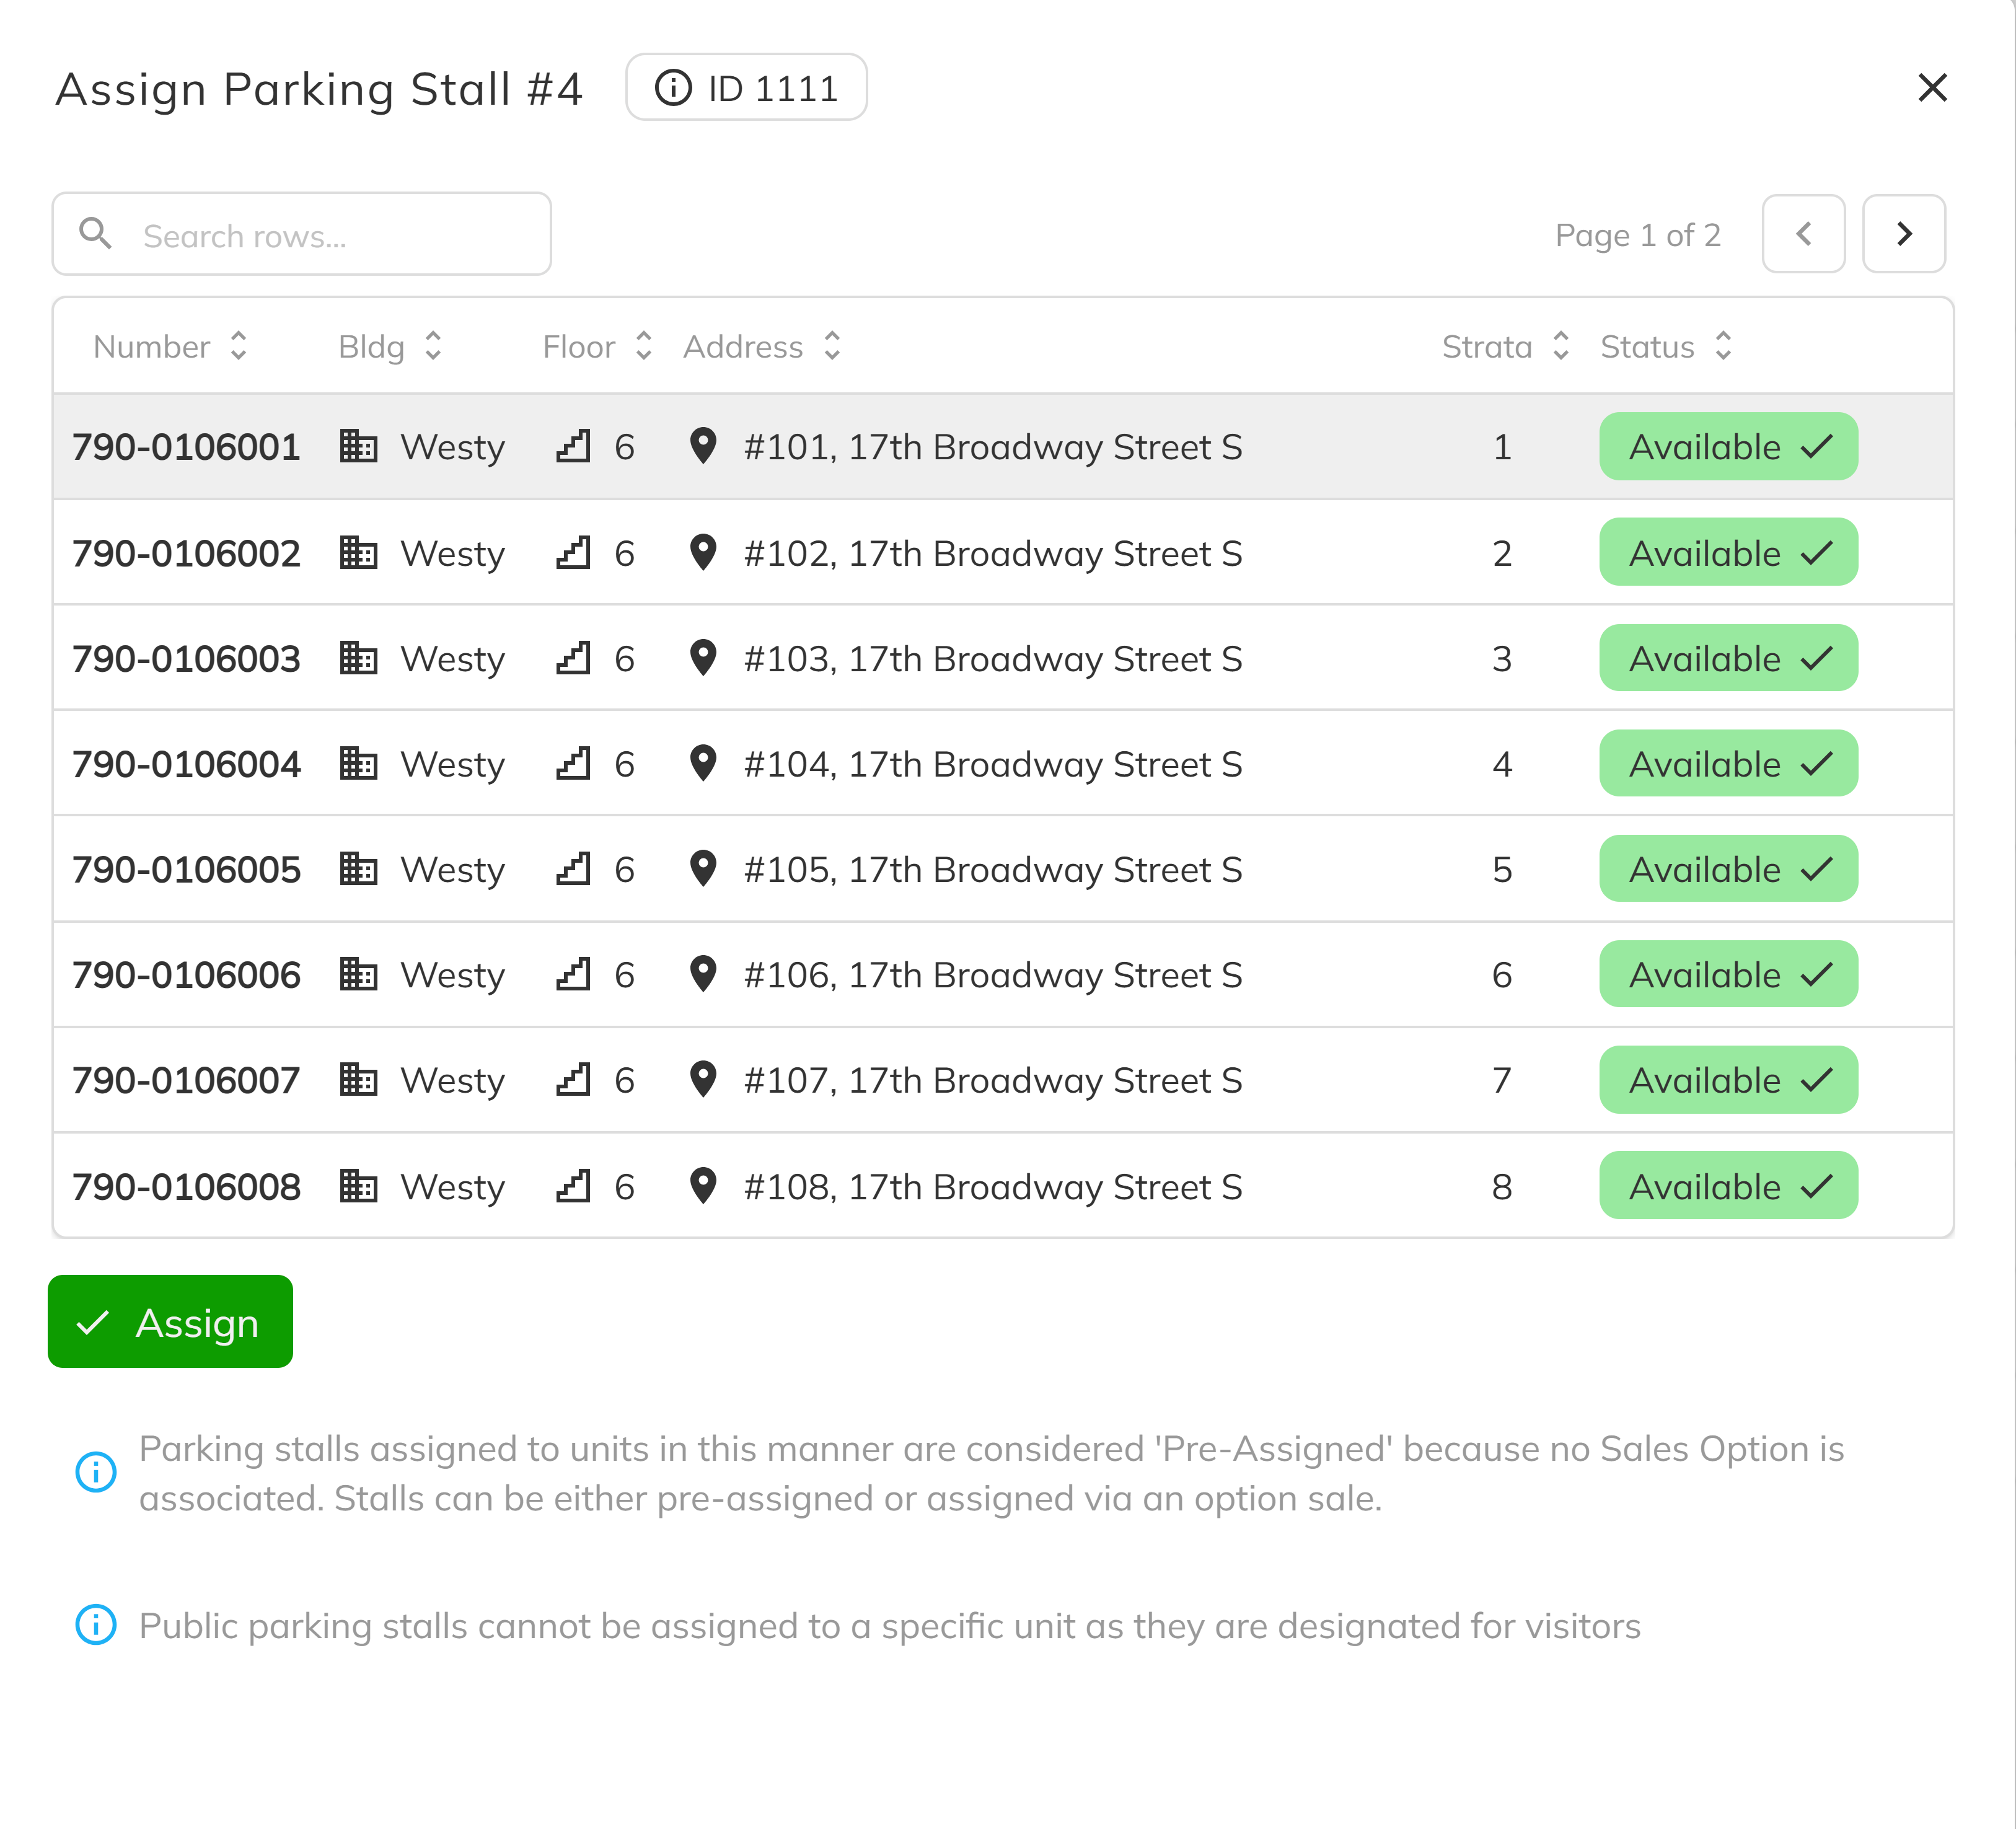
1. Open the Assign Dialog
On the Parking & Storage page, click on the stall you want to assign to open the stall panel, then click the Assign button . The assign dialog opens showing the stall number and a grid of all units from the associated projects.
2. Select a Unit and Assign
Click on a unit row in the grid to select it. You can use the search bar to filter units by number or address. Once a unit is selected, click Assign to link the stall to that unit.
If the selected unit already has another stall assigned, a warning banner will alert you. You can still proceed — a unit can have multiple stalls if needed.
Selling Parking Stalls as Options
Parking stalls can also be sold as purchasable upgrades through the sales options system. This creates a sales option with a price tied to the deal, giving you a financial record of the stall sale.
Before parking stalls can be sold as options, a Sales Option with the category Parking Slot must be created in the Workbench Options tab. This sales option defines the default pricing and description for the stall as a purchasable upgrade.
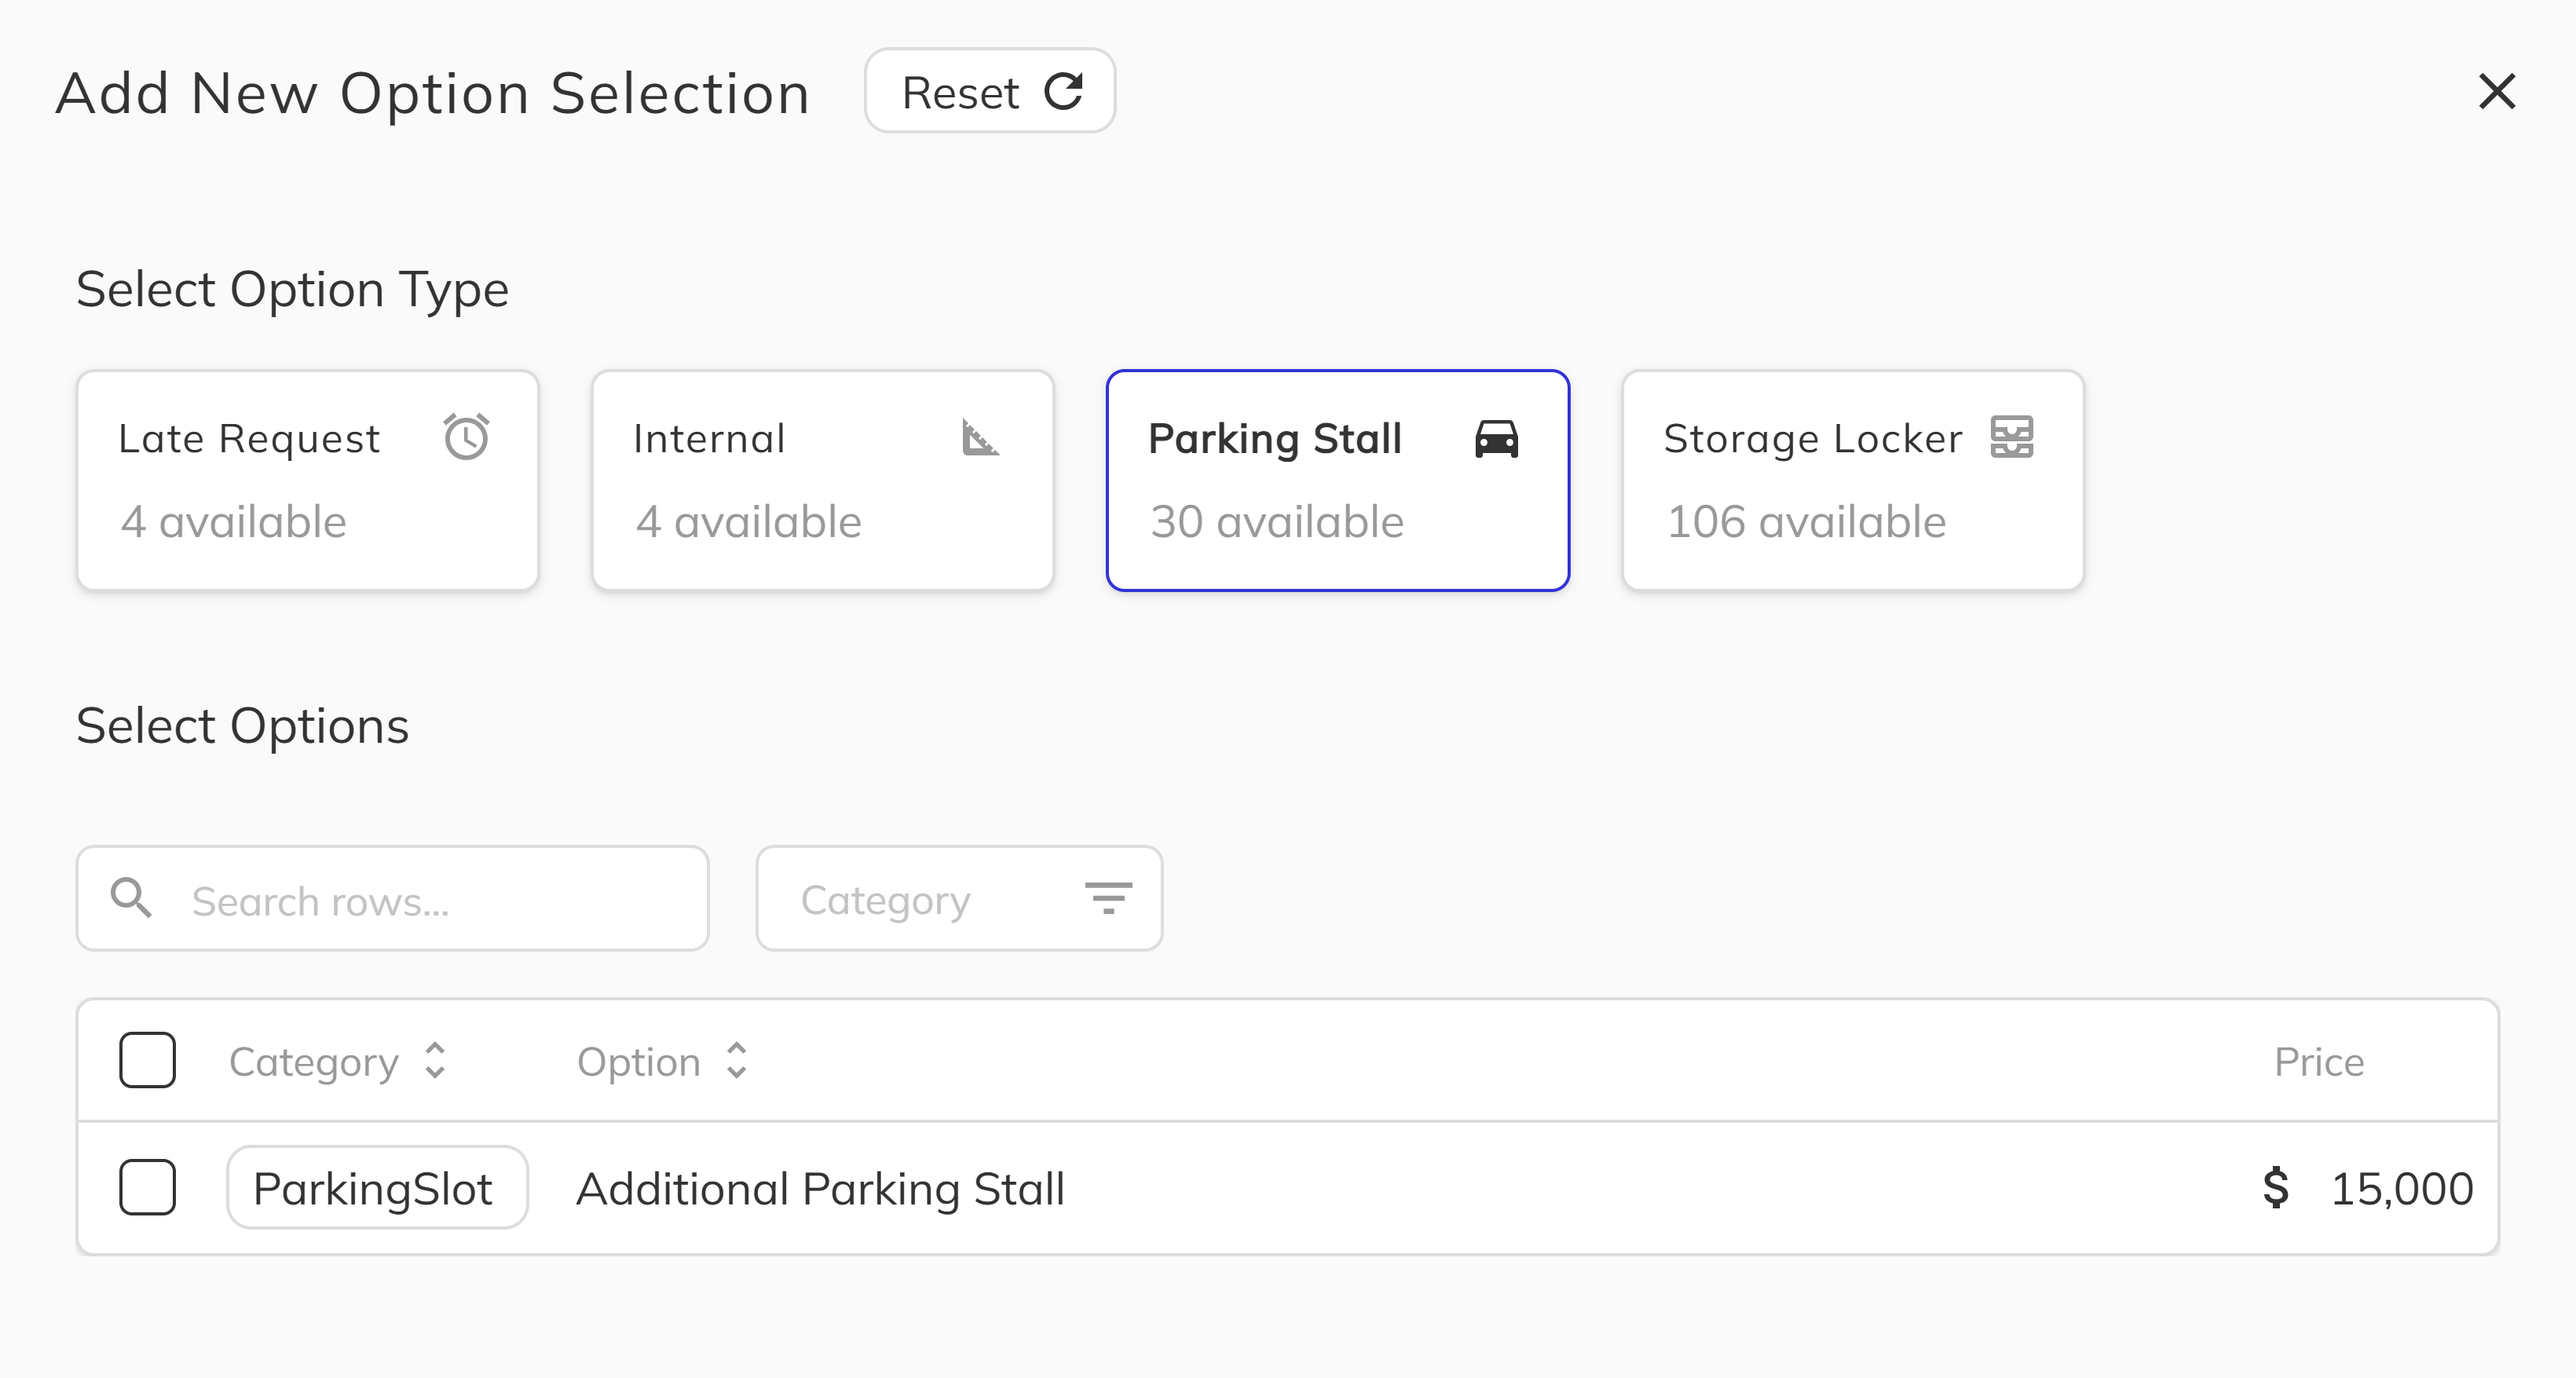
1. Add a Parking Option from the Options Tab
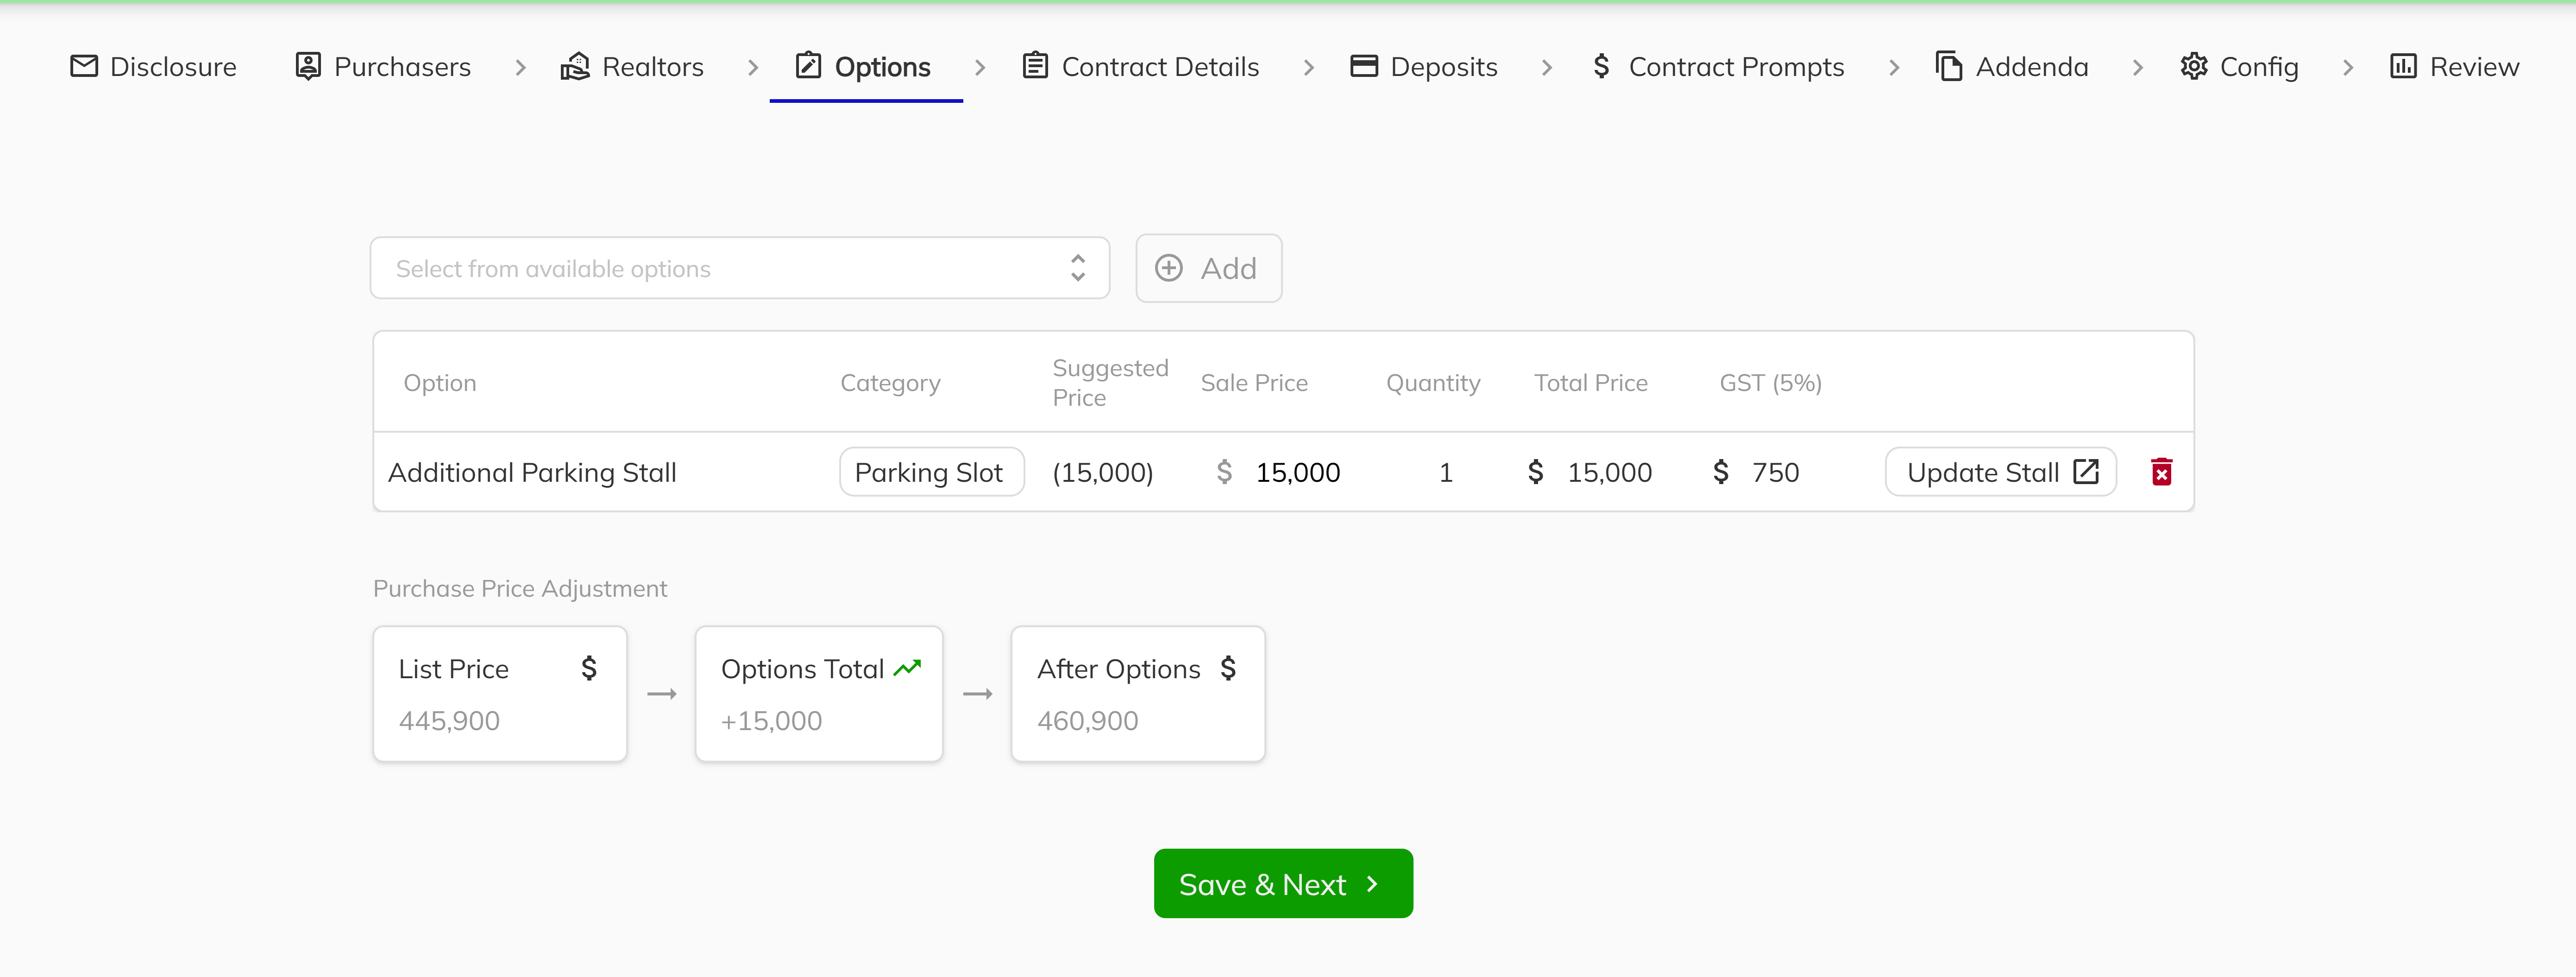
Navigate to a unit's Options tab in the Unit View. Click Actions dropdown and click on the Add Option to open the option selection workflow. Choose the Parking Stall option type from the list — this option type only appears when a sales option with a Parking Slot category exists for the project.
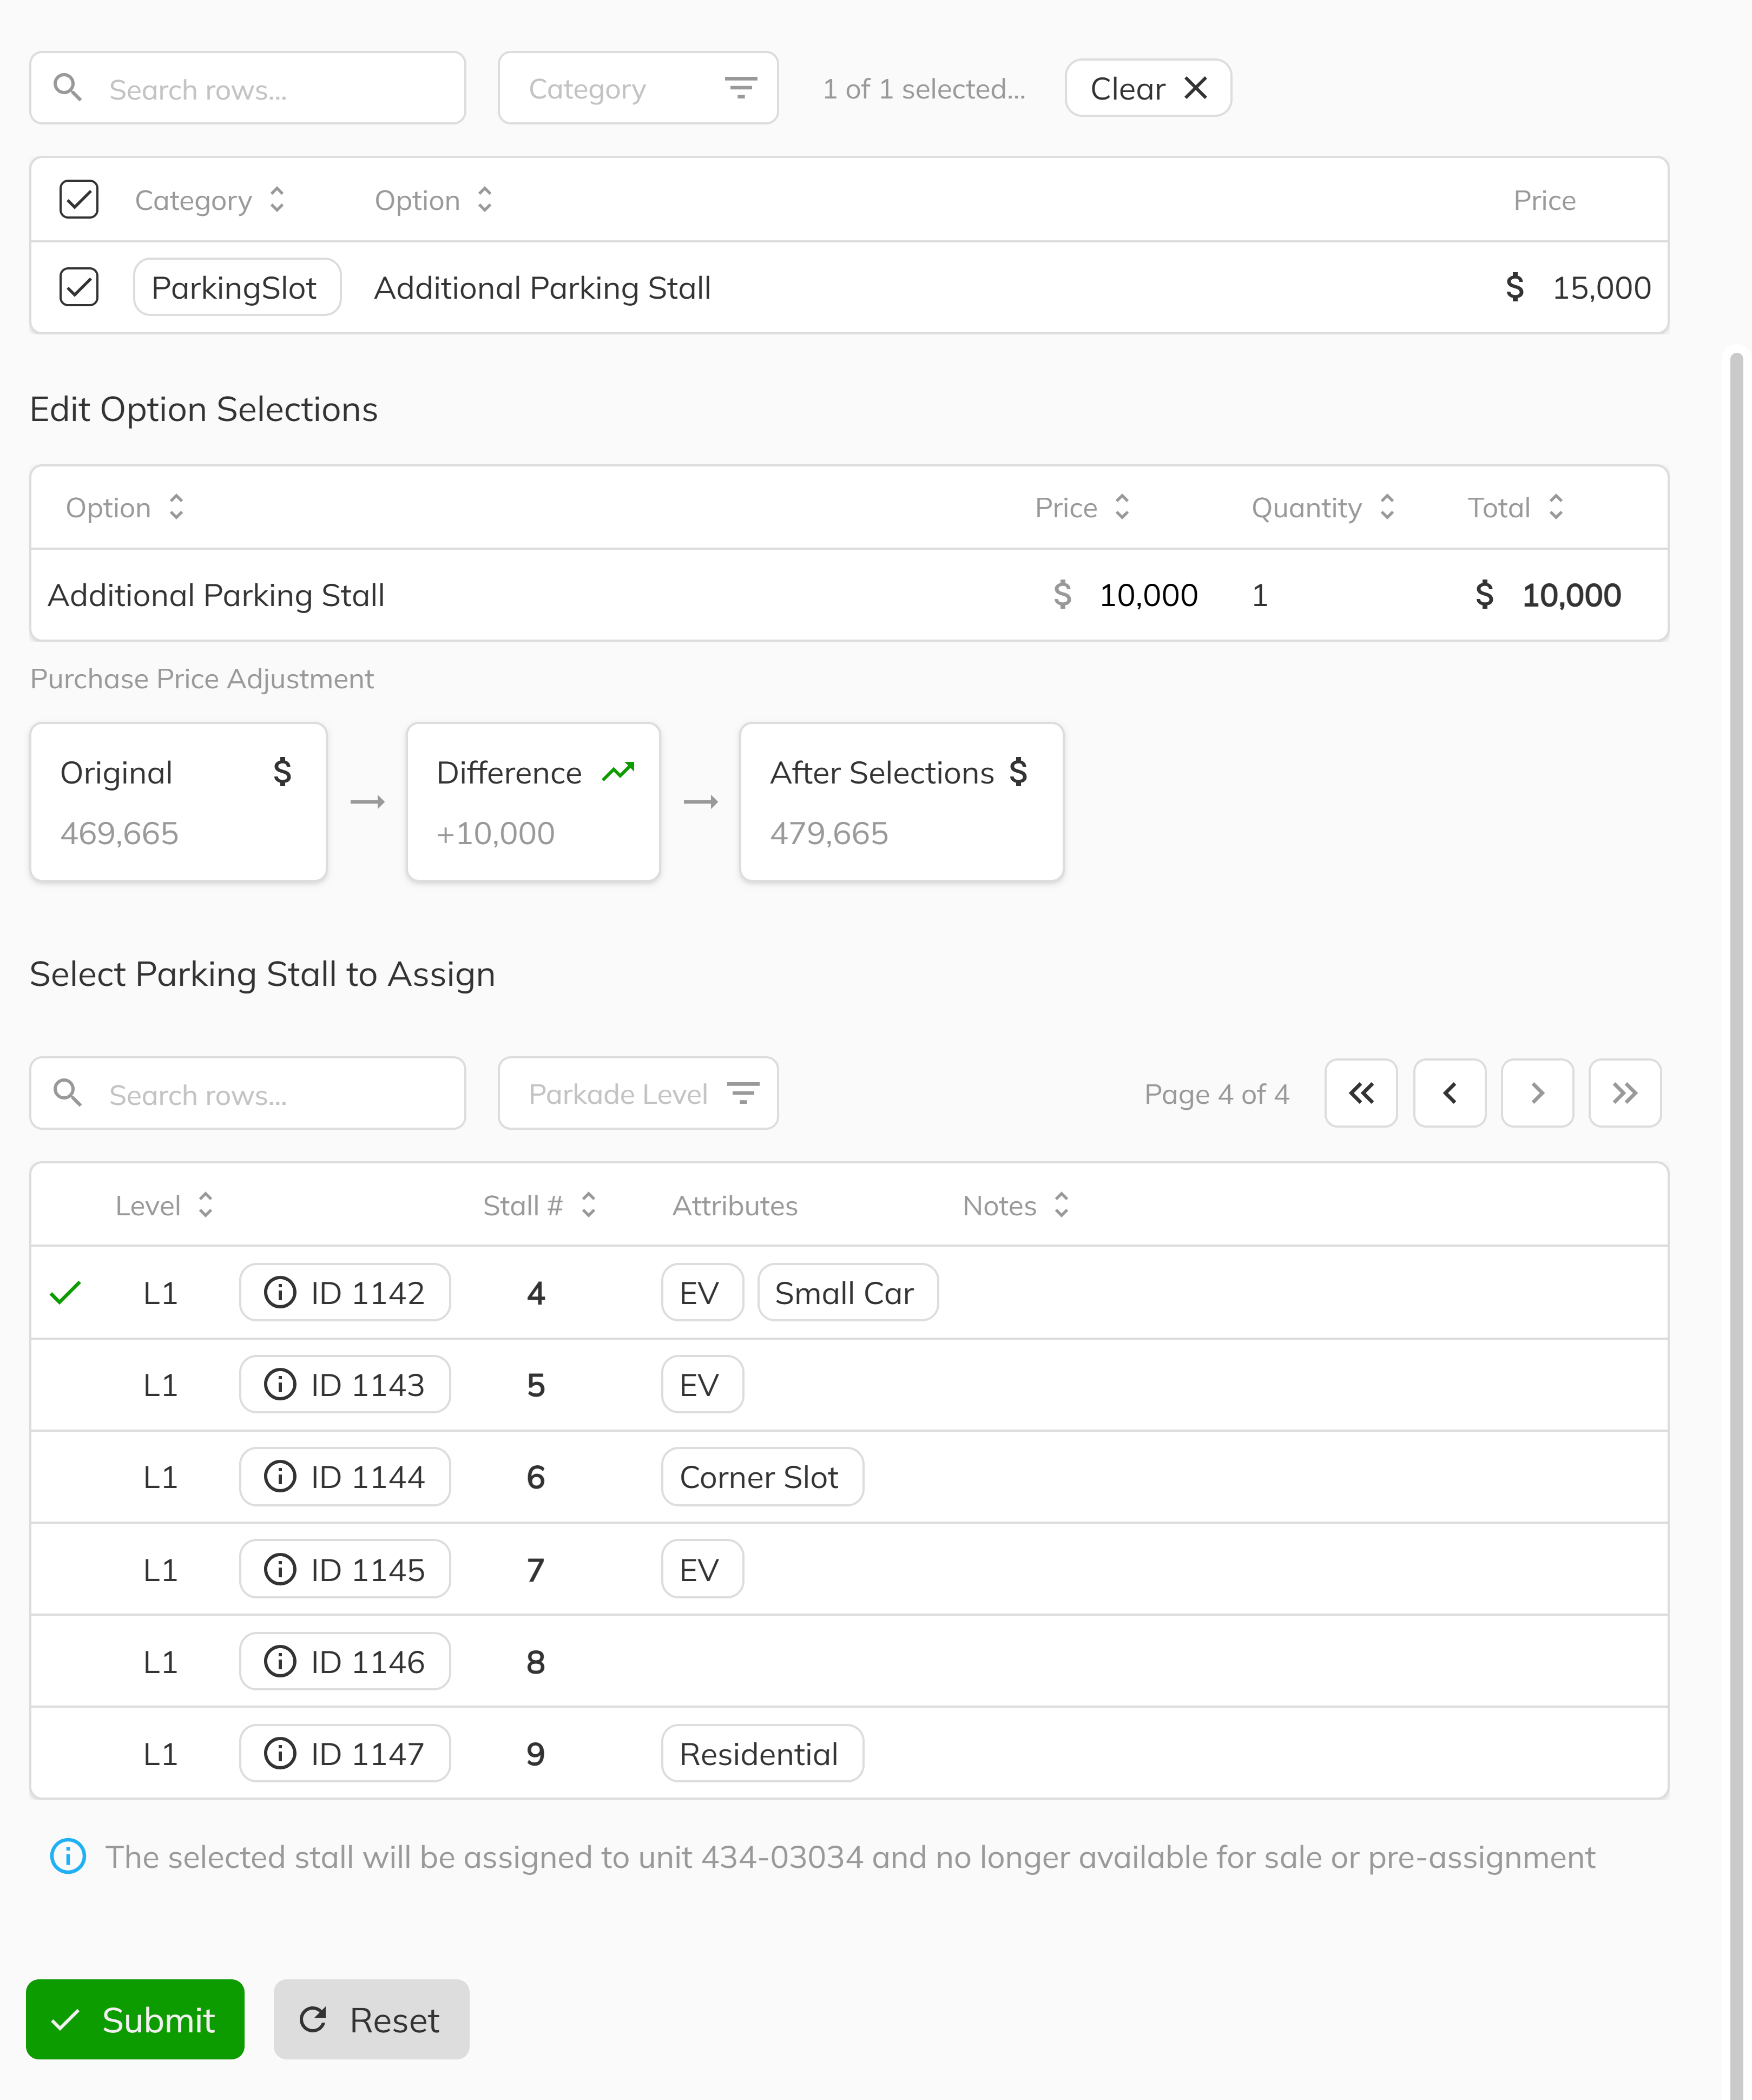
2. Select a Stall and Set the Price
After selecting the parking option, you will be able to choose a specific available stall from the parking stall grid. Adjust the price for this particular deal if needed — the sales option provides a default, but you can override it per unit. Once you've selected the stall and confirmed the price, submit the option.
The system will simultaneously create a sales option for the deal and assign the stall to the unit. The stall will display a "Sold as Option" badge on the Parking & Storage page.
3. Add Parking During New Deal Process
Parking stalls can also be added during the New Deal workflow. When creating a new deal, the options step allows you to include parking stalls as part of the initial purchase. Select a parking stall option, pick an available stall, and set the price — all within the deal creation flow. The stall is assigned and the sales option is created when the deal is finalized.
Unassigning or Changing a Parking Stall Assignment
If a stall needs to be freed up — whether due to a deal cancellation, a reassignment, or a correction — you can unassign it from the individual assign dialog.
1. Open the Stall Panel
On the Parking & Storage page, click on the stall you want to unassign to open the stall panel.
2. Click the Change assignment icon in the Assigned to Column
Click Pencil (Change assignment) Icon next to the unit number for the stall you would wish to unassign or change. Click Unassign to remove the link between the stall and its unit. If you would wish to change the unit assignment, click on the unit number row that you would like the Parking stall to be switched to.

3. Confirm Removal of Option Sales
If the stall was sold as an option, a confirmation prompt will warn you that unassigning will also remove the associated sales option purchase from the deal.
When you unassign a stall that was sold as a sales option, the associated sales option is also removed. This affects the deal's option totals and financial records. Confirm with your team before unassigning option-sold stalls.
Congratulations! You now know how to assign parking stalls to units using bulk assignment, individual assignment, and the sales option workflow. Whether you're pre-assigning stalls during project setup or selling them as upgrades during the deal process, your parking inventory is fully integrated with your sales workflow. Stall assignments appear across the platform — in the Parking & Storage page, unit details, documents, and the Client Portal.