Parking Lots, Parkades & Parking Stalls
Parking inventory in Pluto Systems is organized into two layers — Parking Locations (the physical lot or structure) and Parking Stalls (the individual spaces within them). A Parking Location can be either a surface Parking Lot with a single level or a multi-level Parkade. Once the location is set up, you generate or add stalls inside it, configure their details, and associate the location with your projects so stalls can be assigned or sold to purchasers.
In this guide, we will cover:
- Where to find parking management in the Workbench.
- Creating a Parking Lot or Parkade for your community.
- Configuring your parking location with levels and project associations.
- Generating and adding parking stalls within your location.
How We Got Here
Your organization has a community set up in the Workbench with one or more projects. The buildings and units are in place, and now you need to create parking inventory so stalls can be tracked, assigned to units, or sold as options during the sales process. The Workbench Parking Locations page under your community is where all of this begins.
1. Navigate to Community Parking
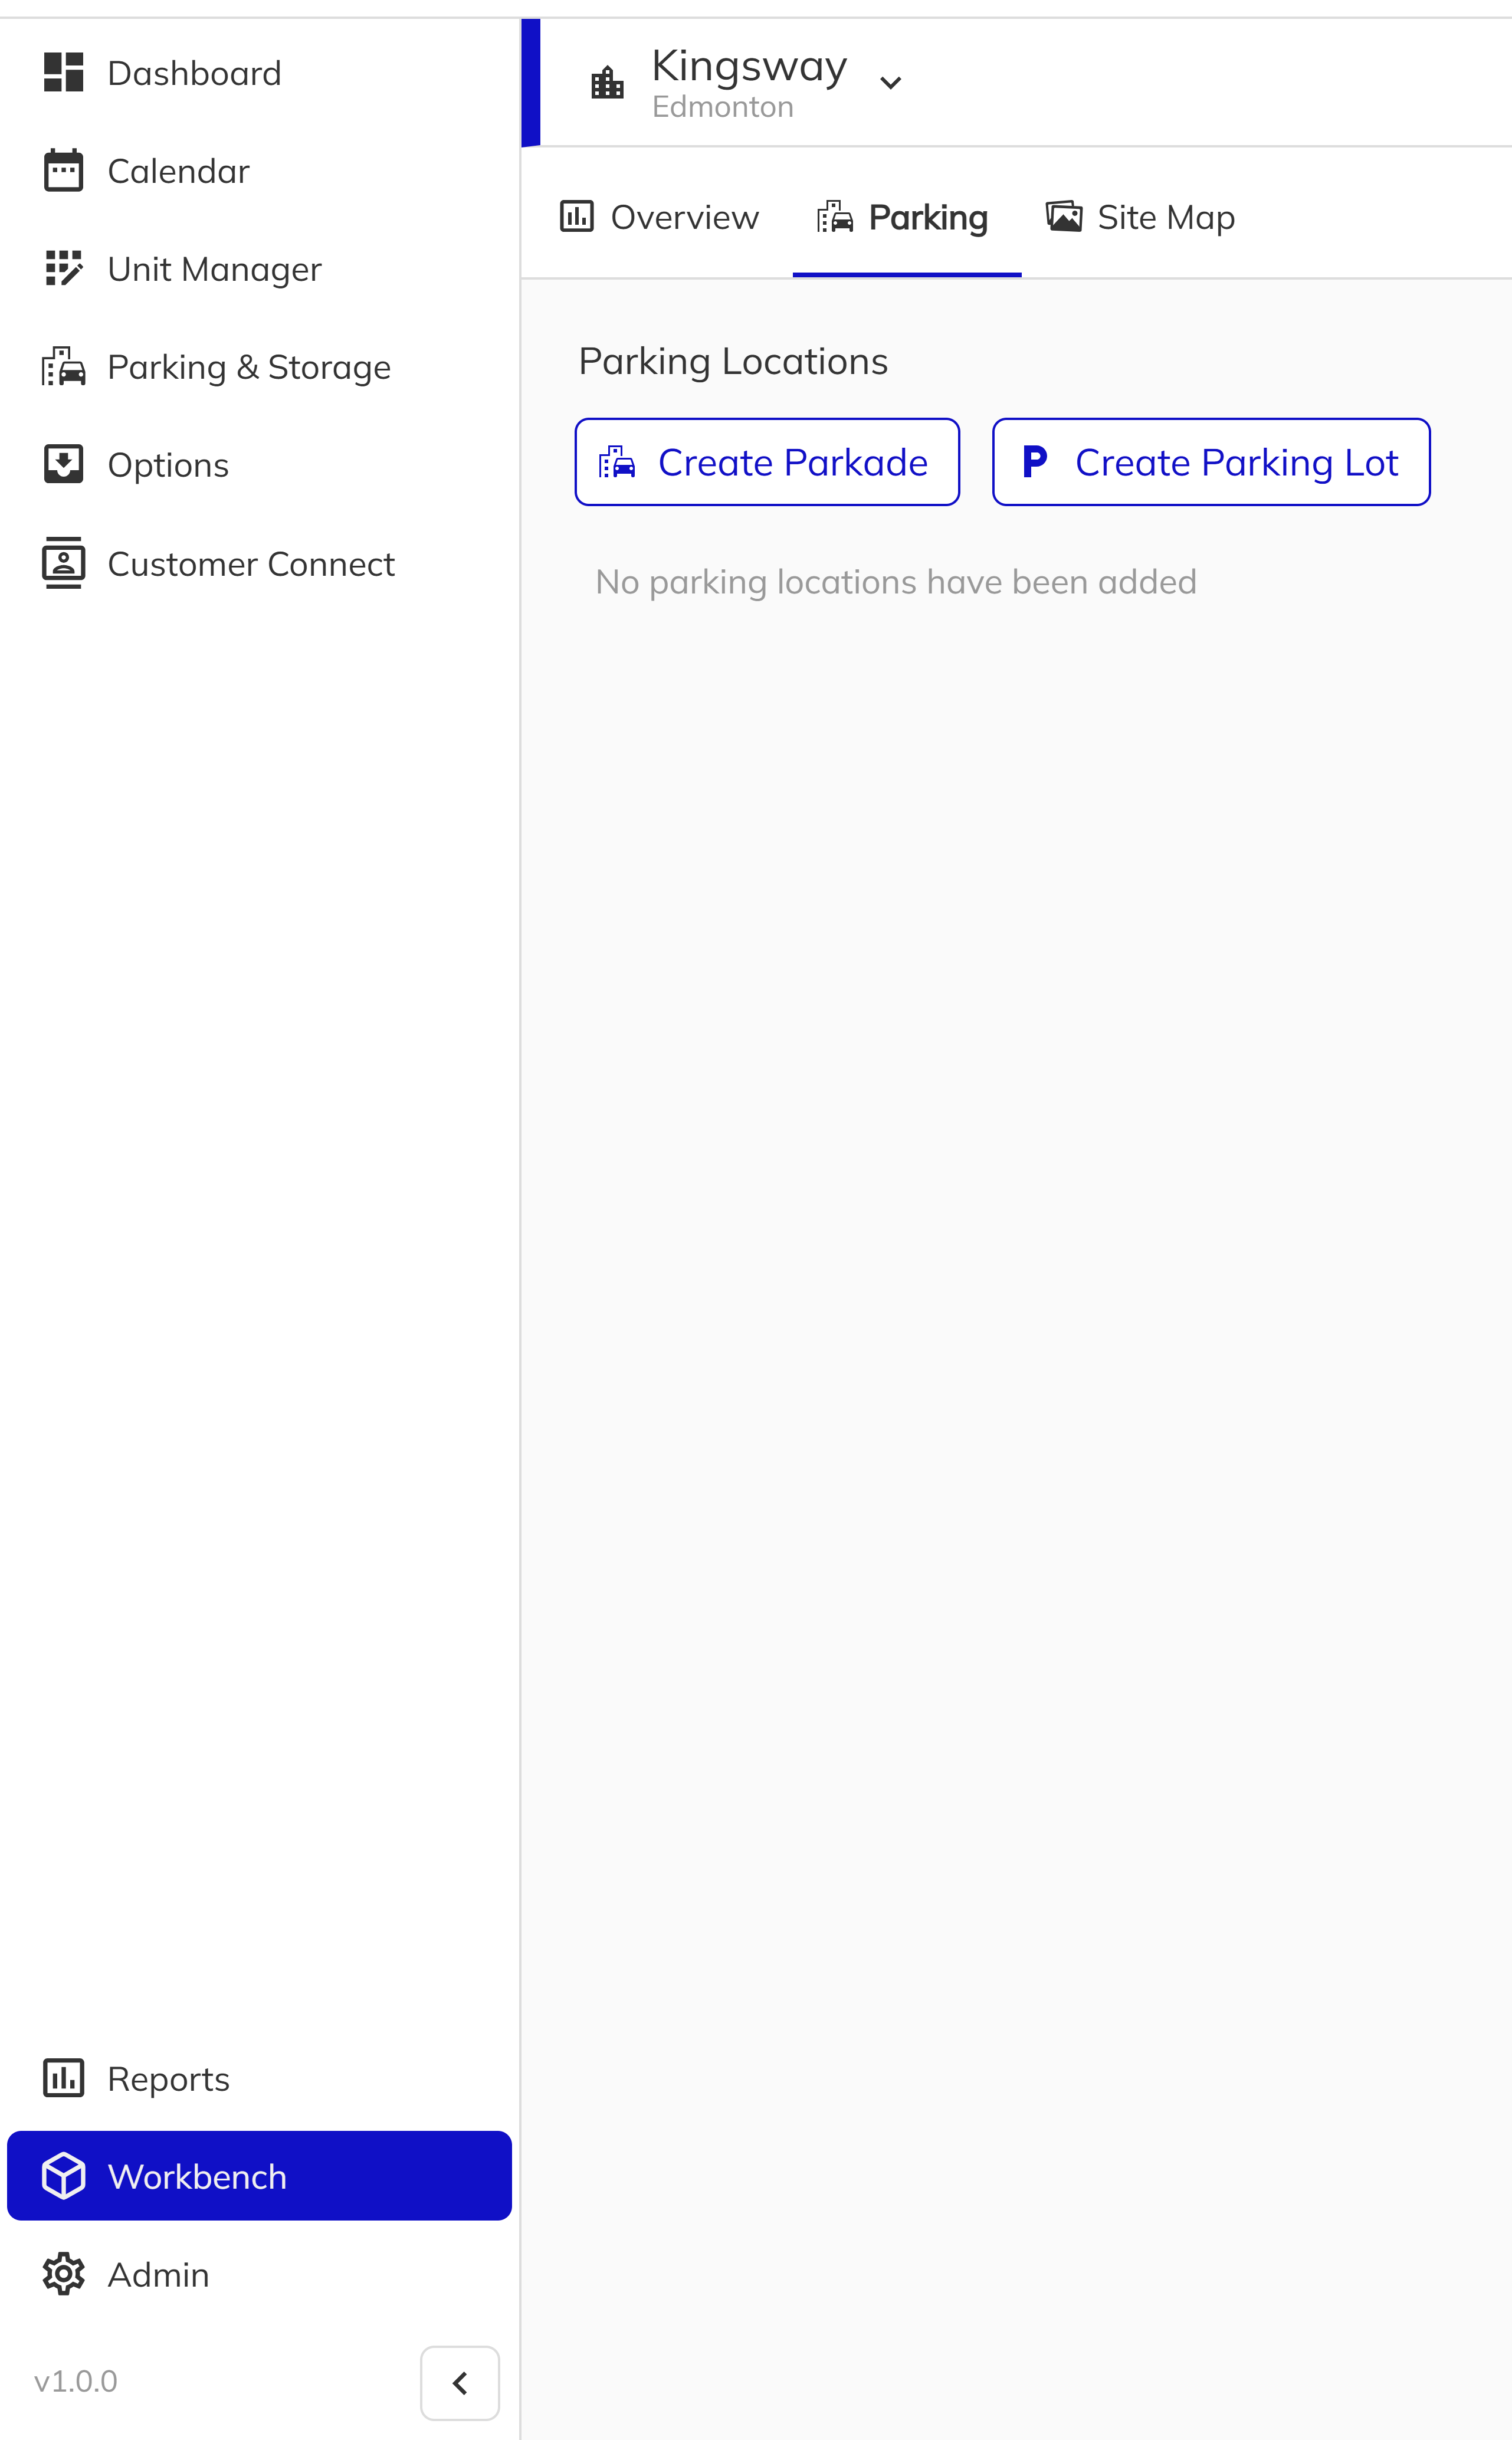
Open the Workbench, select your community, and navigate to the Parking Locations tab. This page displays all existing parking locations for the community along with their type, stall count, and associated projects. From here you can create new locations or click into an existing one to manage its details and stalls.
Creating a Parking Lot or Parkade
1. Choose Your Parking Type
On the Parking Locations page, you will see two creation buttons: Create Parkade and Create Parking Lot. Choose the one that matches your physical parking structure.
- Parking Lot — A surface-level lot with a single level. Ideal for townhome communities or smaller developments.
- Parkade — A multi-level parking structure. Suited for condos, apartments, and larger projects that require tiered parking.
Click the appropriate button to create the location. The system will generate the parking location with a default first level ("L1") and open the configuration panel.
2. Link It to a Project
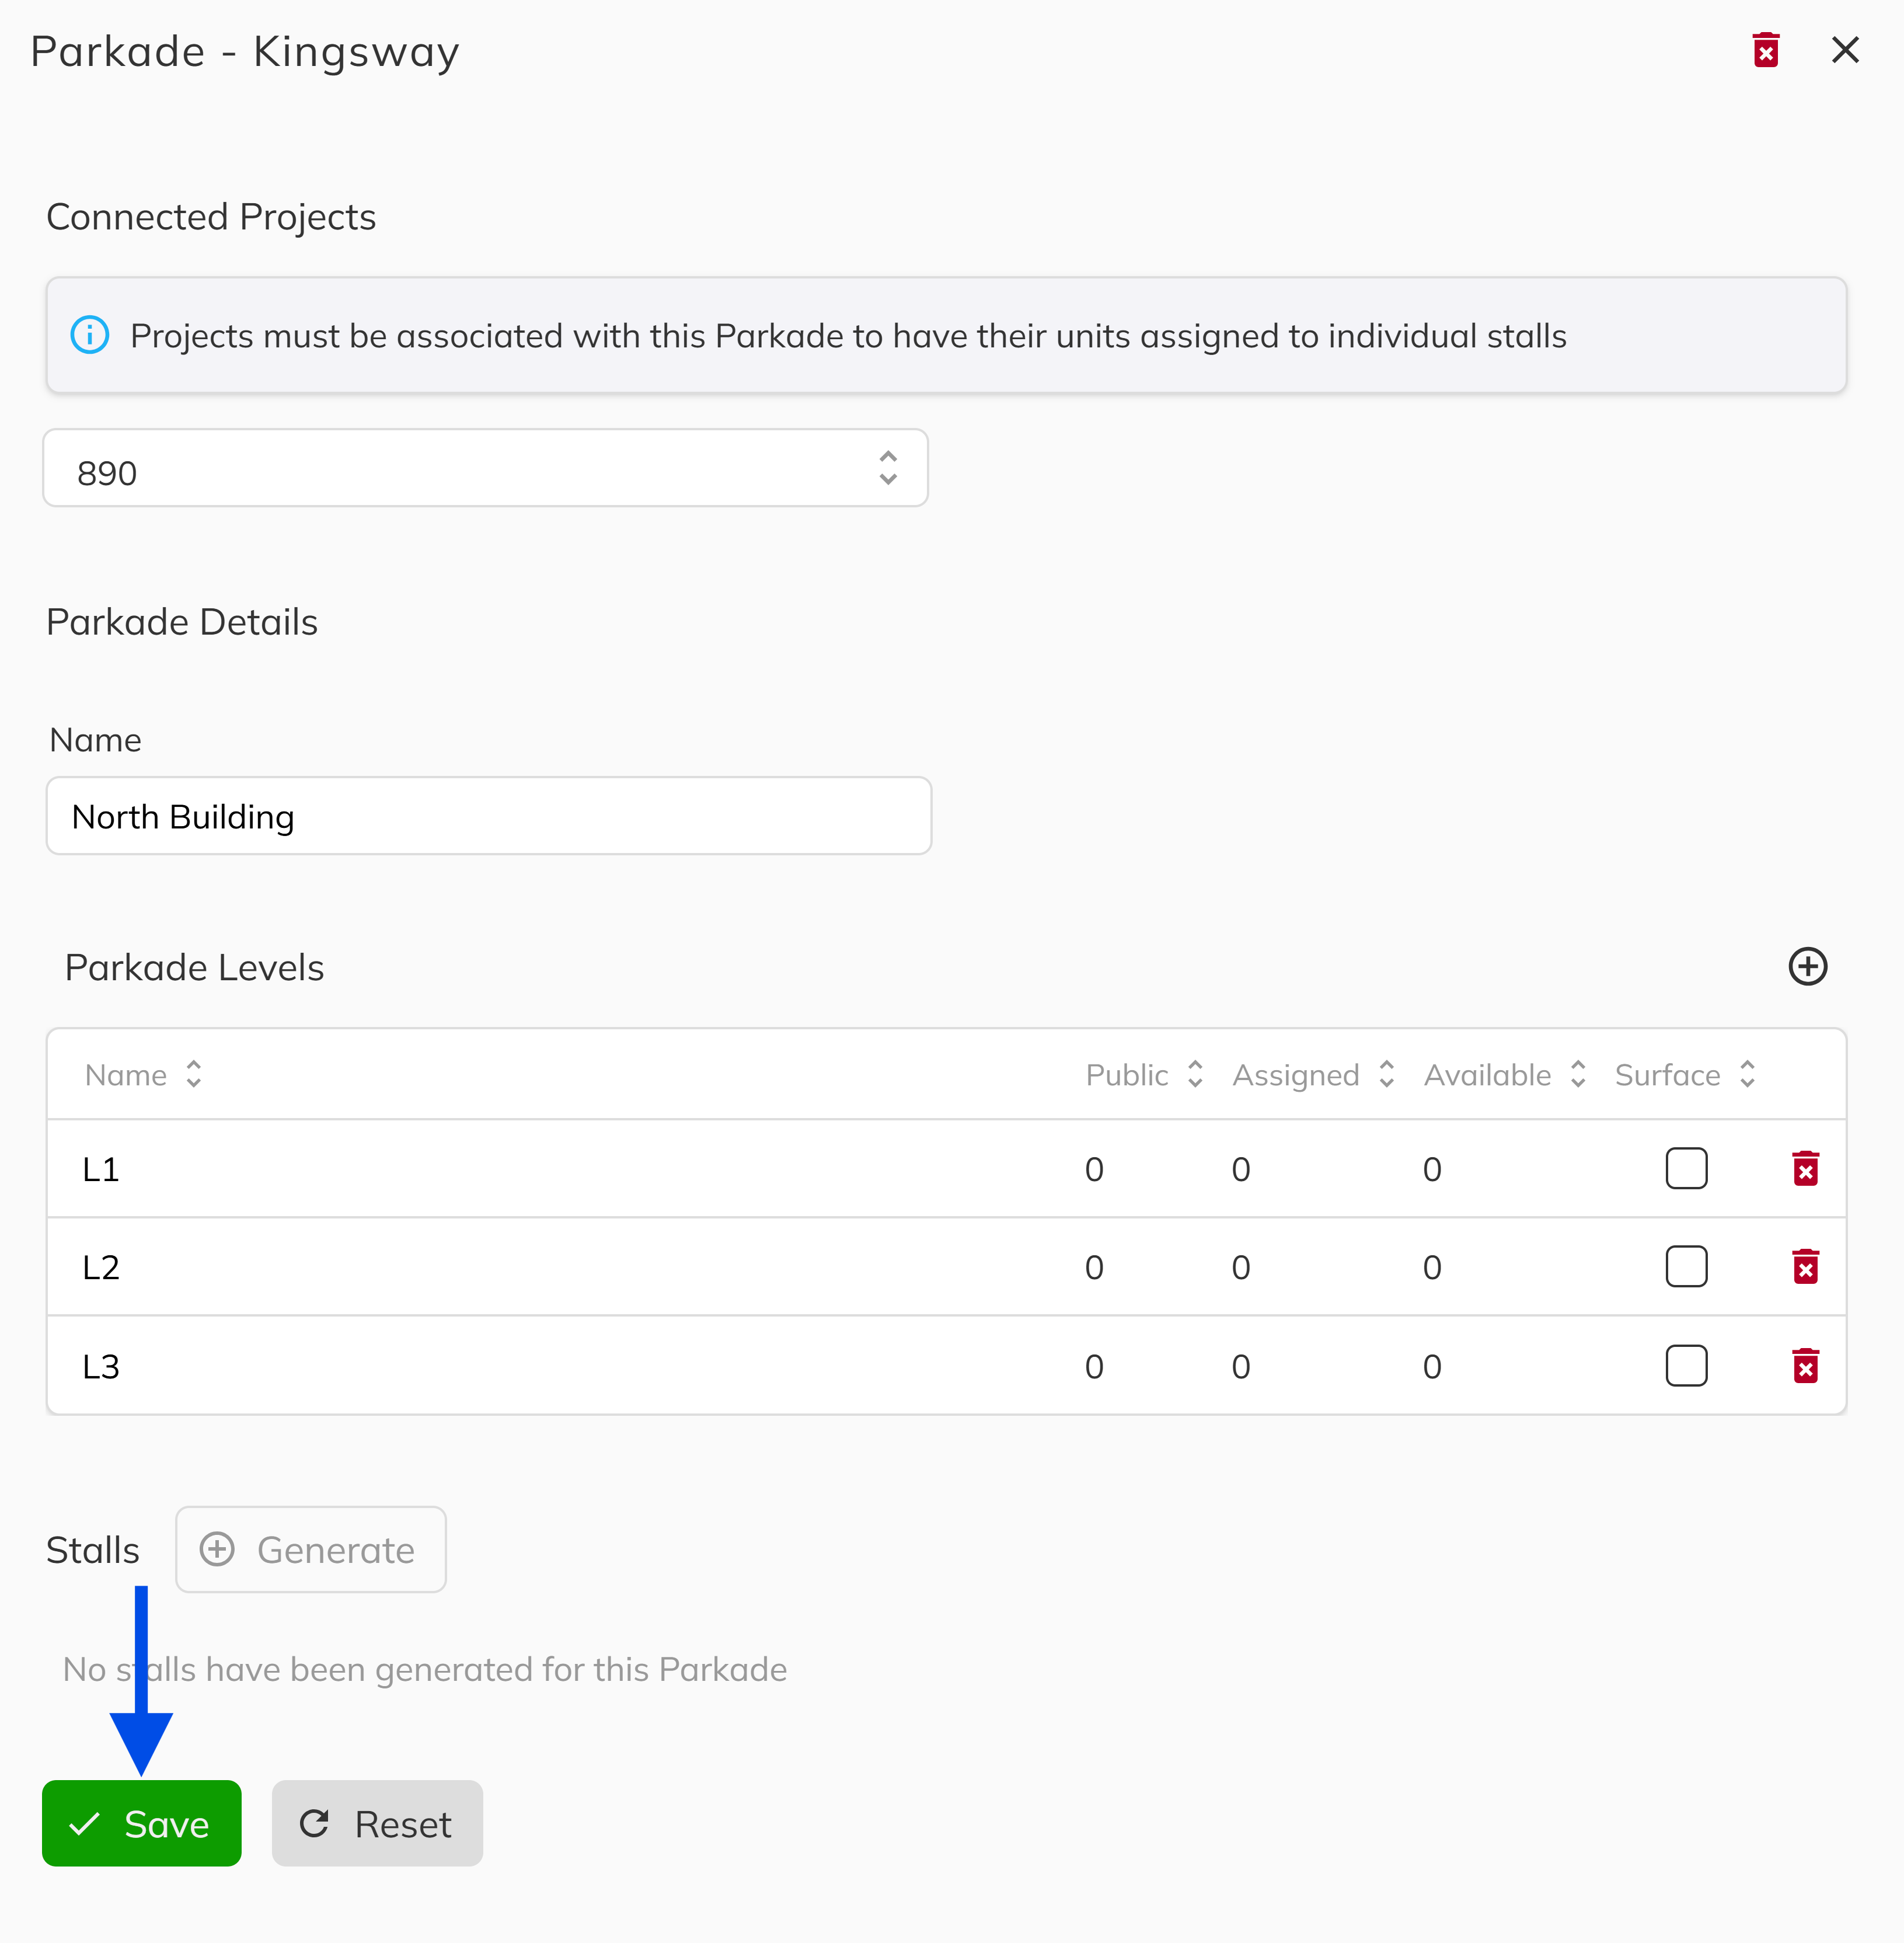
The configuration side panel opens immediately after creation. Use the Projects selector to associate your parking location with one or more projects in the community. This association determines which units can later be assigned stalls from this location — only units belonging to linked projects will appear during stall assignment. You can associate multiple projects if the parking location serves more than one building or phase.
A parking location must be associated with at least one project before its stalls can be assigned to units. Without this association, the stalls will exist but cannot be linked to any inventory.
3. Name Your Parking Location
Enter a Name for your parking location (e.g., "East Parkade", "Visitor Lot B"). The name helps identify the location across the platform and in stall assignment views.
4. Configure Levels
If you created a Parkade, you can add additional levels beyond the default "L1". Each level has a Name (e.g., "L1", "L2", "P1") and an Is Ground Level toggle to indicate which level is at street grade. Add as many levels as your structure requires. Left click Save button to make your current changes.
Parking Lots are restricted to a single level. The level management section will not appear for surface lots.
Creating Parking Stalls
With your parking location configured, the next step is to populate it with individual parking stalls. You can generate stalls in bulk or add them one at a time.
1. Bulk Generate Stalls
Click the Generate Stalls button within your parking location to open the bulk generation dialog. This is the fastest way to set up your parking inventory.
For a Parkade, configure each level individually:
- Total Stalls — How many stalls to create on this level.
- Starting Number — The first stall number (e.g., 101 for Level 1, 201 for Level 2).
- Increment — Whether stall numbers count up (+1), down (-1), or have no sequential numbering.
For a Parking Lot, the configuration is simpler:
- Total Stalls — How many stalls to create.
- Sequential Numbering — Toggle to auto-number stalls starting from 1.
Before submitting, an editable preview grid shows every stall that will be created. You can adjust individual stall numbers, mark stalls as Public (visitor parking), or add Attributes (e.g., "Handicap", "EV Charging") directly in the grid.
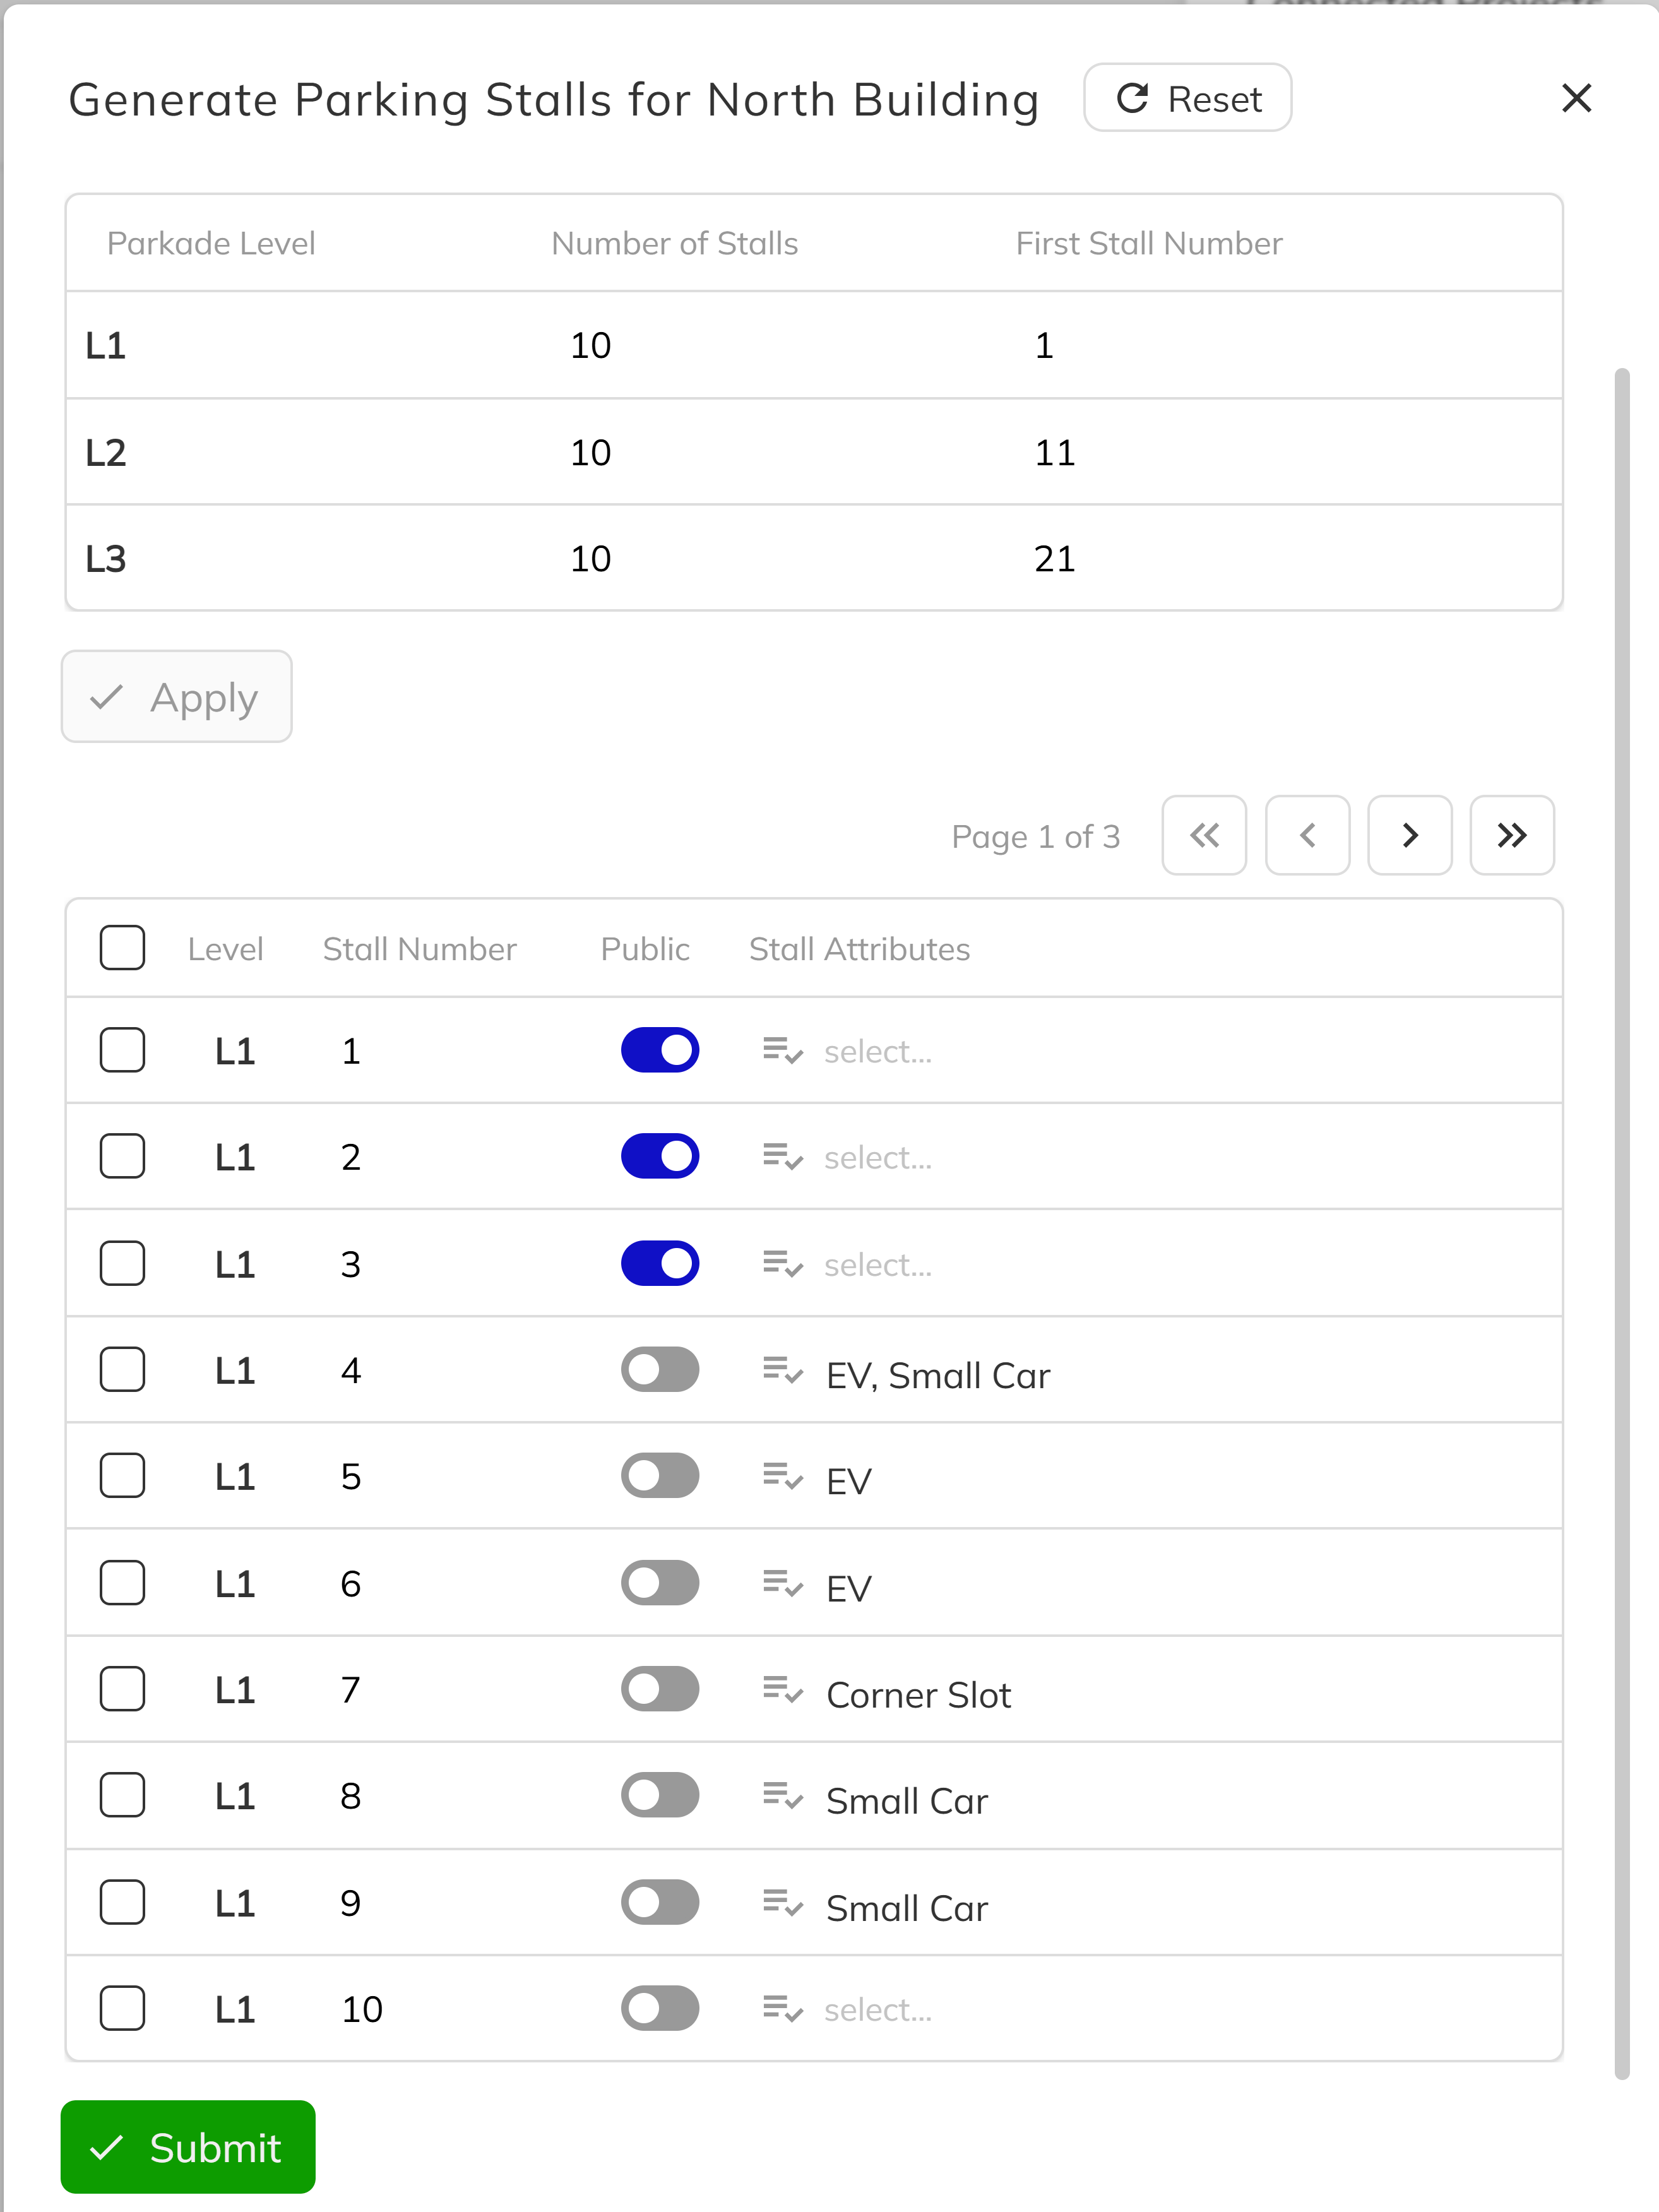
Stall numbers must be unique within a parking location. The generation dialog will validate for duplicates before allowing submission.
2. Add a Single Stall
If you need to add just one stall — perhaps a new space was added during construction — follow these steps:
- Navigate to the Parking & Storage item in the side menu of your Pluto app.
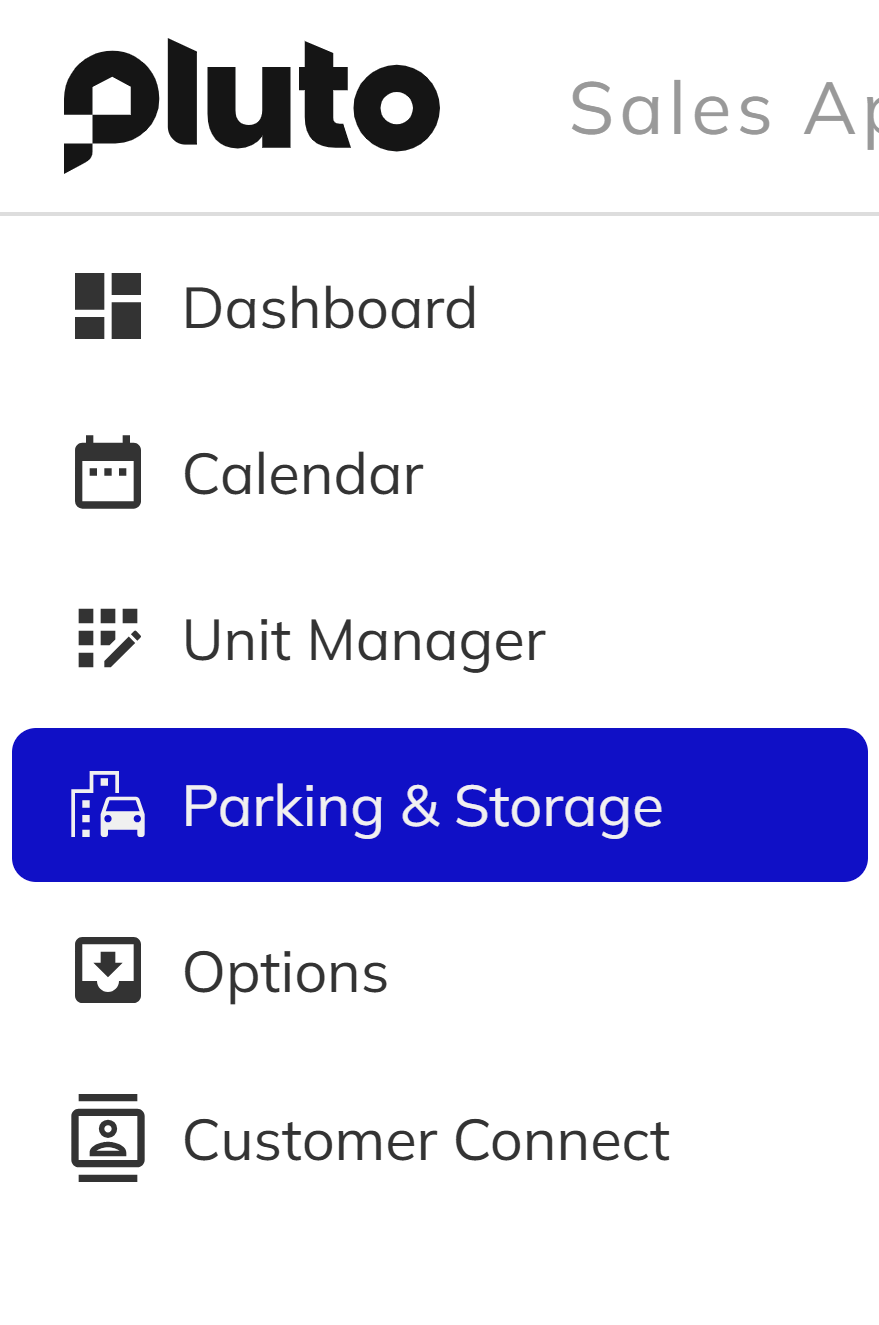
- Click on the Community and Project that you would like to add the parking stall to.
- Confirm you are viewing the correct parking lot or parkade.
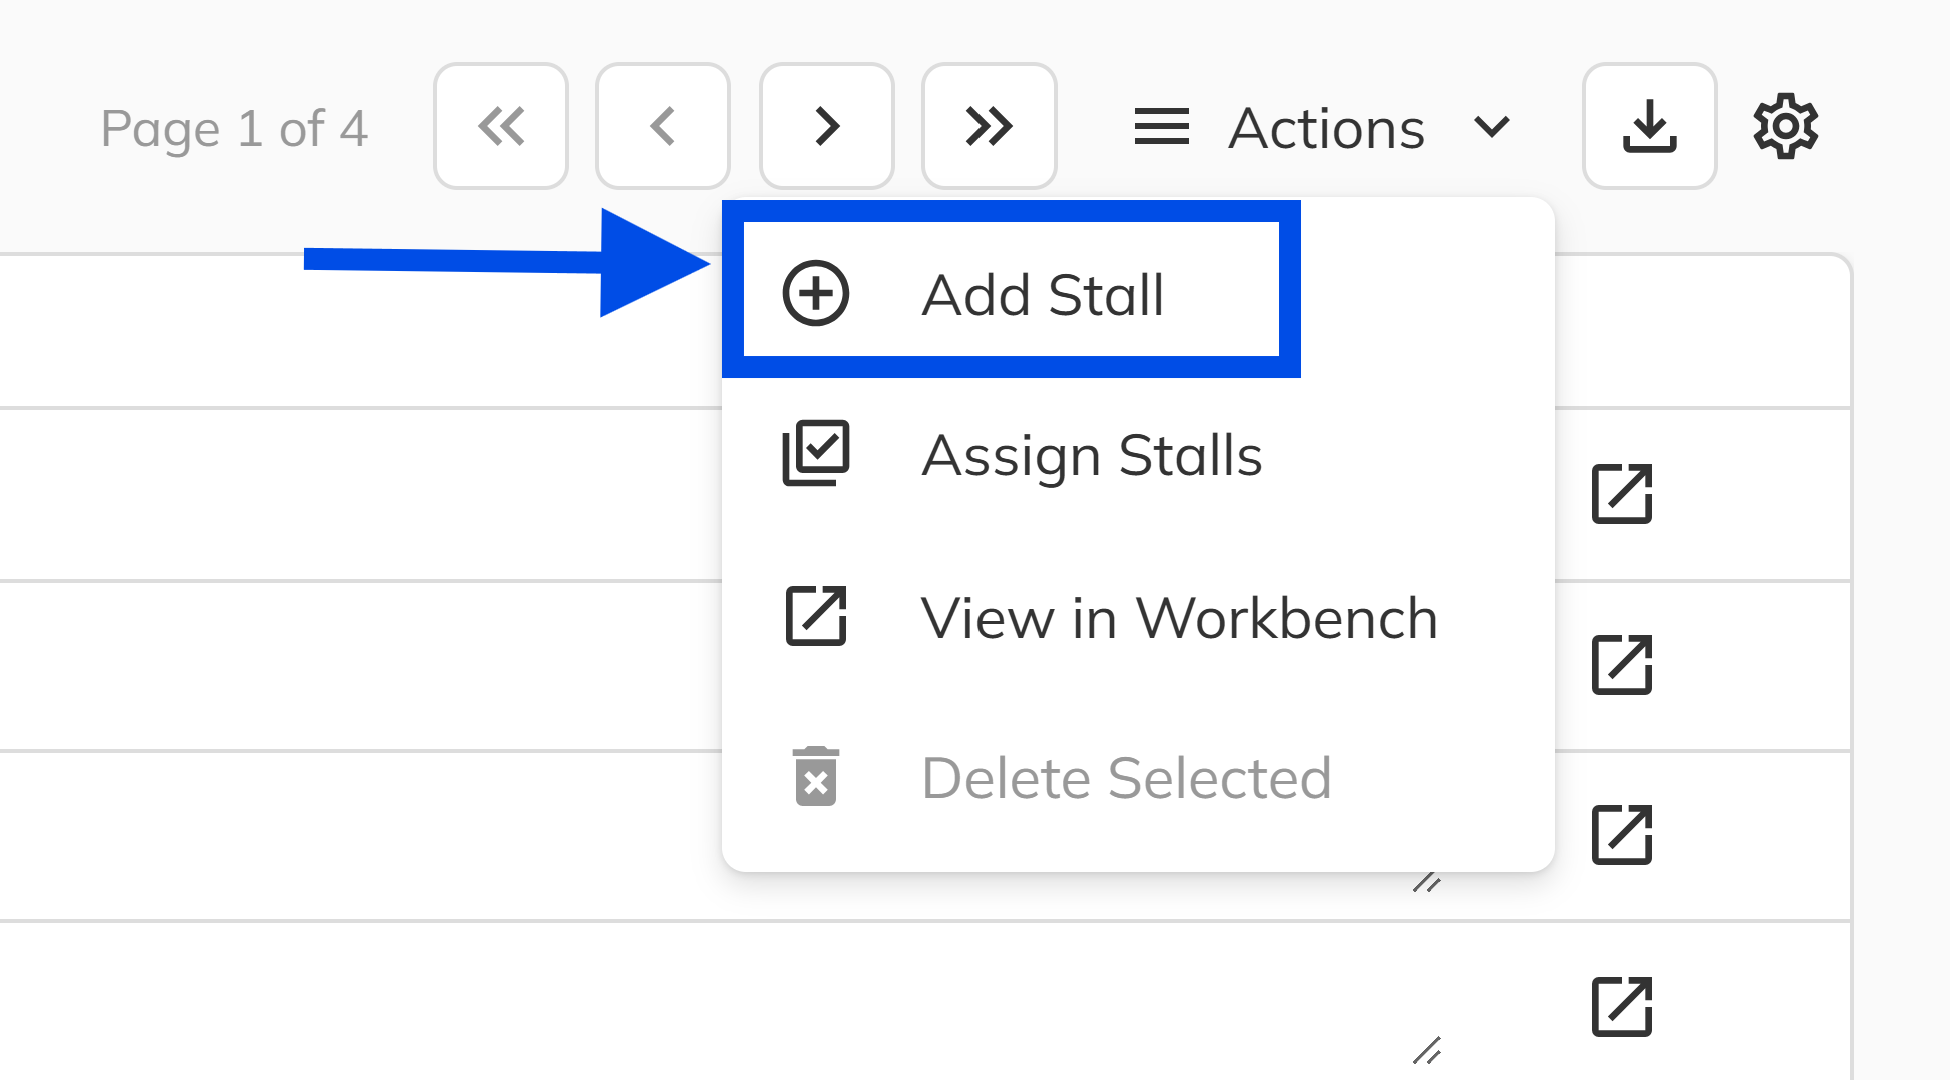
- Click the Actions dropdown and click Add Stall button to open the creation dialog.
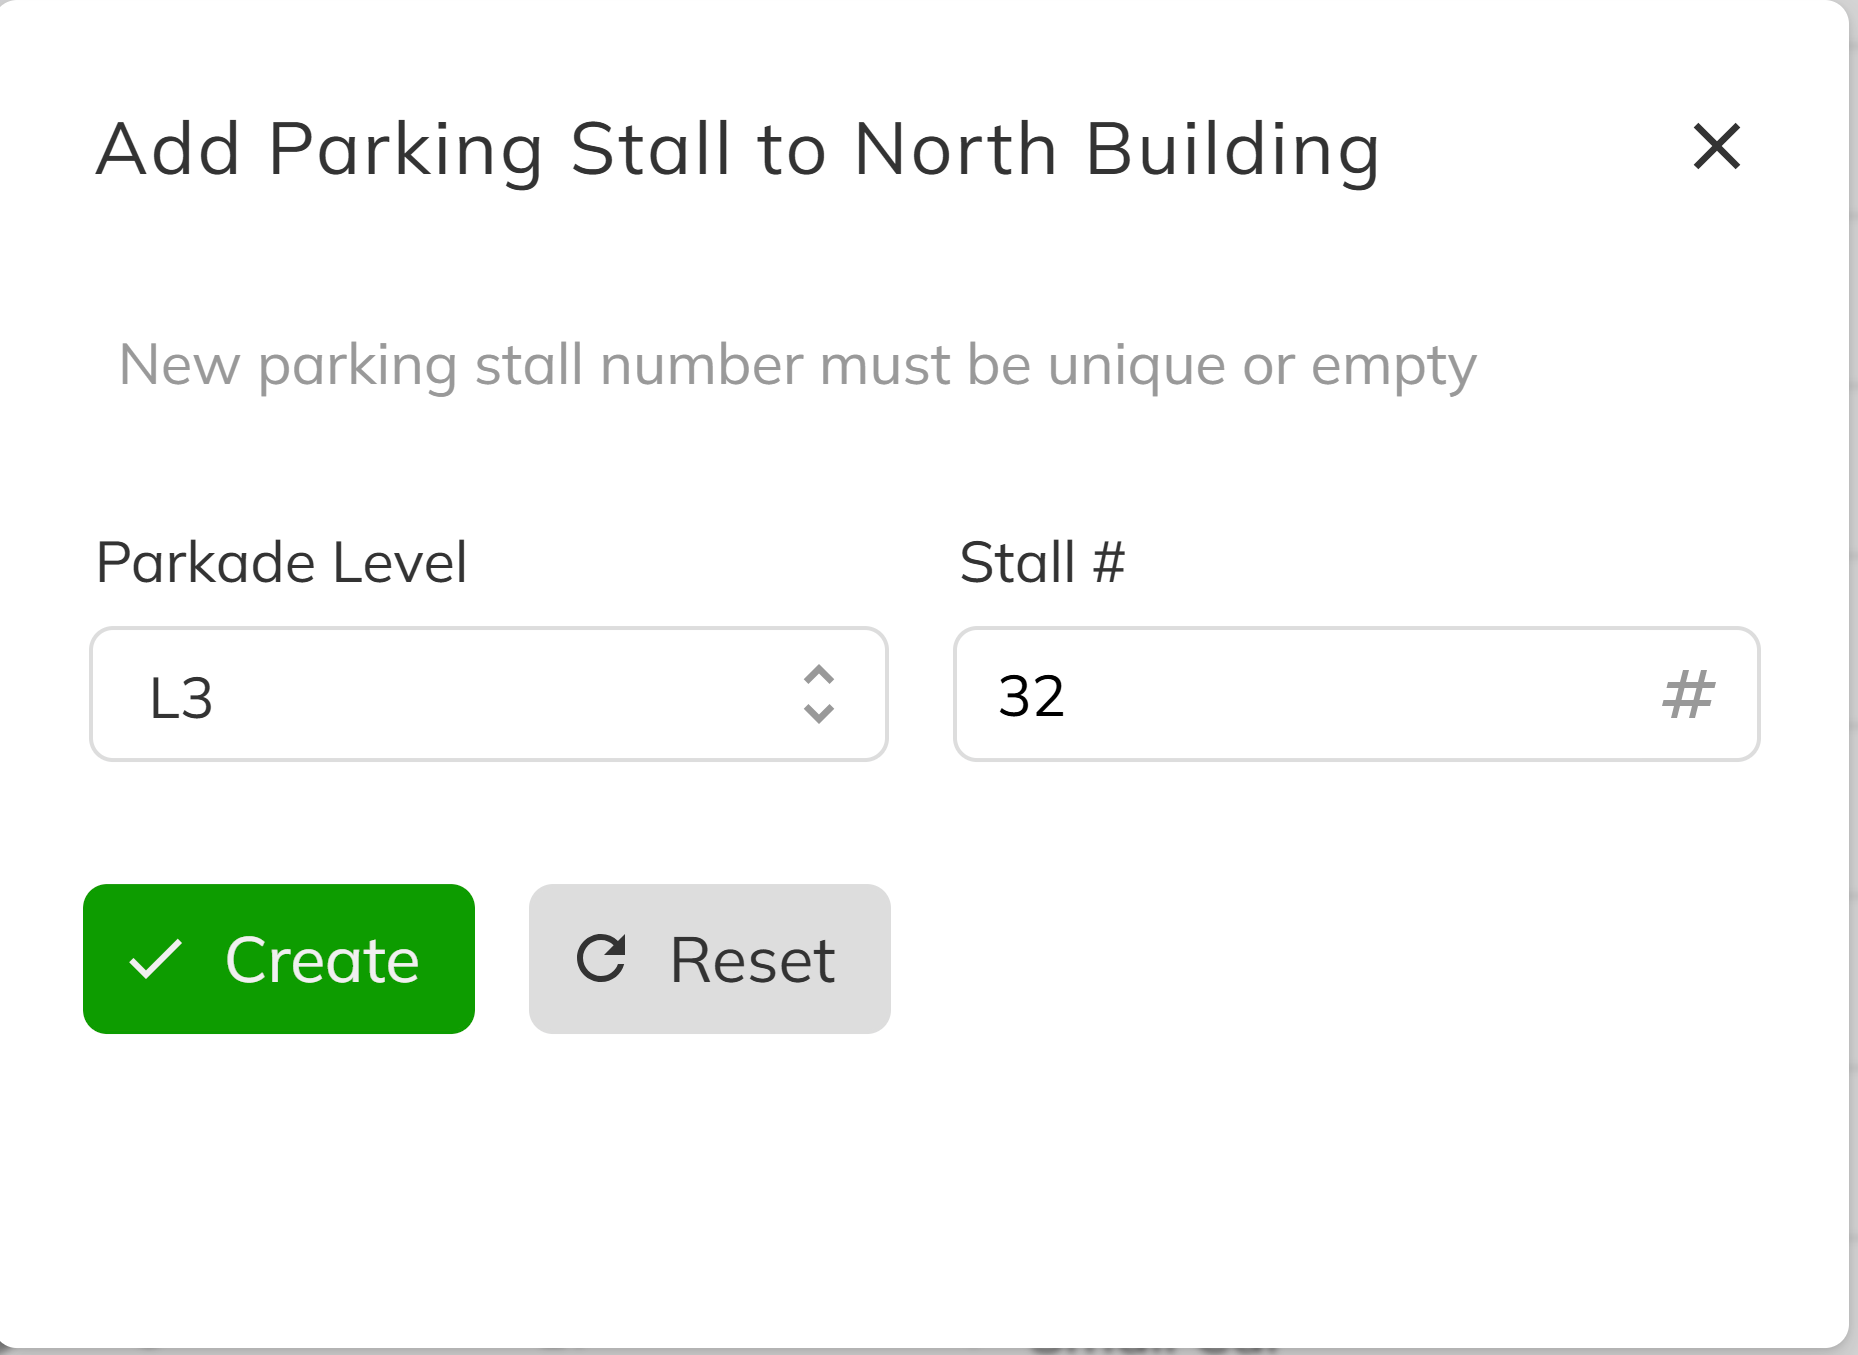
- Select the Level (for parkades) and enter a Stall Number.
- Click Create to create the stall. It is created with default dimensions of 9 feet wide by 17 feet deep.
3. Review and Edit Stall Details
Once stalls are created, they appear in the stalls grid within the parking location. You can select any stall to edit its details:
| Field | Description |
|---|---|
| Stall Number | Alphanumeric identifier, unique within the location. |
| Width (Feet) | Physical width of the stall (default 9 ft). |
| Depth (Feet) | Physical depth of the stall (default 17 ft). |
| Attributes | Tags like "Handicap", "EV Charging", "Tandem" — customizable per organization. |
| Is Public | Marks the stall as visitor/public parking. Public stalls cannot be assigned to units. |
| Notes | Free-text field for any additional information about the stall. |
Your organization can define custom stall attributes to categorize parking spaces. These attributes are managed at the organization level and appear as multi-select tags when editing stalls.
Congratulations! You have successfully created a parking location, configured its levels and project associations, and populated it with parking stalls. Your parking inventory is now ready for stall assignment to individual units or to be sold as options through the sales process. From here, stalls can be assigned to specific units on the Parking & Storage page within each project, or offered to purchasers as sales options during a deal.