Mass Email
The Mass Email tool allows you to send emails to a large group of contacts at once. Whether you need to notify all purchasers in a community about an update, reach out to realtors across a project, or communicate with lawyers handling transactions, Mass Email streamlines the process so you don't have to send individual emails one by one.
This guide covers who you can send mass emails to, how to filter your recipients, and the step-by-step workflow for composing and sending your email.
How We Got Here
Before using Mass Email, your organization's data should already be set up in the Pluto Systems sales app. Communities, projects, buildings, and units need to exist, and contacts (purchasers, realtors, lawyers, etc.) should be linked to those units. Your account also requires the Mass Email permission to access this feature.
Who Can You Send Mass Emails To?
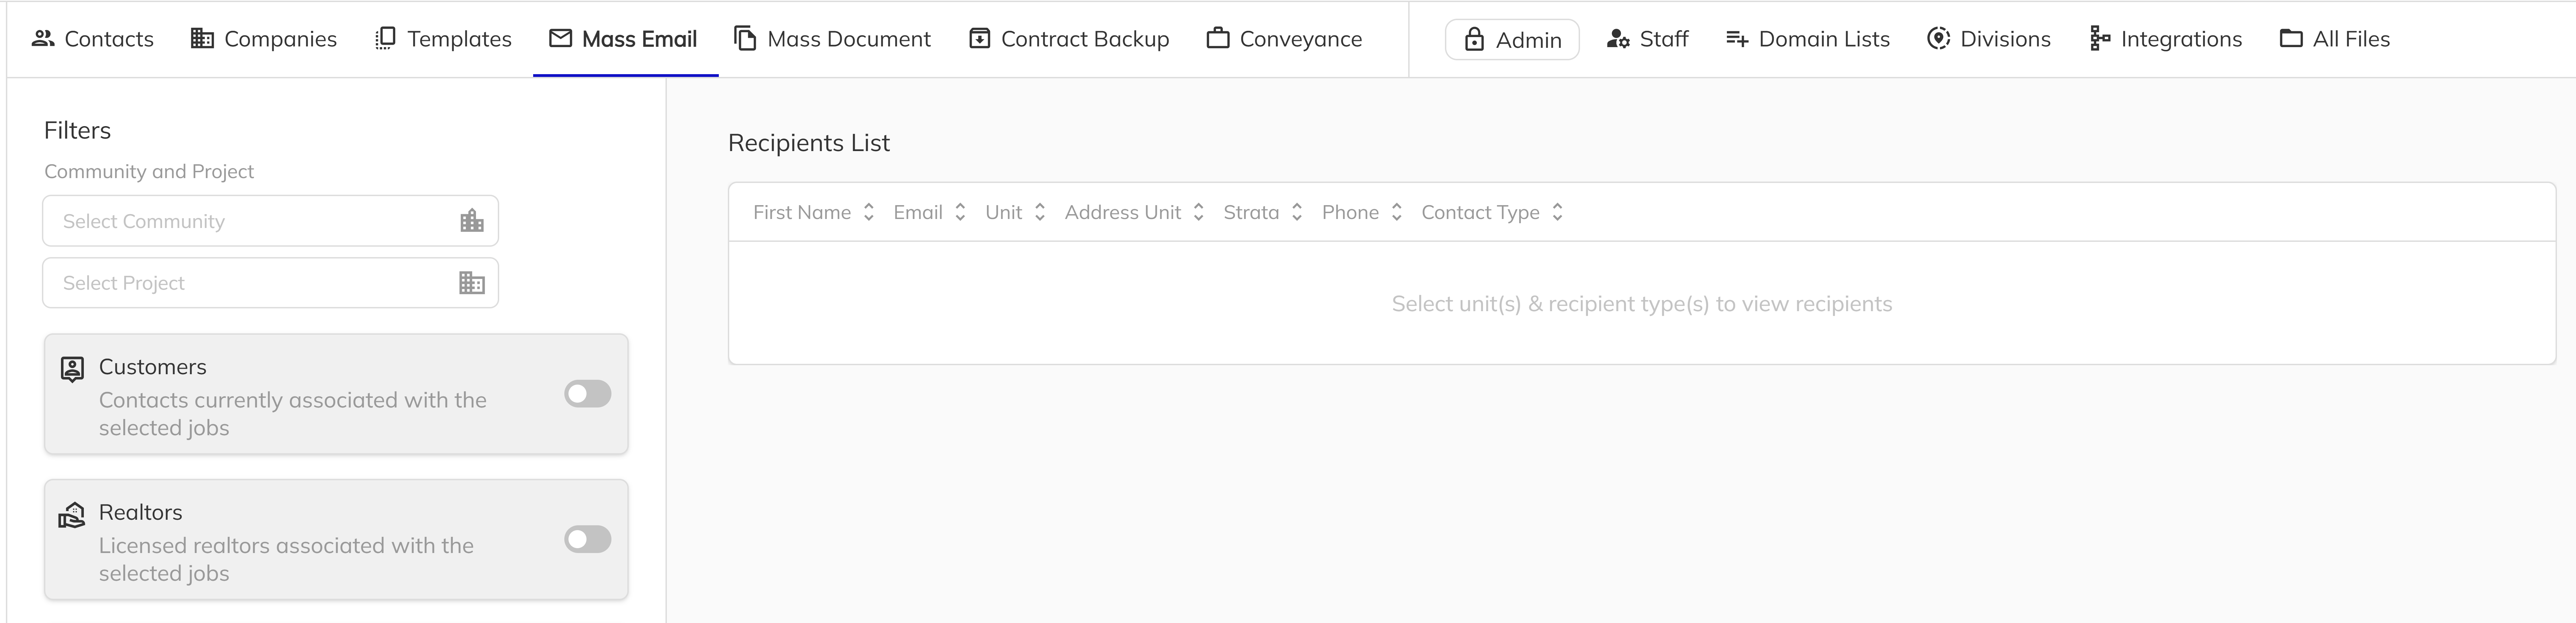
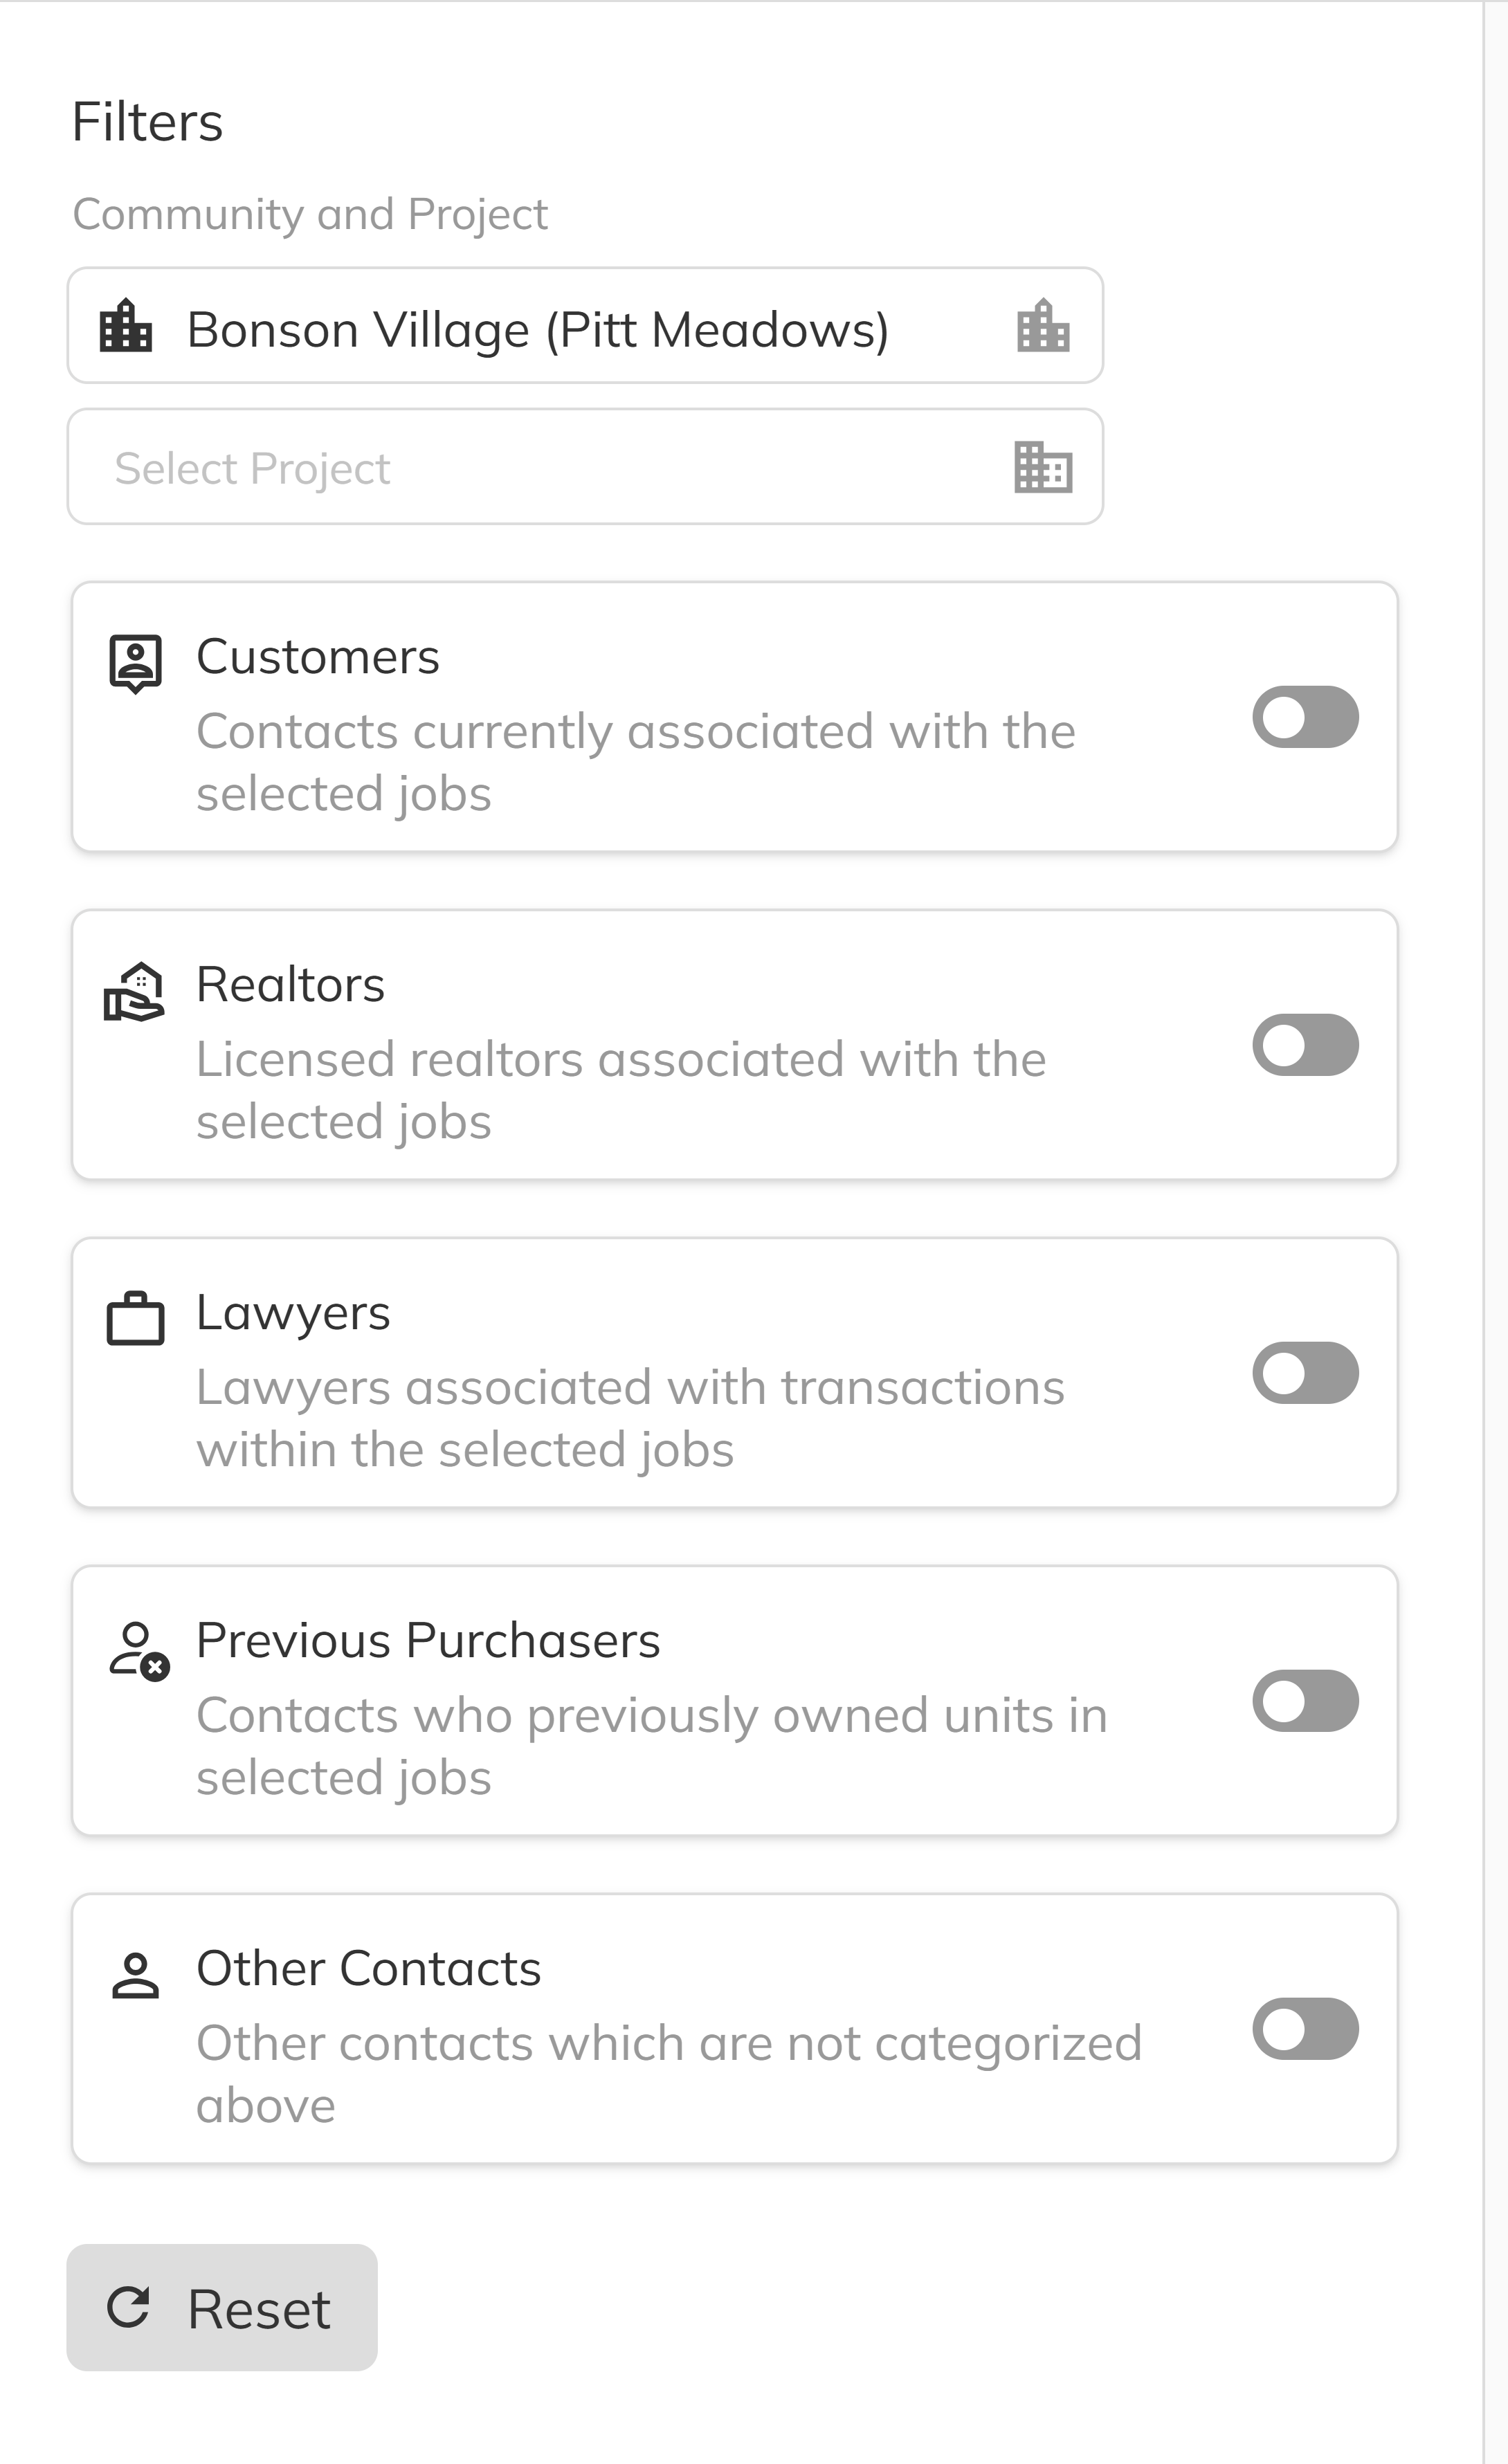
Mass Email lets you target five categories of contacts associated with the units you select. You can enable any combination of these recipient types using the toggle switches in the filter panel:
| Recipient Type | Description |
|---|---|
| Customers | Contacts currently associated with the selected units (active purchasers). |
| Realtors | Licensed realtors linked to the selected units. |
| Lawyers | Lawyers associated with transactions within the selected units. |
| Previous Purchasers | Contacts who previously owned the selected units. |
| Other Contacts | Any additional contacts linked to the selected units who are not directly part of the transaction but should be kept informed. |
Only contacts with a valid email address on file will appear in the recipients list. Contacts without an email address are excluded automatically.
Sending a Mass Email
1. Navigate to the Mass Email page
Open the sales app and go to the Admin page from the main navigation. Left click the Mass Email tab in the top toolbar. The Mass Email page will open, showing the Filters panel on the left and the Recipients List and Email Workflow on the right.
2. Select a Community
In the Filters panel, use the Select Community dropdown to choose the community you want to email contacts from. All subsequent filter options (projects, buildings, floors, units) are scoped to the selected community.
3. Select Projects, Buildings, Floors, and Units
After selecting a community, narrow down your recipients using the hierarchical filters:
- Project(s) — Select one or more projects within the community.
- Building(s) — Appears for high-density projects (multi-family, high-rise, low-rise) with more than one building. Select the buildings you want to target.
- Floor(s) — Appears when the selected buildings have multiple floors. Select specific floors if needed.
- Unit(s) — Select the specific units whose contacts you want to email. Use Select All to quickly include every available unit.
![]()
Each multi-select dropdown includes a Select All option, making it easy to include all items at that level without selecting them individually.
4. Toggle recipient types
With your units selected, enable the recipient type toggles to choose who you want to email. Turn on Customers, Realtors, Lawyers, Previous Purchasers, and/or Other Contacts as needed. The Recipients List grid on the right will update in real-time to show the matching contacts along with their name, email, unit number, and contact type.
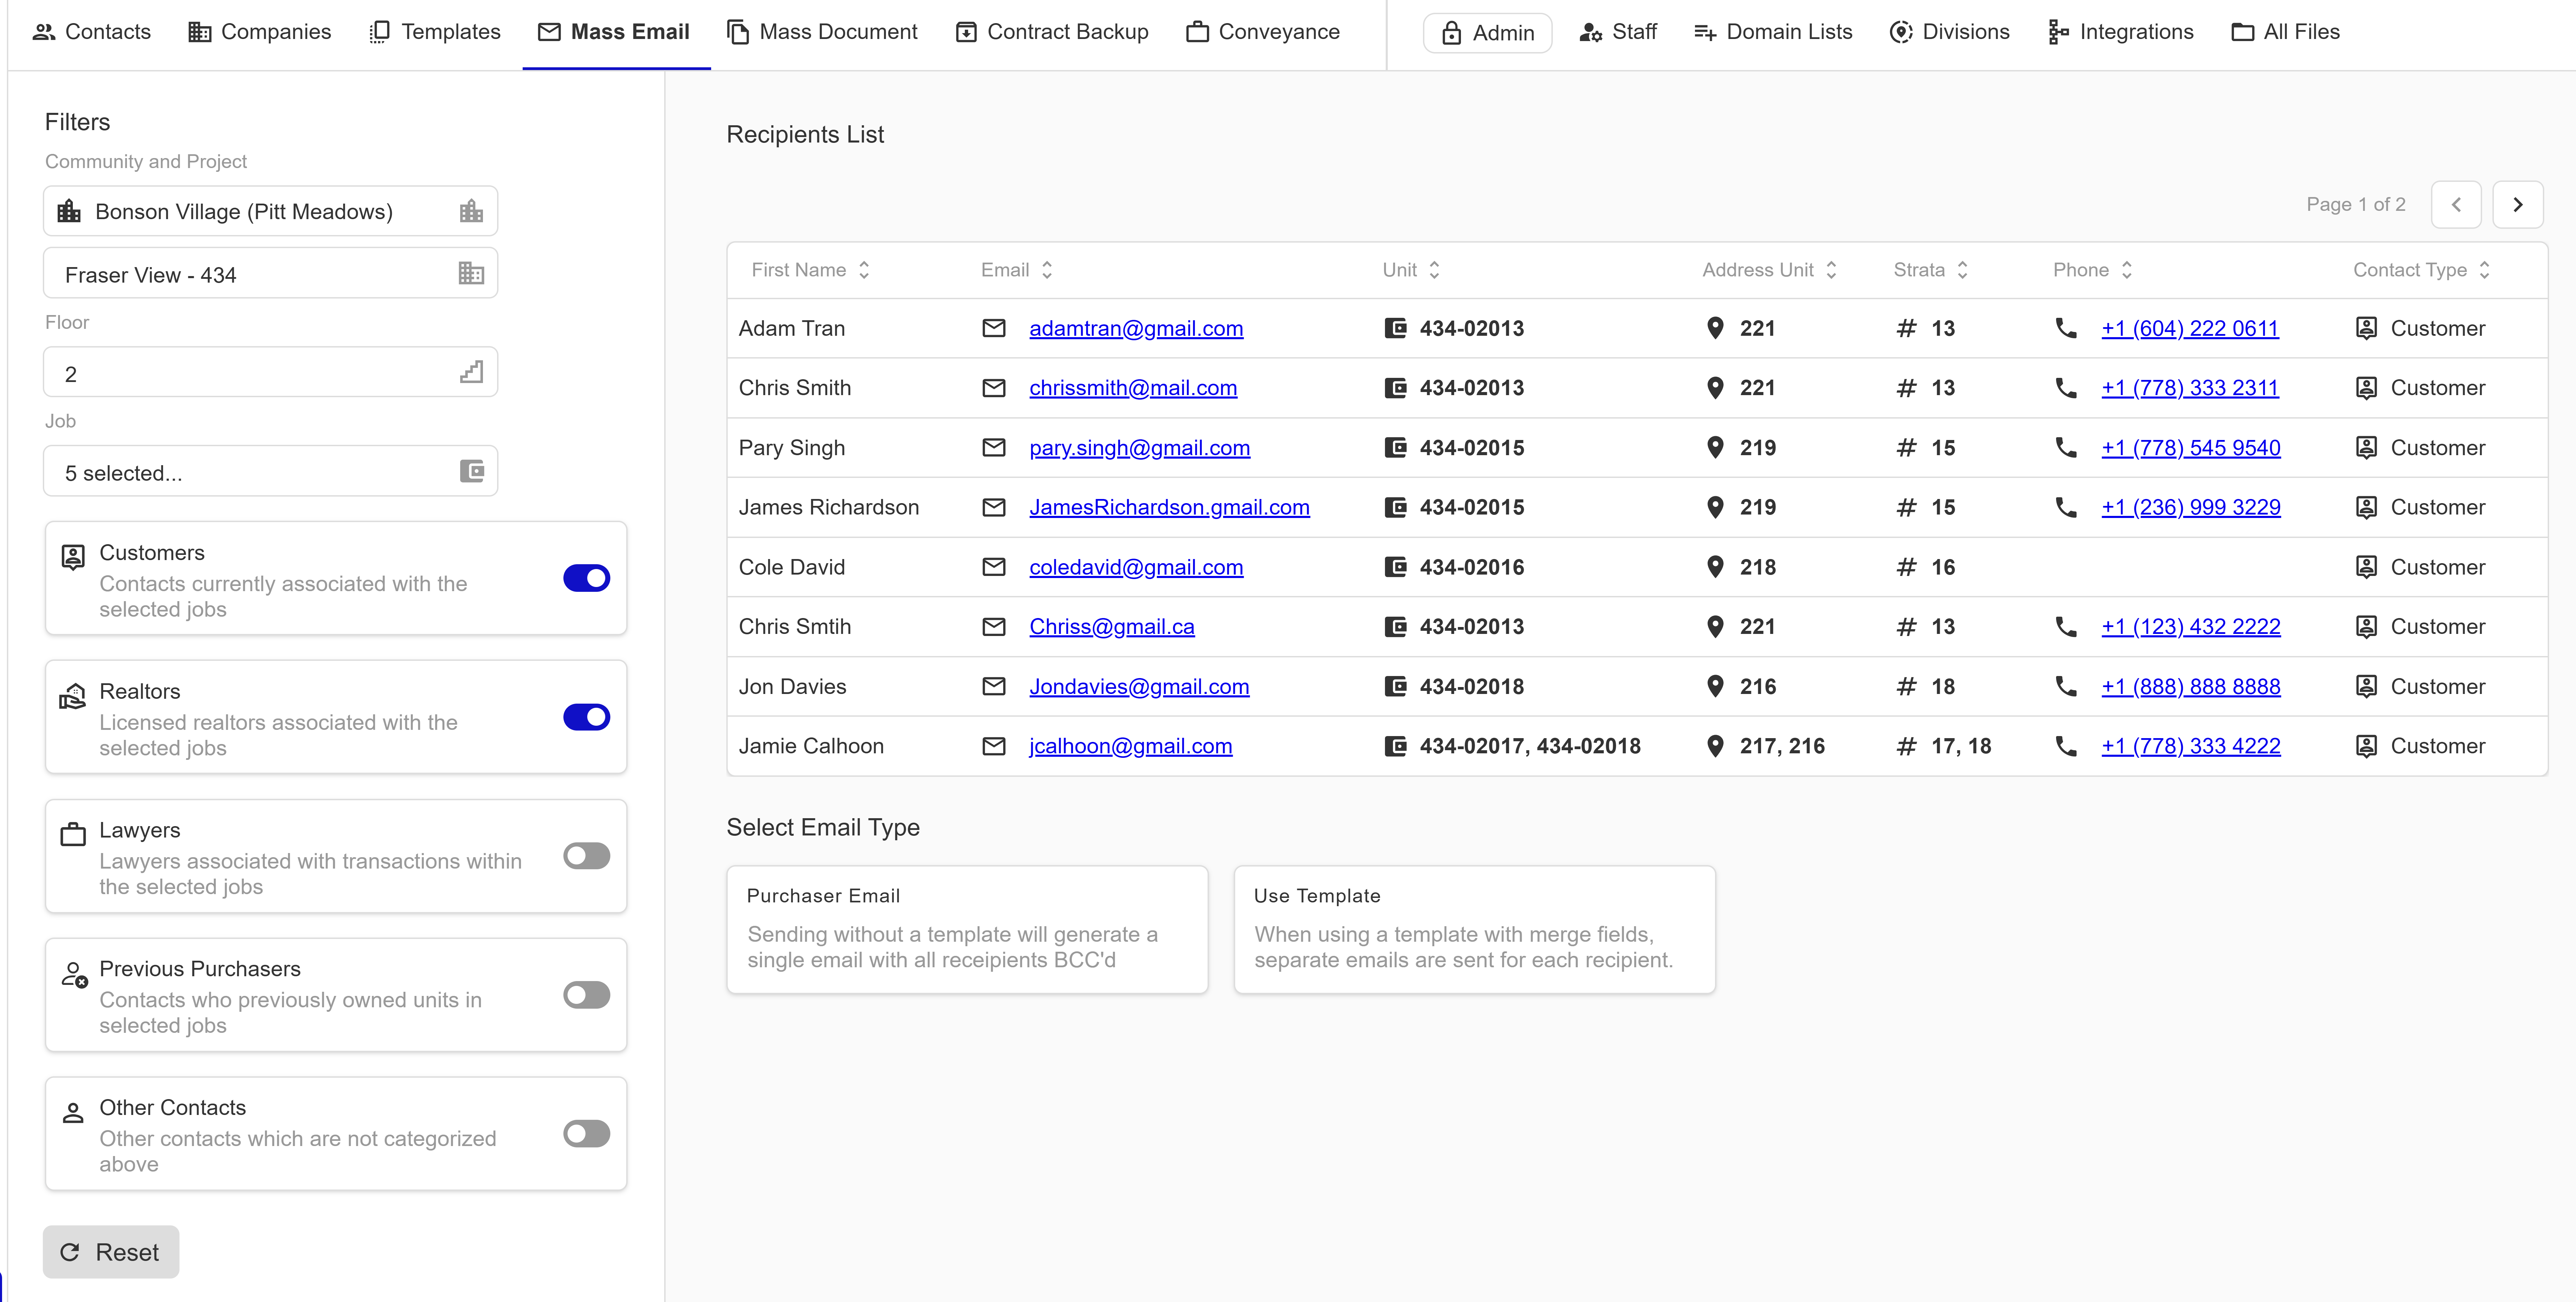
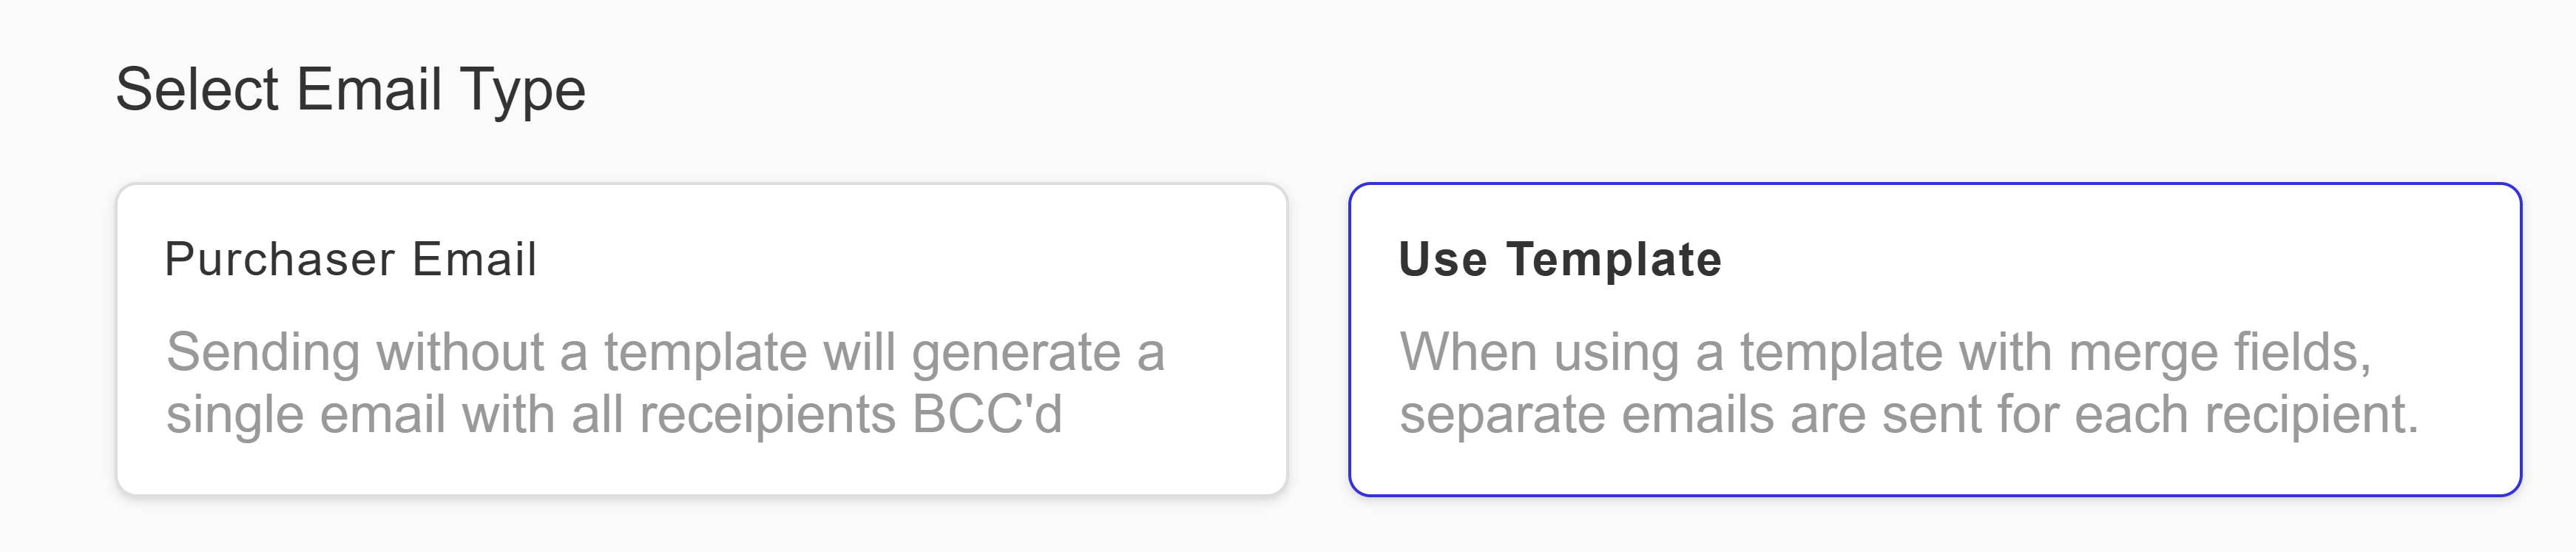
5. Choose your email type
In the email workflow area, you'll be presented with two options:
- Purchaser Email — Sends a single email with all recipients added to the BCC field. This is ideal for general announcements that don't need personalized content.
- Use Template — Sends a separate email for each unit, with merge fields resolved per unit. This is best when your email content needs to include unit-specific details like unit numbers, addresses, or purchaser names.
Select the option that fits your needs.
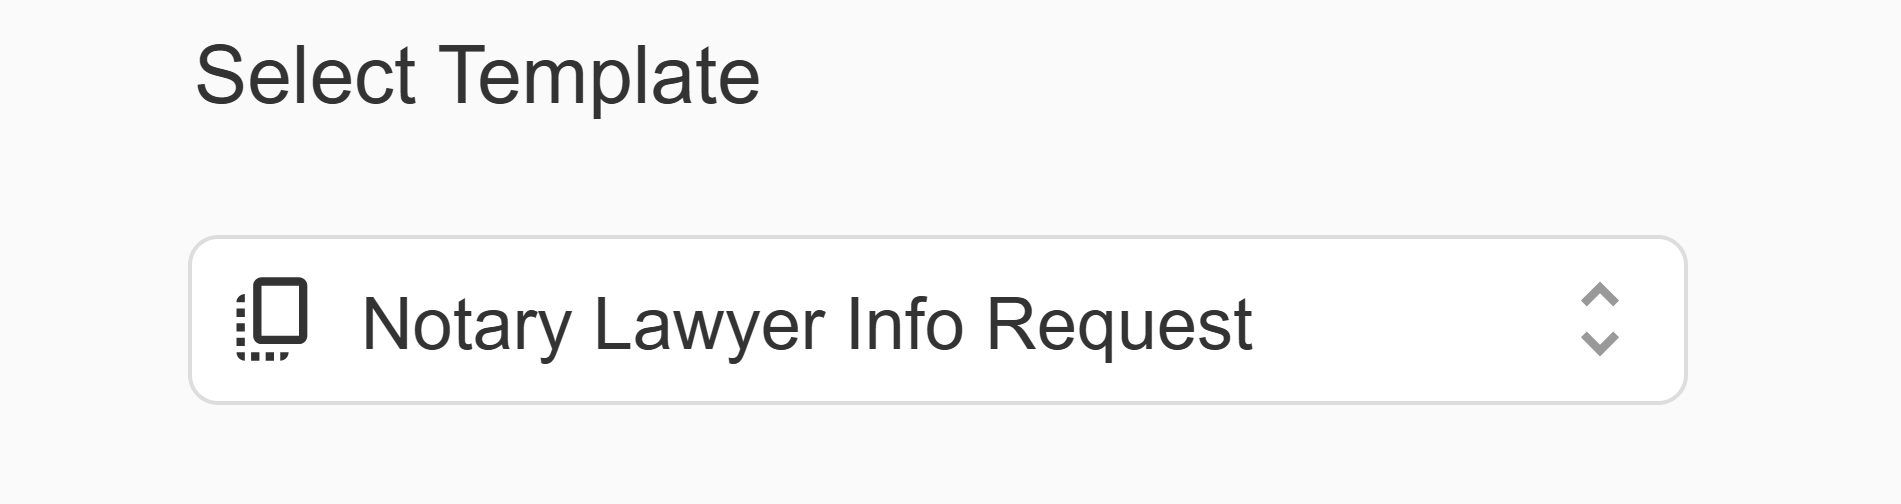
6. Select a template (if applicable)
If you chose Use Template, a template dropdown will appear. Select an email template from the list of available templates configured for your community. The template's subject and body will be loaded into the email editor. Merge fields in the template will be automatically resolved with unit-specific data when the email is sent.
7. Manage your recipients
Review the auto-populated recipient list in the Manage Recipients step. Recipients from your filter selections are automatically added to the BCC field. From this step you can:
- Add additional recipients manually by typing an email address into the To or BCC fields and clicking Add.
- Remove recipients by clicking the delete icon next to any email address.
- Set the From name — the display name recipients will see in their inbox.
- Set the Reply To address — where replies will be directed (defaults to your account email).
- Send to self — toggle this on to BCC yourself a copy of the email for your records.
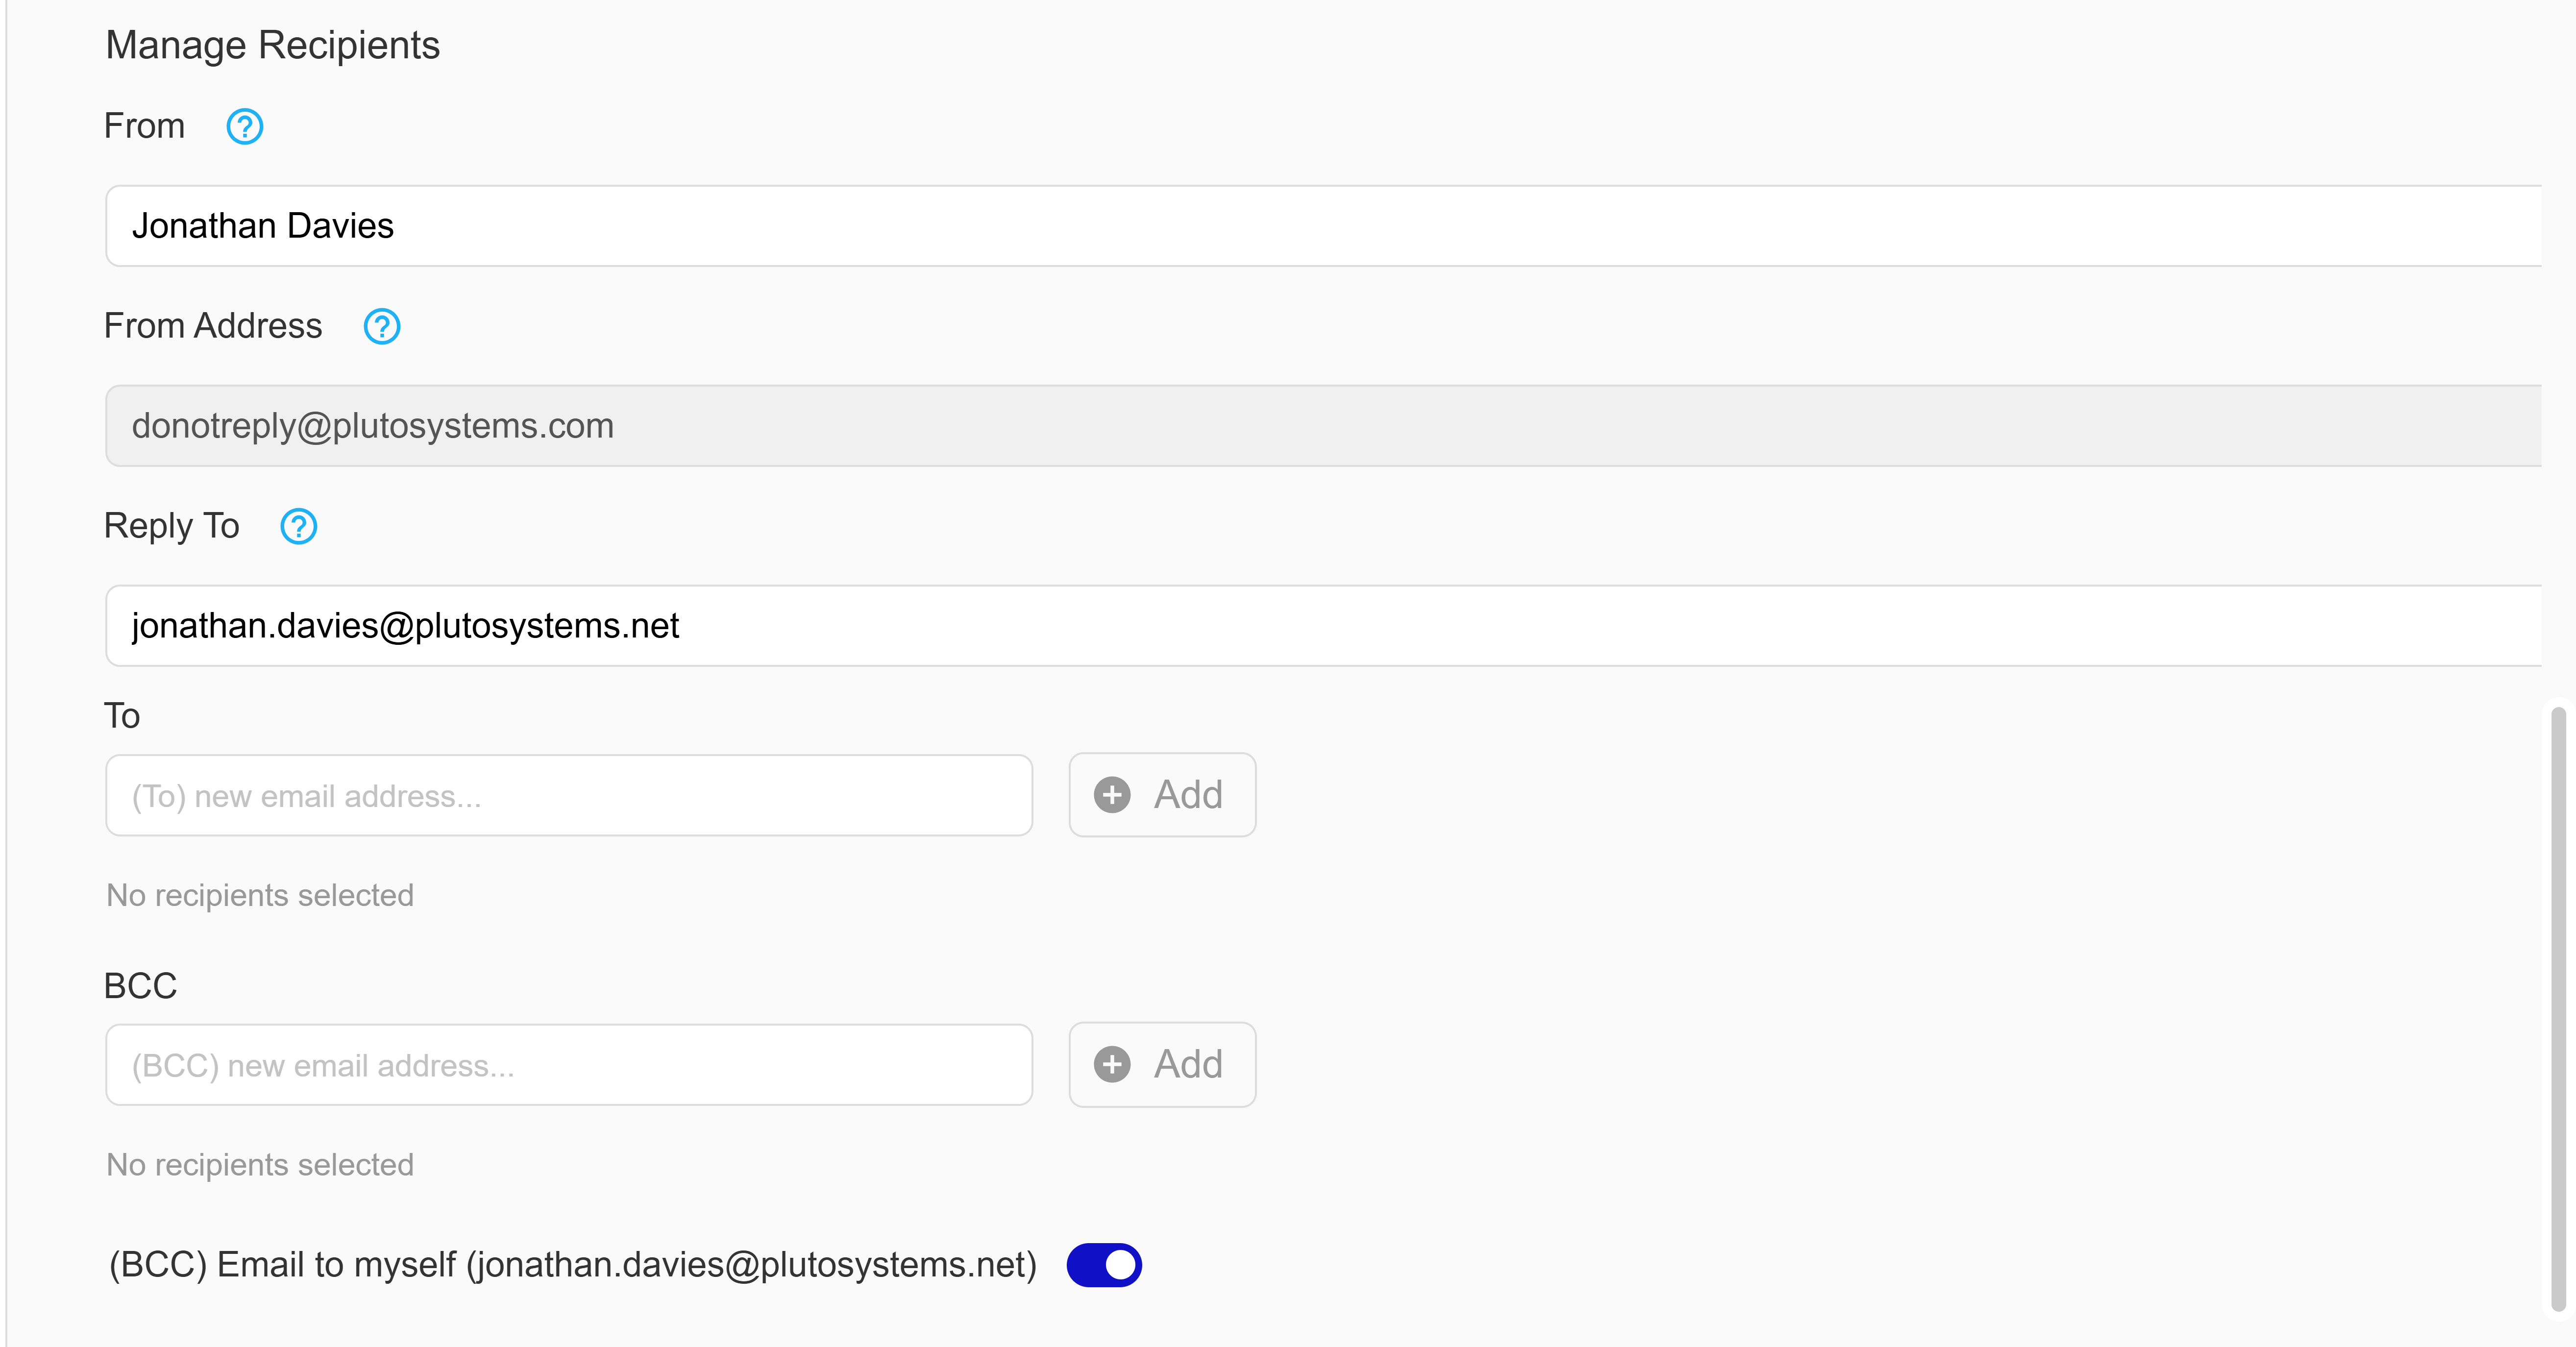
All mass emails are sent from donotreply@plutosystems.com. This cannot be changed. Use the Reply To field to specify the address where responses should be directed.
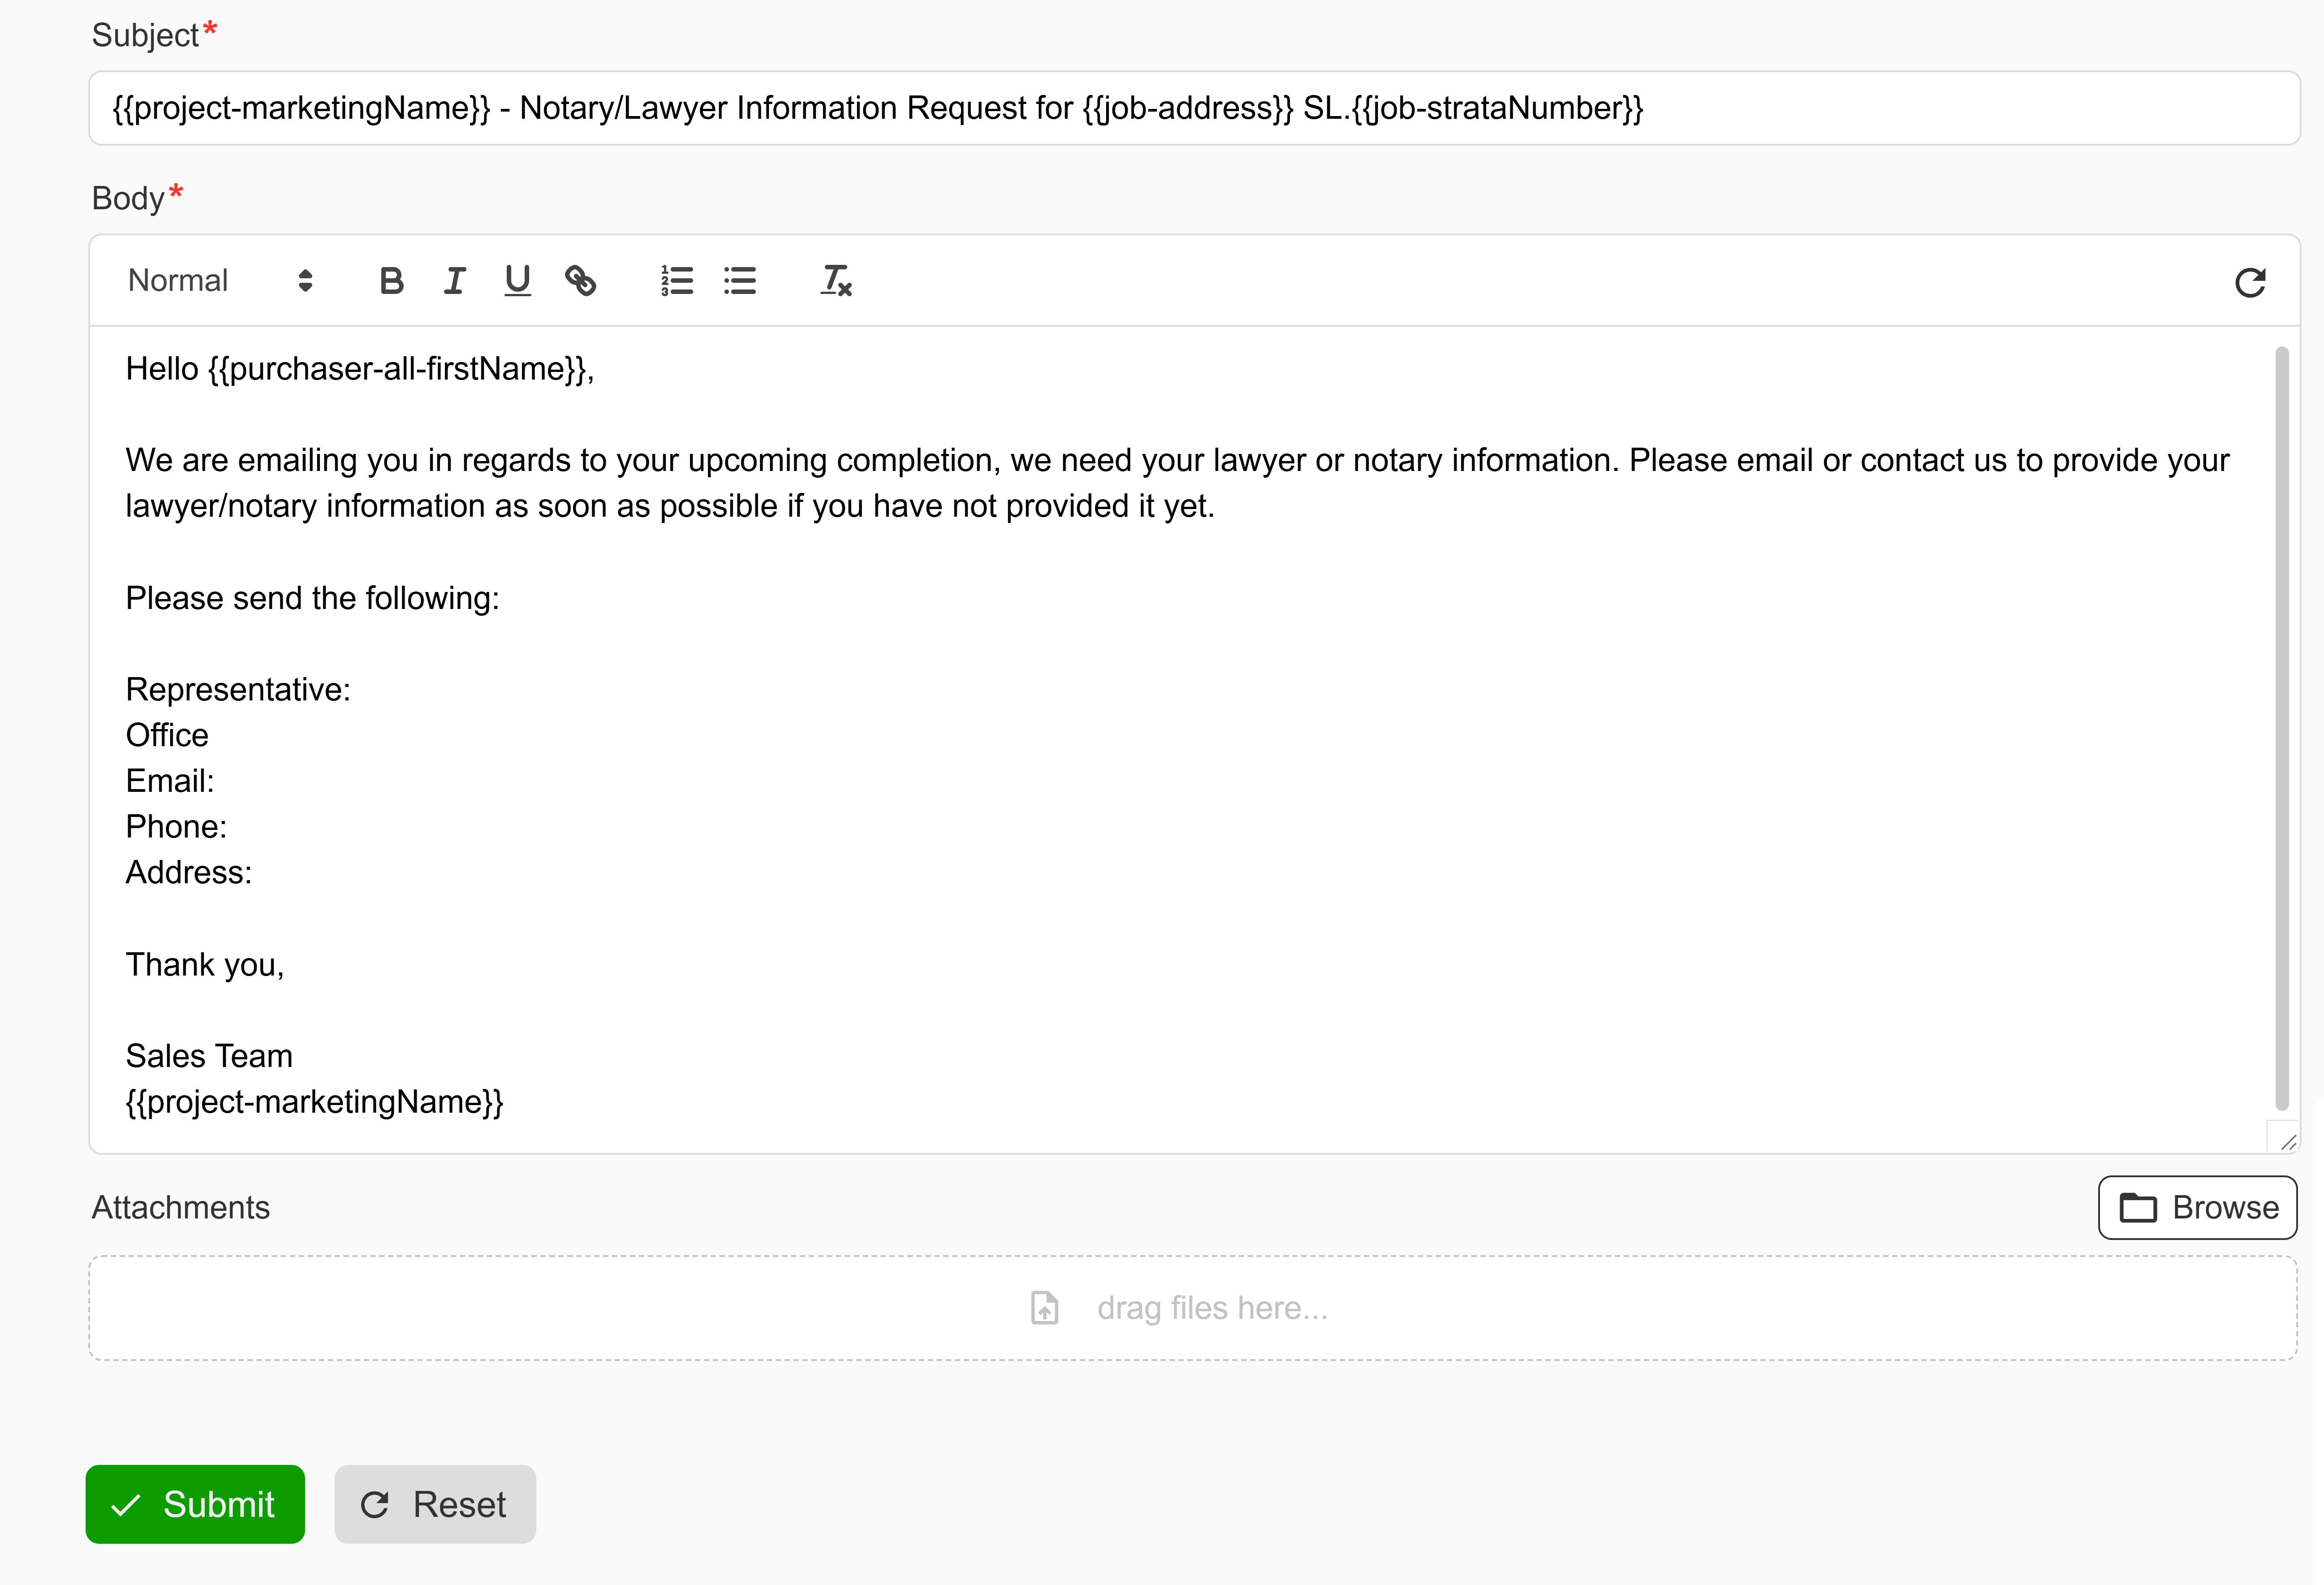
8. Compose and send your email
In the Edit Email Content step, write your subject line and email body using the rich text editor. If you selected a template in the previous step, the subject and body will already be pre-filled with the template content — you can leave it as is or make any edits before sending. You can also attach files to the email. When you're satisfied with the content, click the Submit button.
A confirmation dialog will appear showing the subject line and the total number of recipients. Click Yes to send the email.
Congratulations! You have successfully sent a mass email to your selected contacts. A confirmation toast will appear indicating the email was sent successfully. The email will be logged in the communications panel for your records, and all recipients will receive the message in their inbox.
Resetting Your Email
If you need to start over at any point during the workflow, click the Reset button. This will clear all email content and reset the workflow back to the beginning. Your filter selections will remain intact so you can quickly compose a new email to the same group of recipients.
To reset the filters as well, use the Reset button at the bottom of the Filters panel. This will clear all community, project, unit selections and recipient toggles.