New Deal Process
The New Deal process in Pluto Systems enables you to convert a reservation into a formal sales agreement. This comprehensive workflow guides you through managing purchaser information, selecting options, setting deposits, and preparing all necessary documentation. Whether you're starting from an active reservation or locating an available unit, this guide will walk you through every step to complete a deal successfully.
How We Got Here
A purchaser or realtor is interested in buying a property. They may have reserved a unit through a sales representative or the Customer Connect, or they may have identified a specific unit without a prior reservation. Regardless of the path taken, the New Deal process begins here, converting their interest into a formal sales agreement.
New Deal Workflow
1. Access the Sales App and Dashboard
Open your browser and navigate to your Pluto Systems Sales App. Once logged in, you'll land on your dashboard, which displays key information including active reservations.
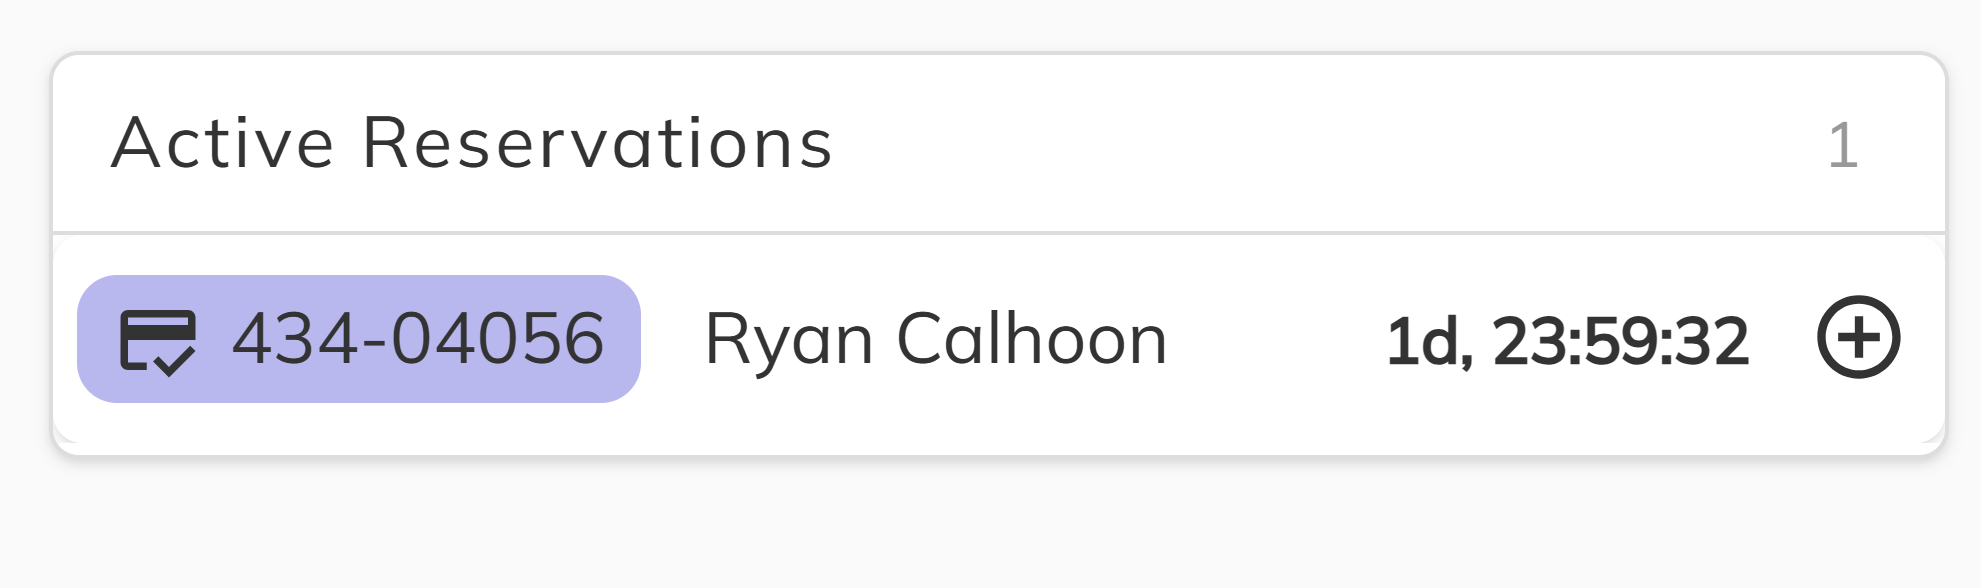
2. Locate Your Reservation (Optional)
On your dashboard, the Active Reservations panel displays reserved units, providing a quick way to enter the New Deal process directly. Click the unit number, and a side menu will appear with the New Deal button. Click it to proceed. This is an optional shortcut—you can also access deals through the Unit Manager if you prefer. You may go down to Step 6 to continue.
3. Access Unit Manager
The Unit Manager provides an alternative method to view available or reserved units.
To access the Unit Manager:
- Open the side menu
- Click Unit Manager
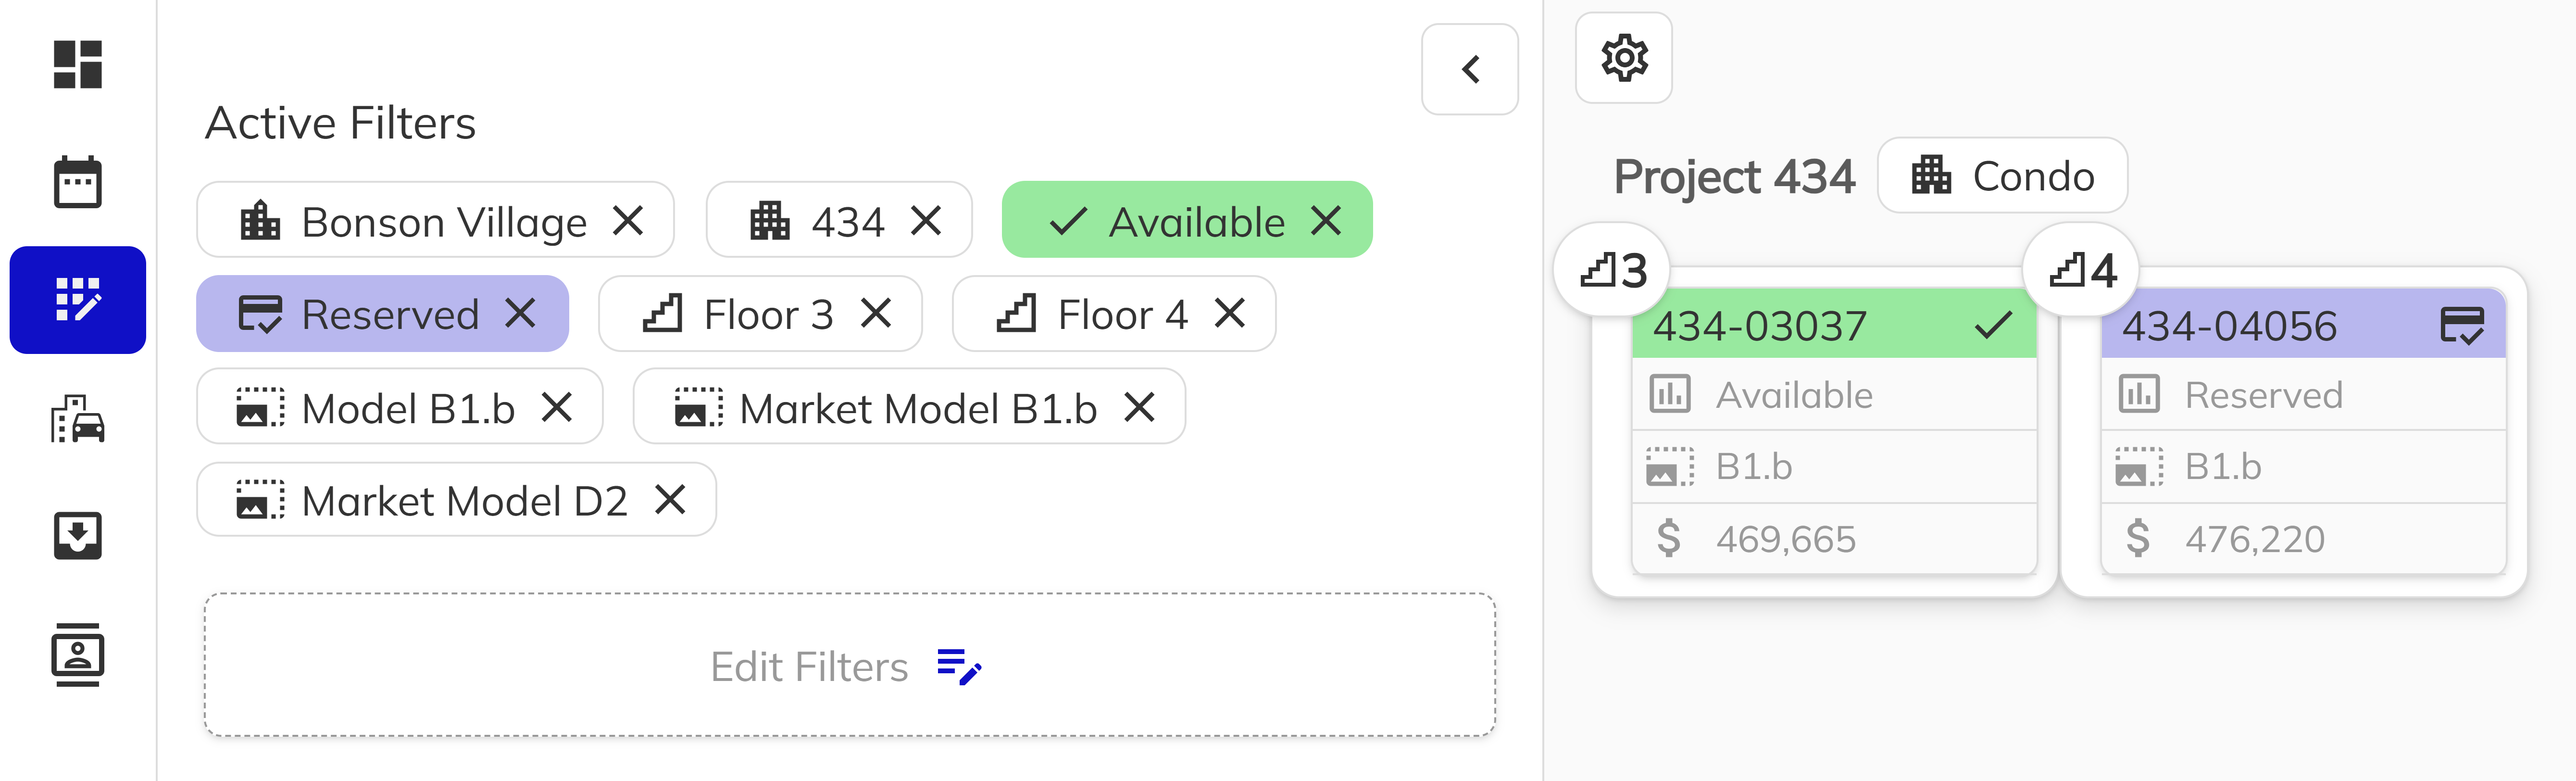
4. Filter and Select the Unit
Filter the unit list to find the specific unit for your purchaser. Look for units with a Sales status of Available or Reserved. Click on the unit you wish to proceed with. For this example, we'll use a Reserved unit.
5. Enter the New Deal Process
Once you've selected a unit, the next step depends on its sales status:
For Reserved Units: Click the New Deal button in the side menu to proceed.
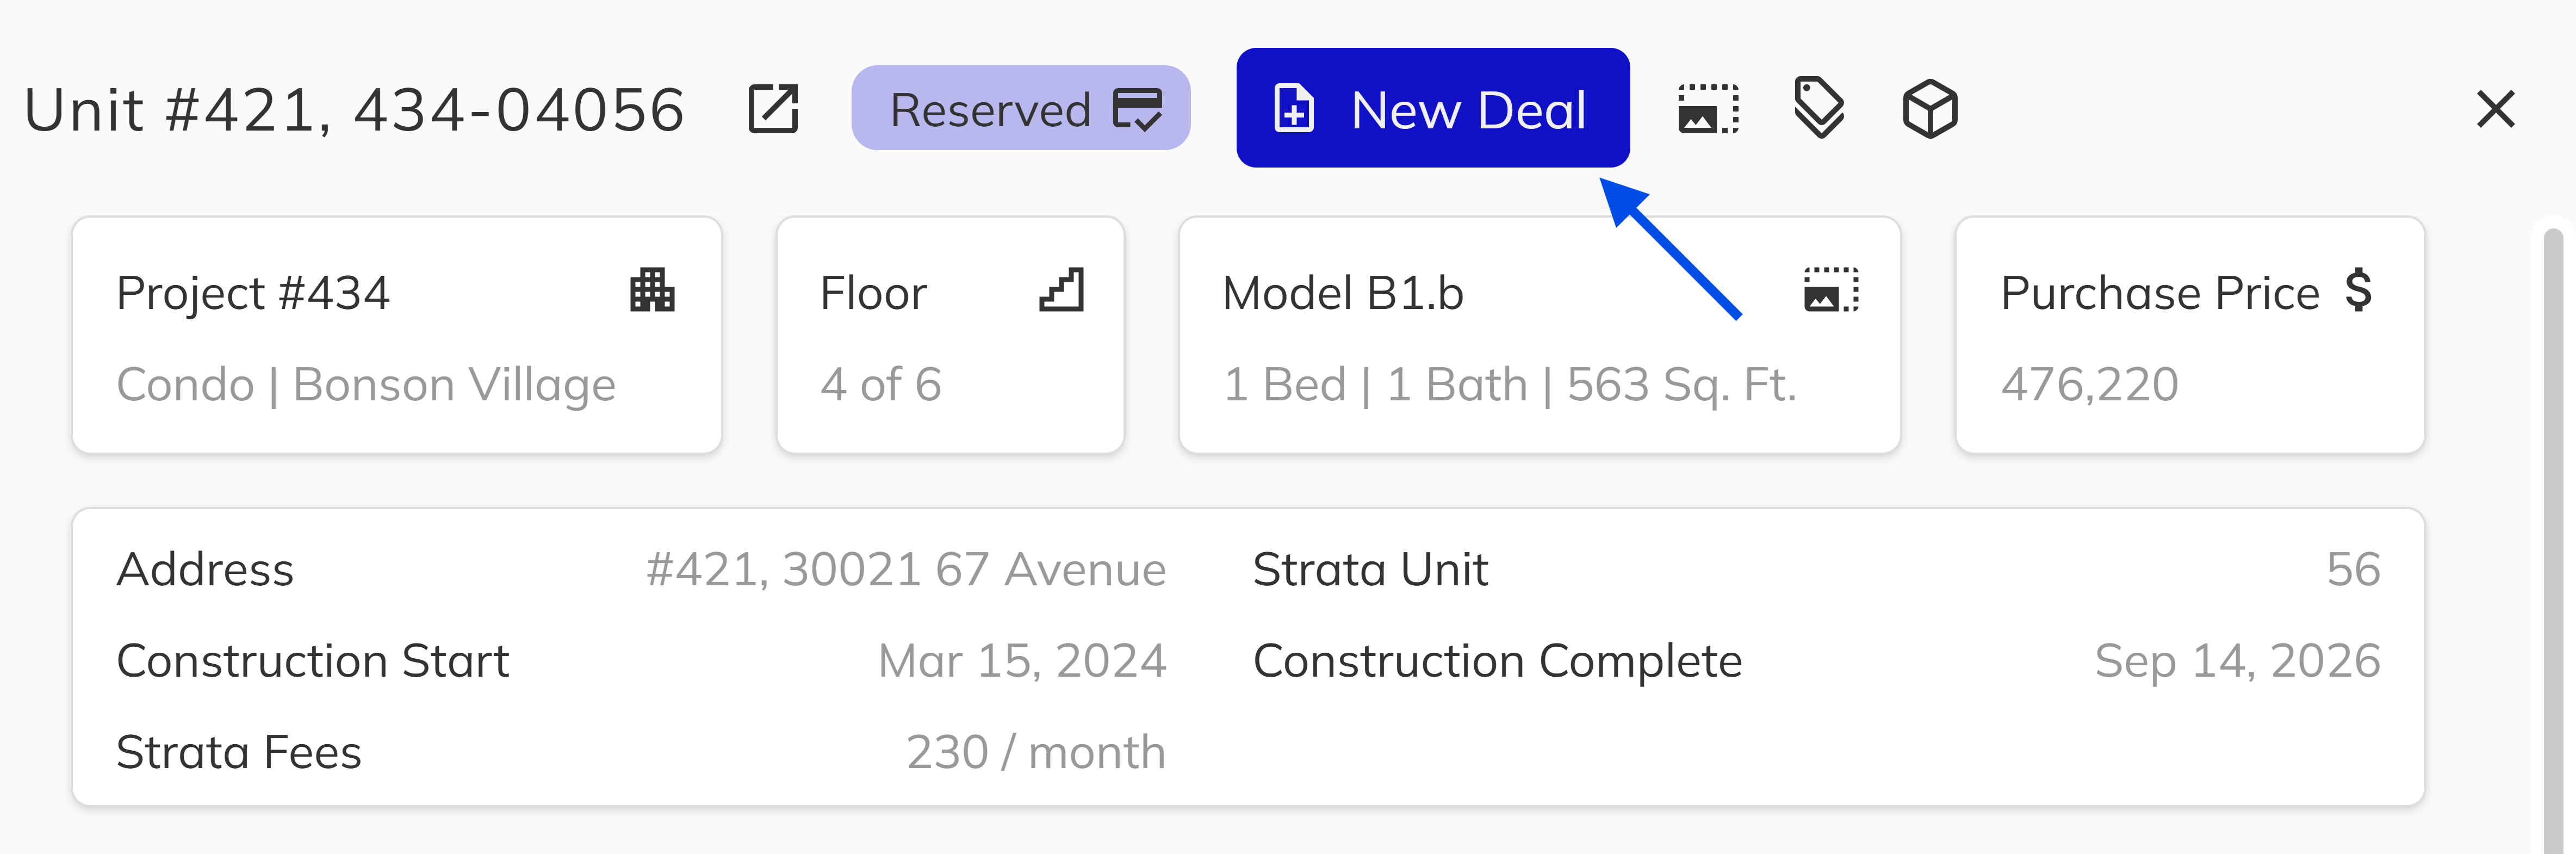
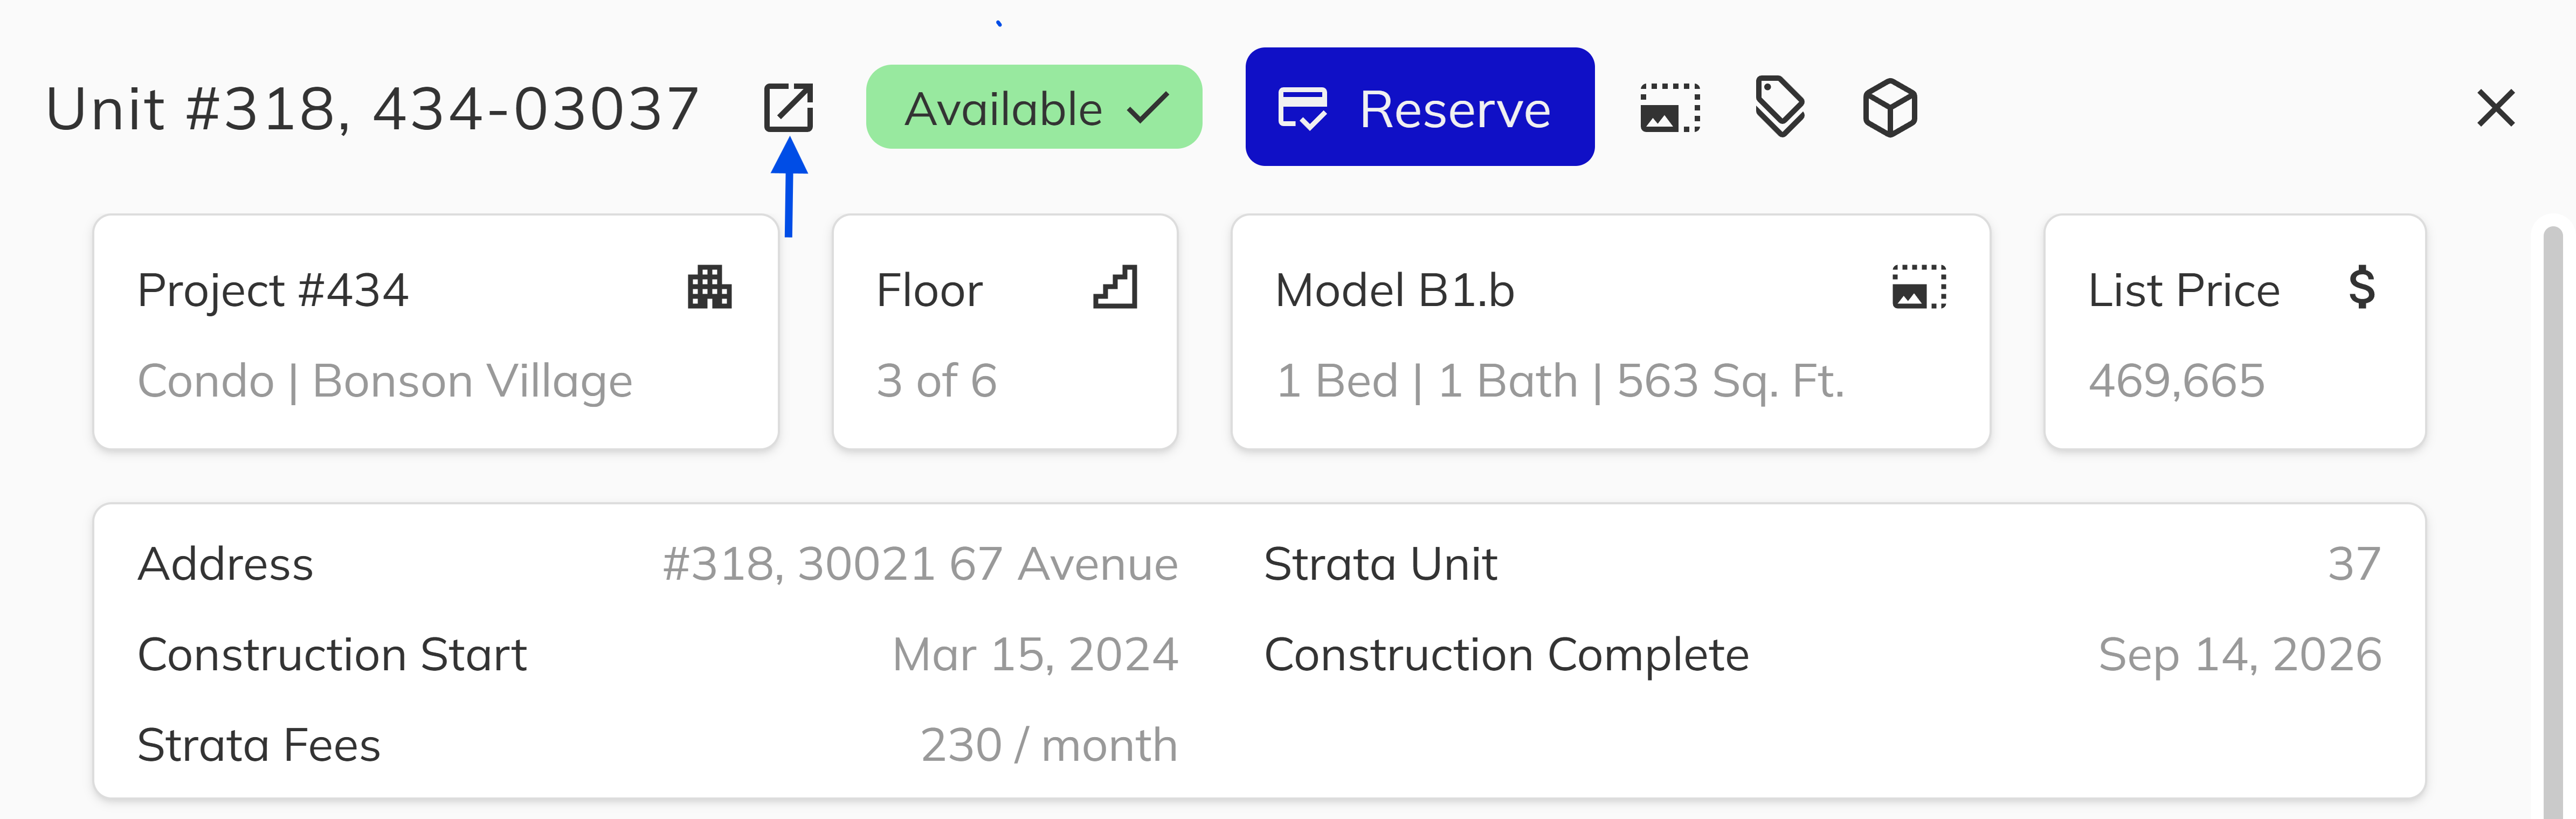
For Available Units: Click the Unit View icon. The New Deal button will appear in the top right of the screen.
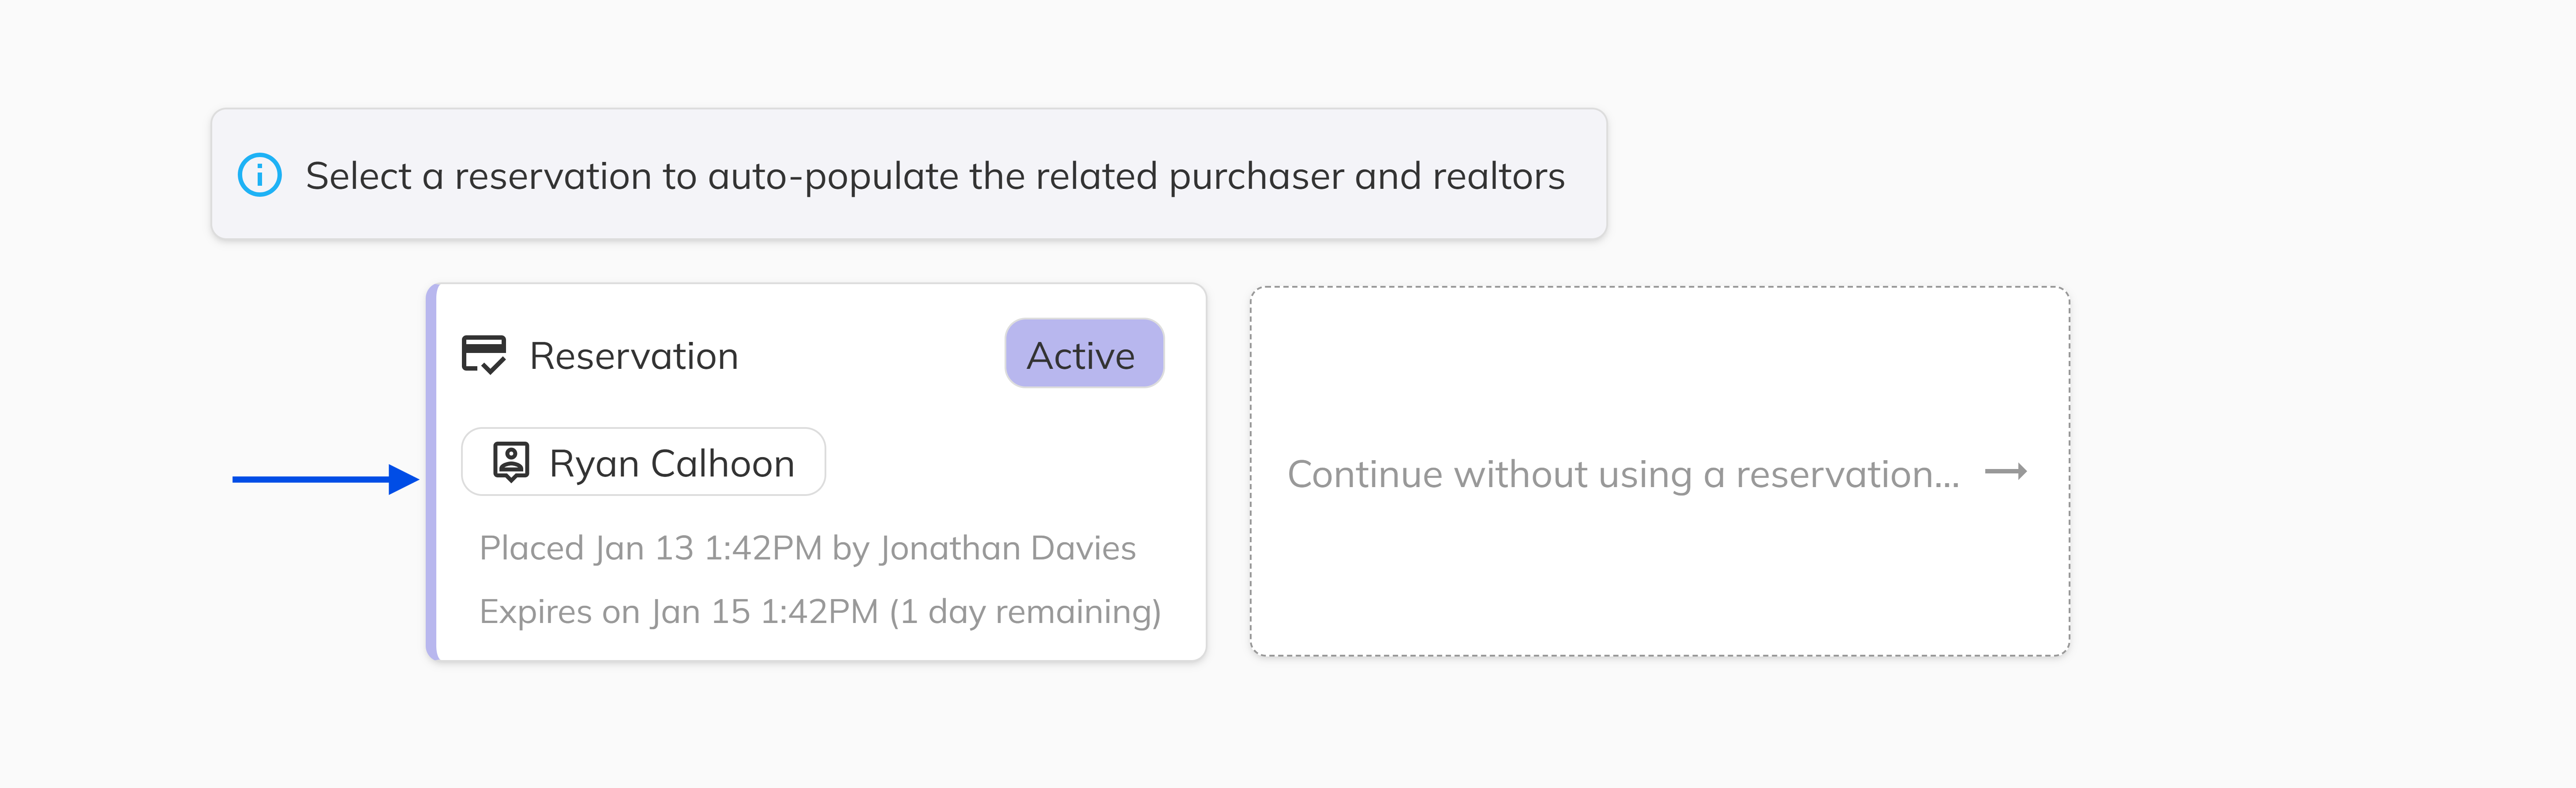
6. Select or Create a Reservation
You now enter the New Deal process, beginning with the Reservation tab. The Reservation tab appears only if the unit's sales status is Reserved. If you have reservations in queue, click the reservation you wish to link to this deal.
If multiple reservations exist, ensure you select the correct one before proceeding, as this determines which reservation the deal is associated with.
7. Send Disclosure Statements (Strata Units Only)
If applicable, a Disclosure Statement tab will appear. This step is primarily for strata units and allows you to send the required disclosure statement to the purchaser or designated contacts.

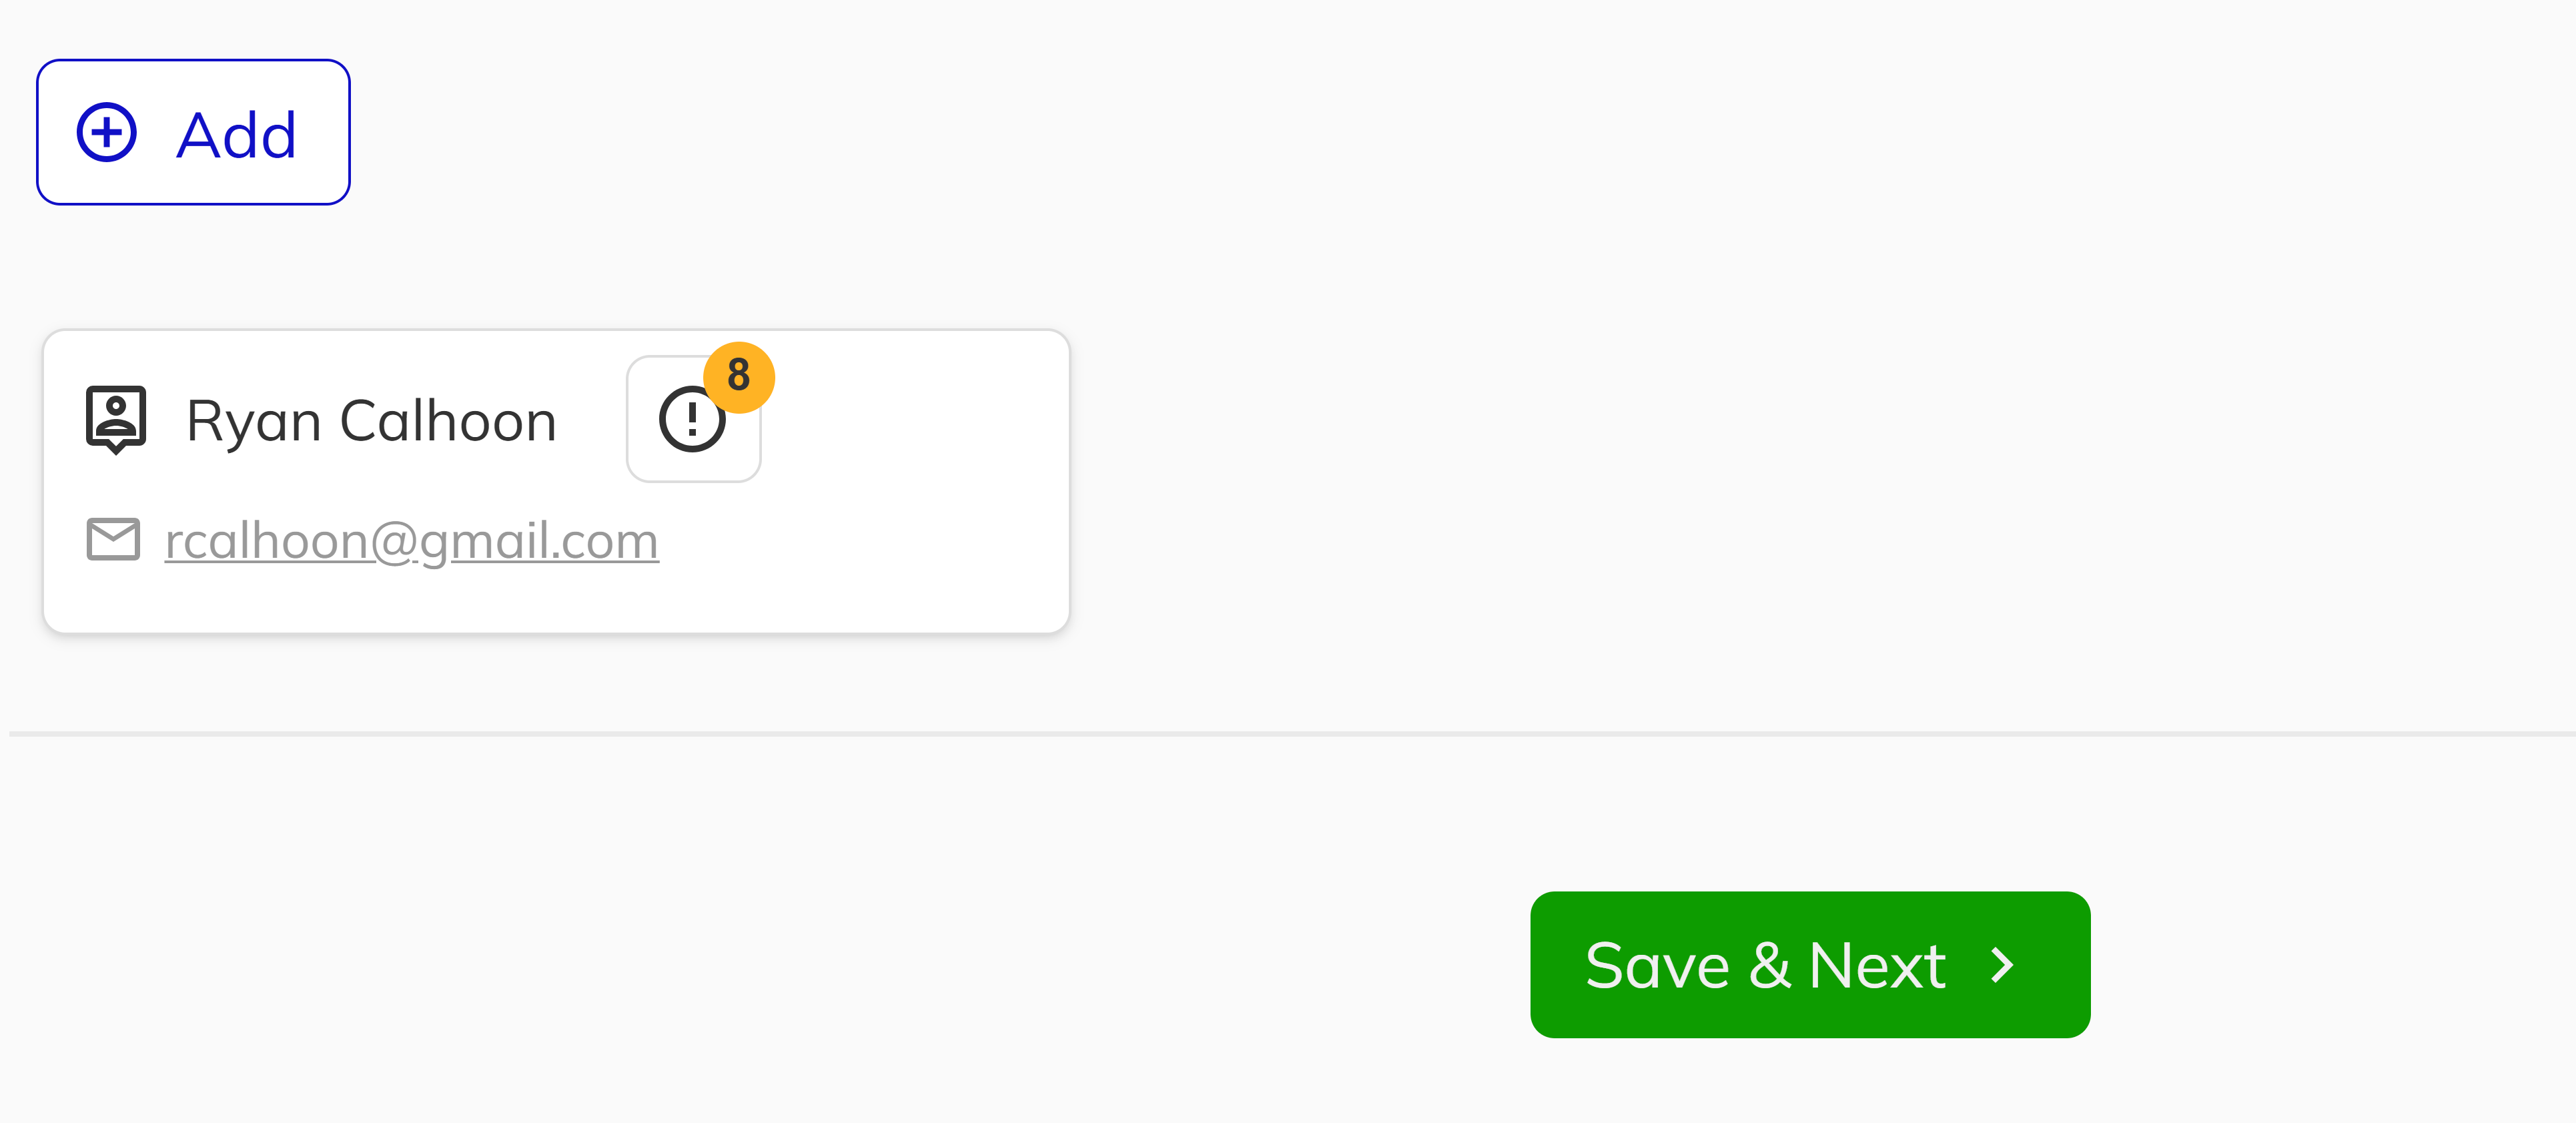
8. Add and Verify Purchaser
Add the purchaser through existing contacts or create a new contact. If the purchaser is purchasing through a company, you can attach that company to the purchaser record. Ensure all required Purchaser Information is complete and verified, as this data is essential for FINTRAC compliance. Verify the purchaser's identity and accurately fill out all required fields. Click Save & Next to continue.
You can create, update, or remove purchaser at any point during the deal process. Once your Purchaser information is complete, click Save & Continue.
Incomplete or unverified purchaser information may delay deal completion. Ensure all FINTRAC-required fields are completed and identity verification is confirmed before proceeding.
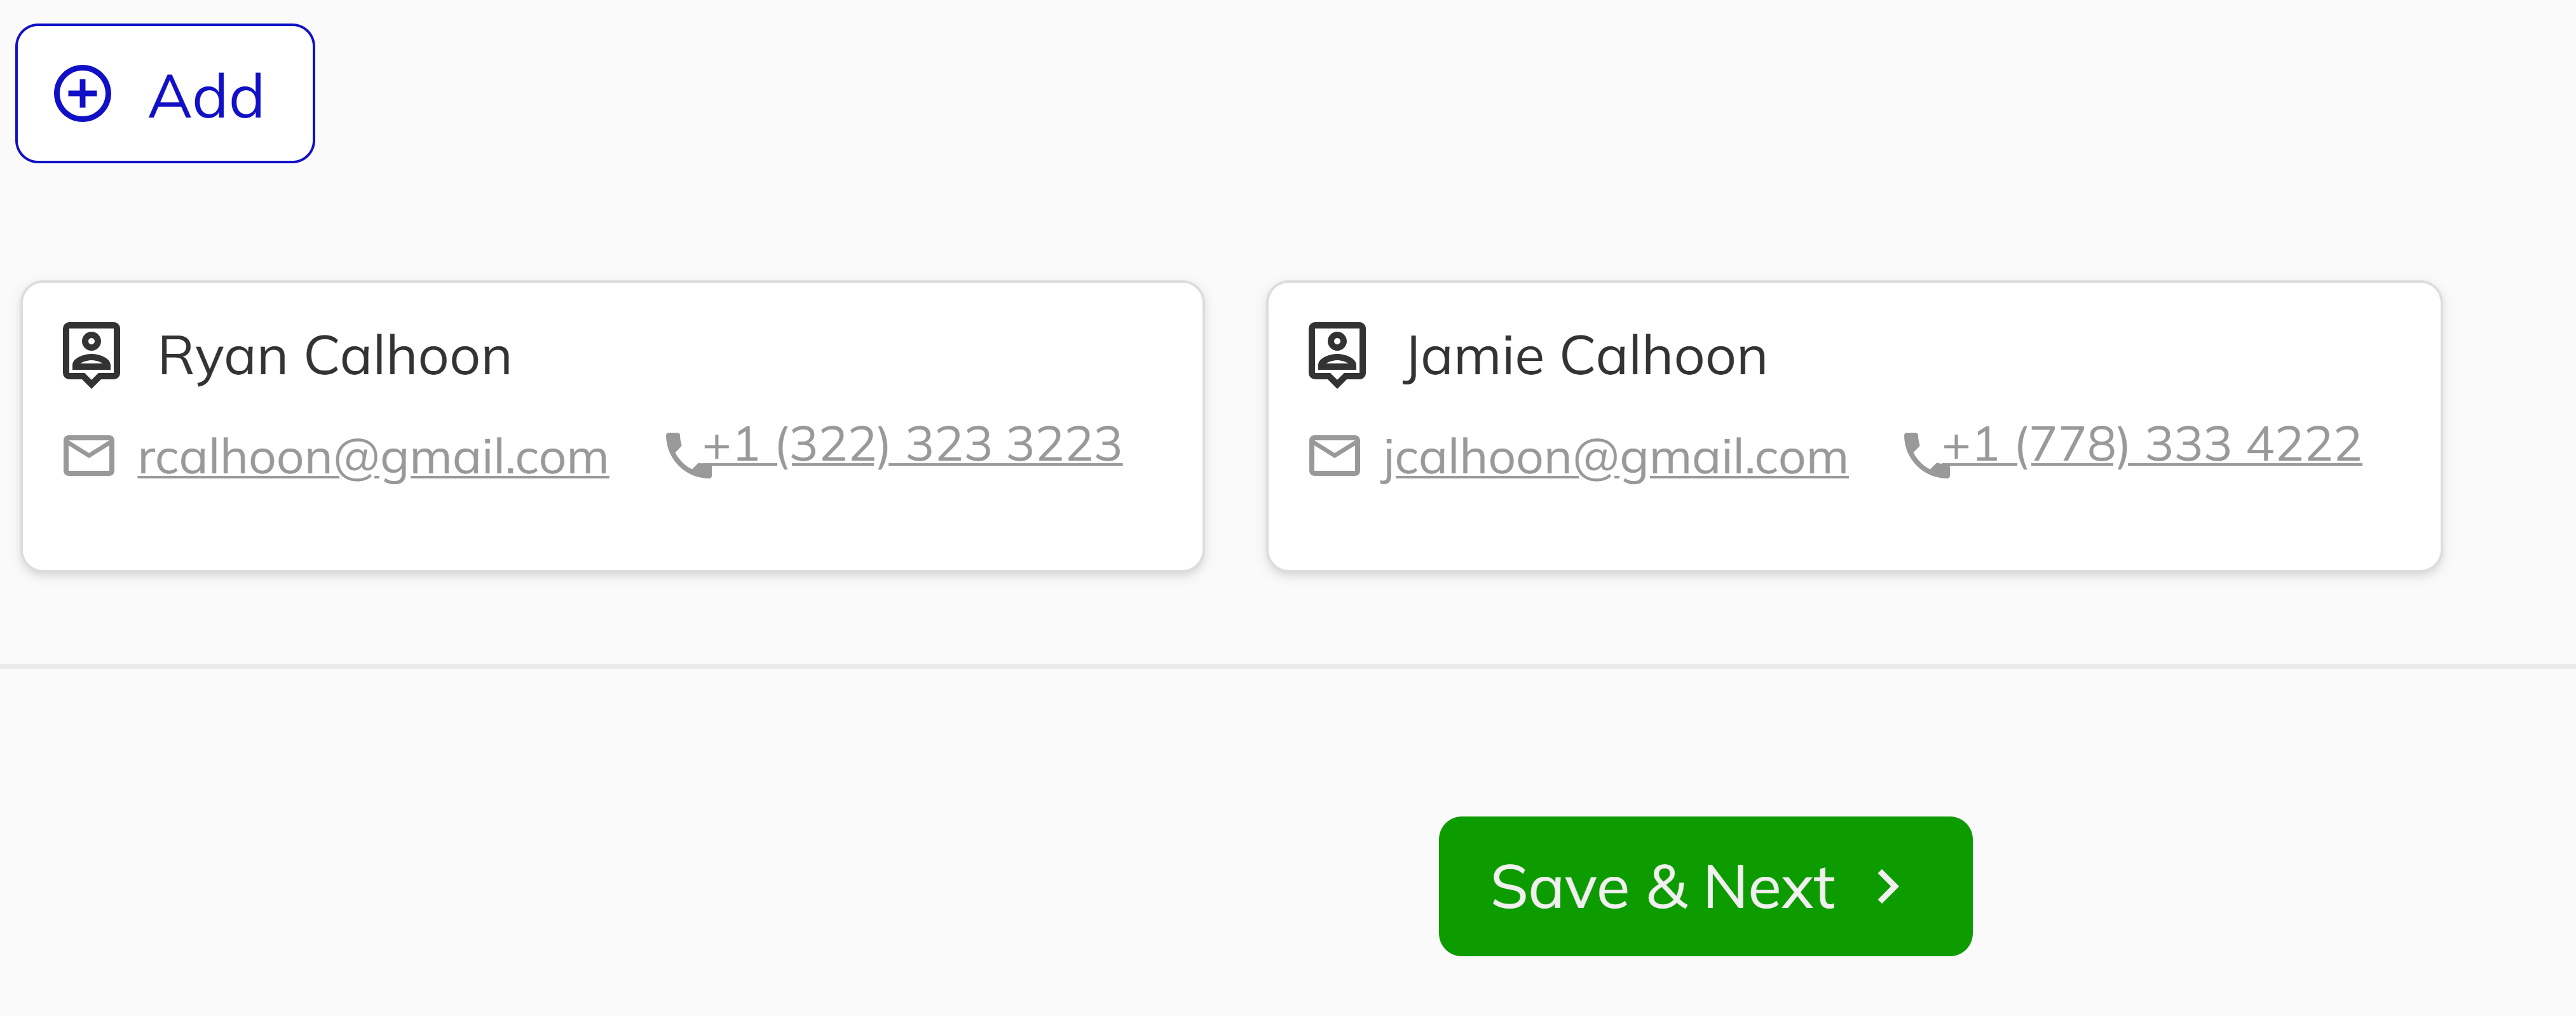
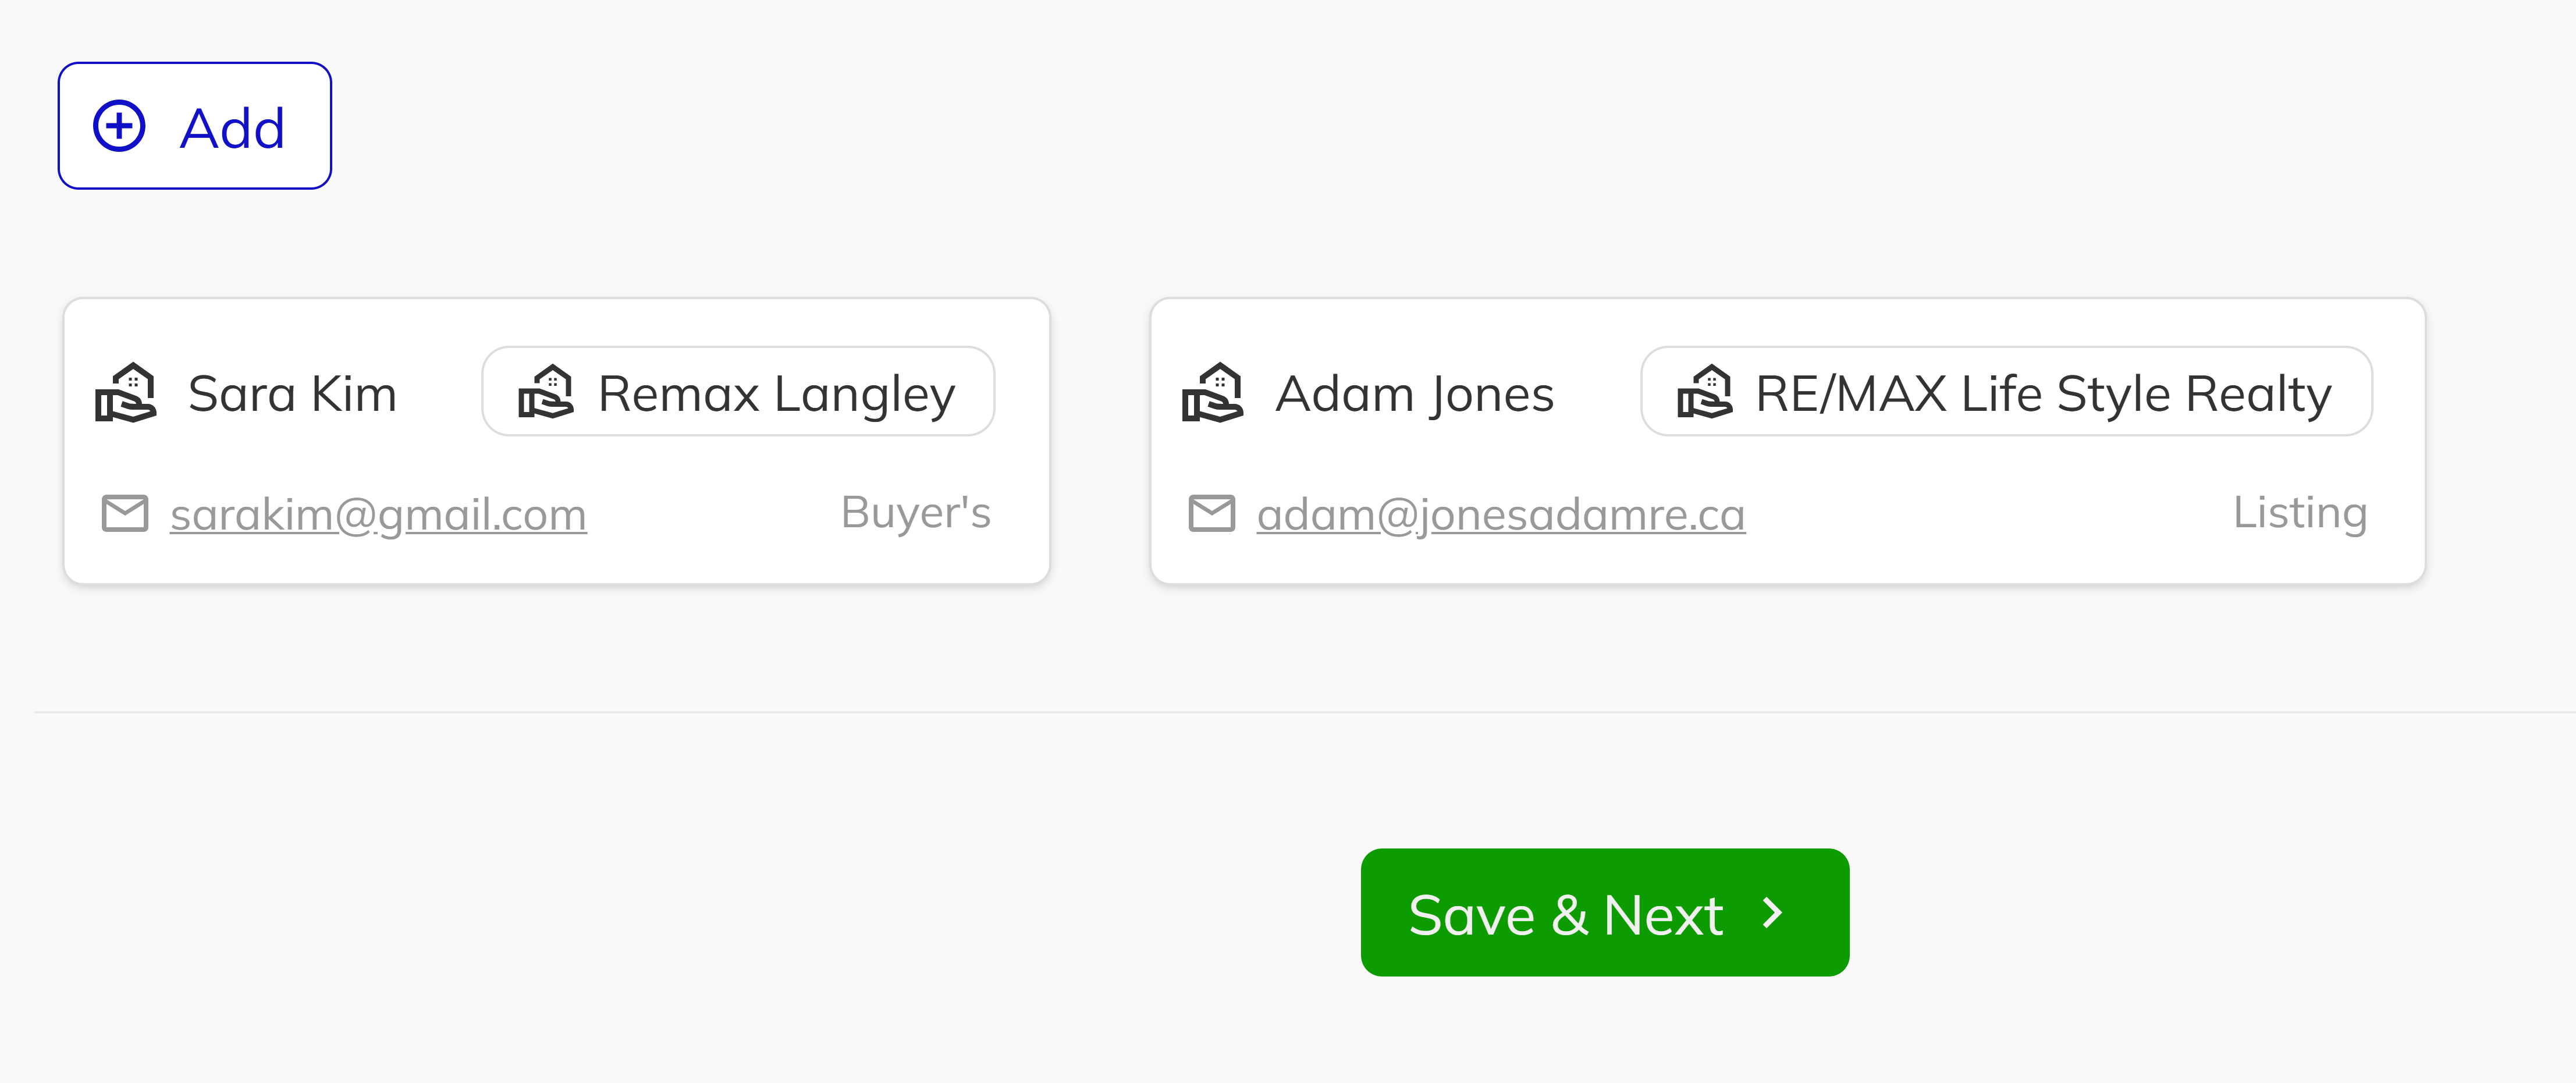
9. Add Realtors
In the Realtors section, add the buying agent and, if applicable, the listing agent. You can either:
- Create a new contact and brokerage, or
- Select an existing contact and brokerage from your system
You can create, update, or remove realtors at any point during the deal process. Once your realtor information is complete, click Save & Continue.
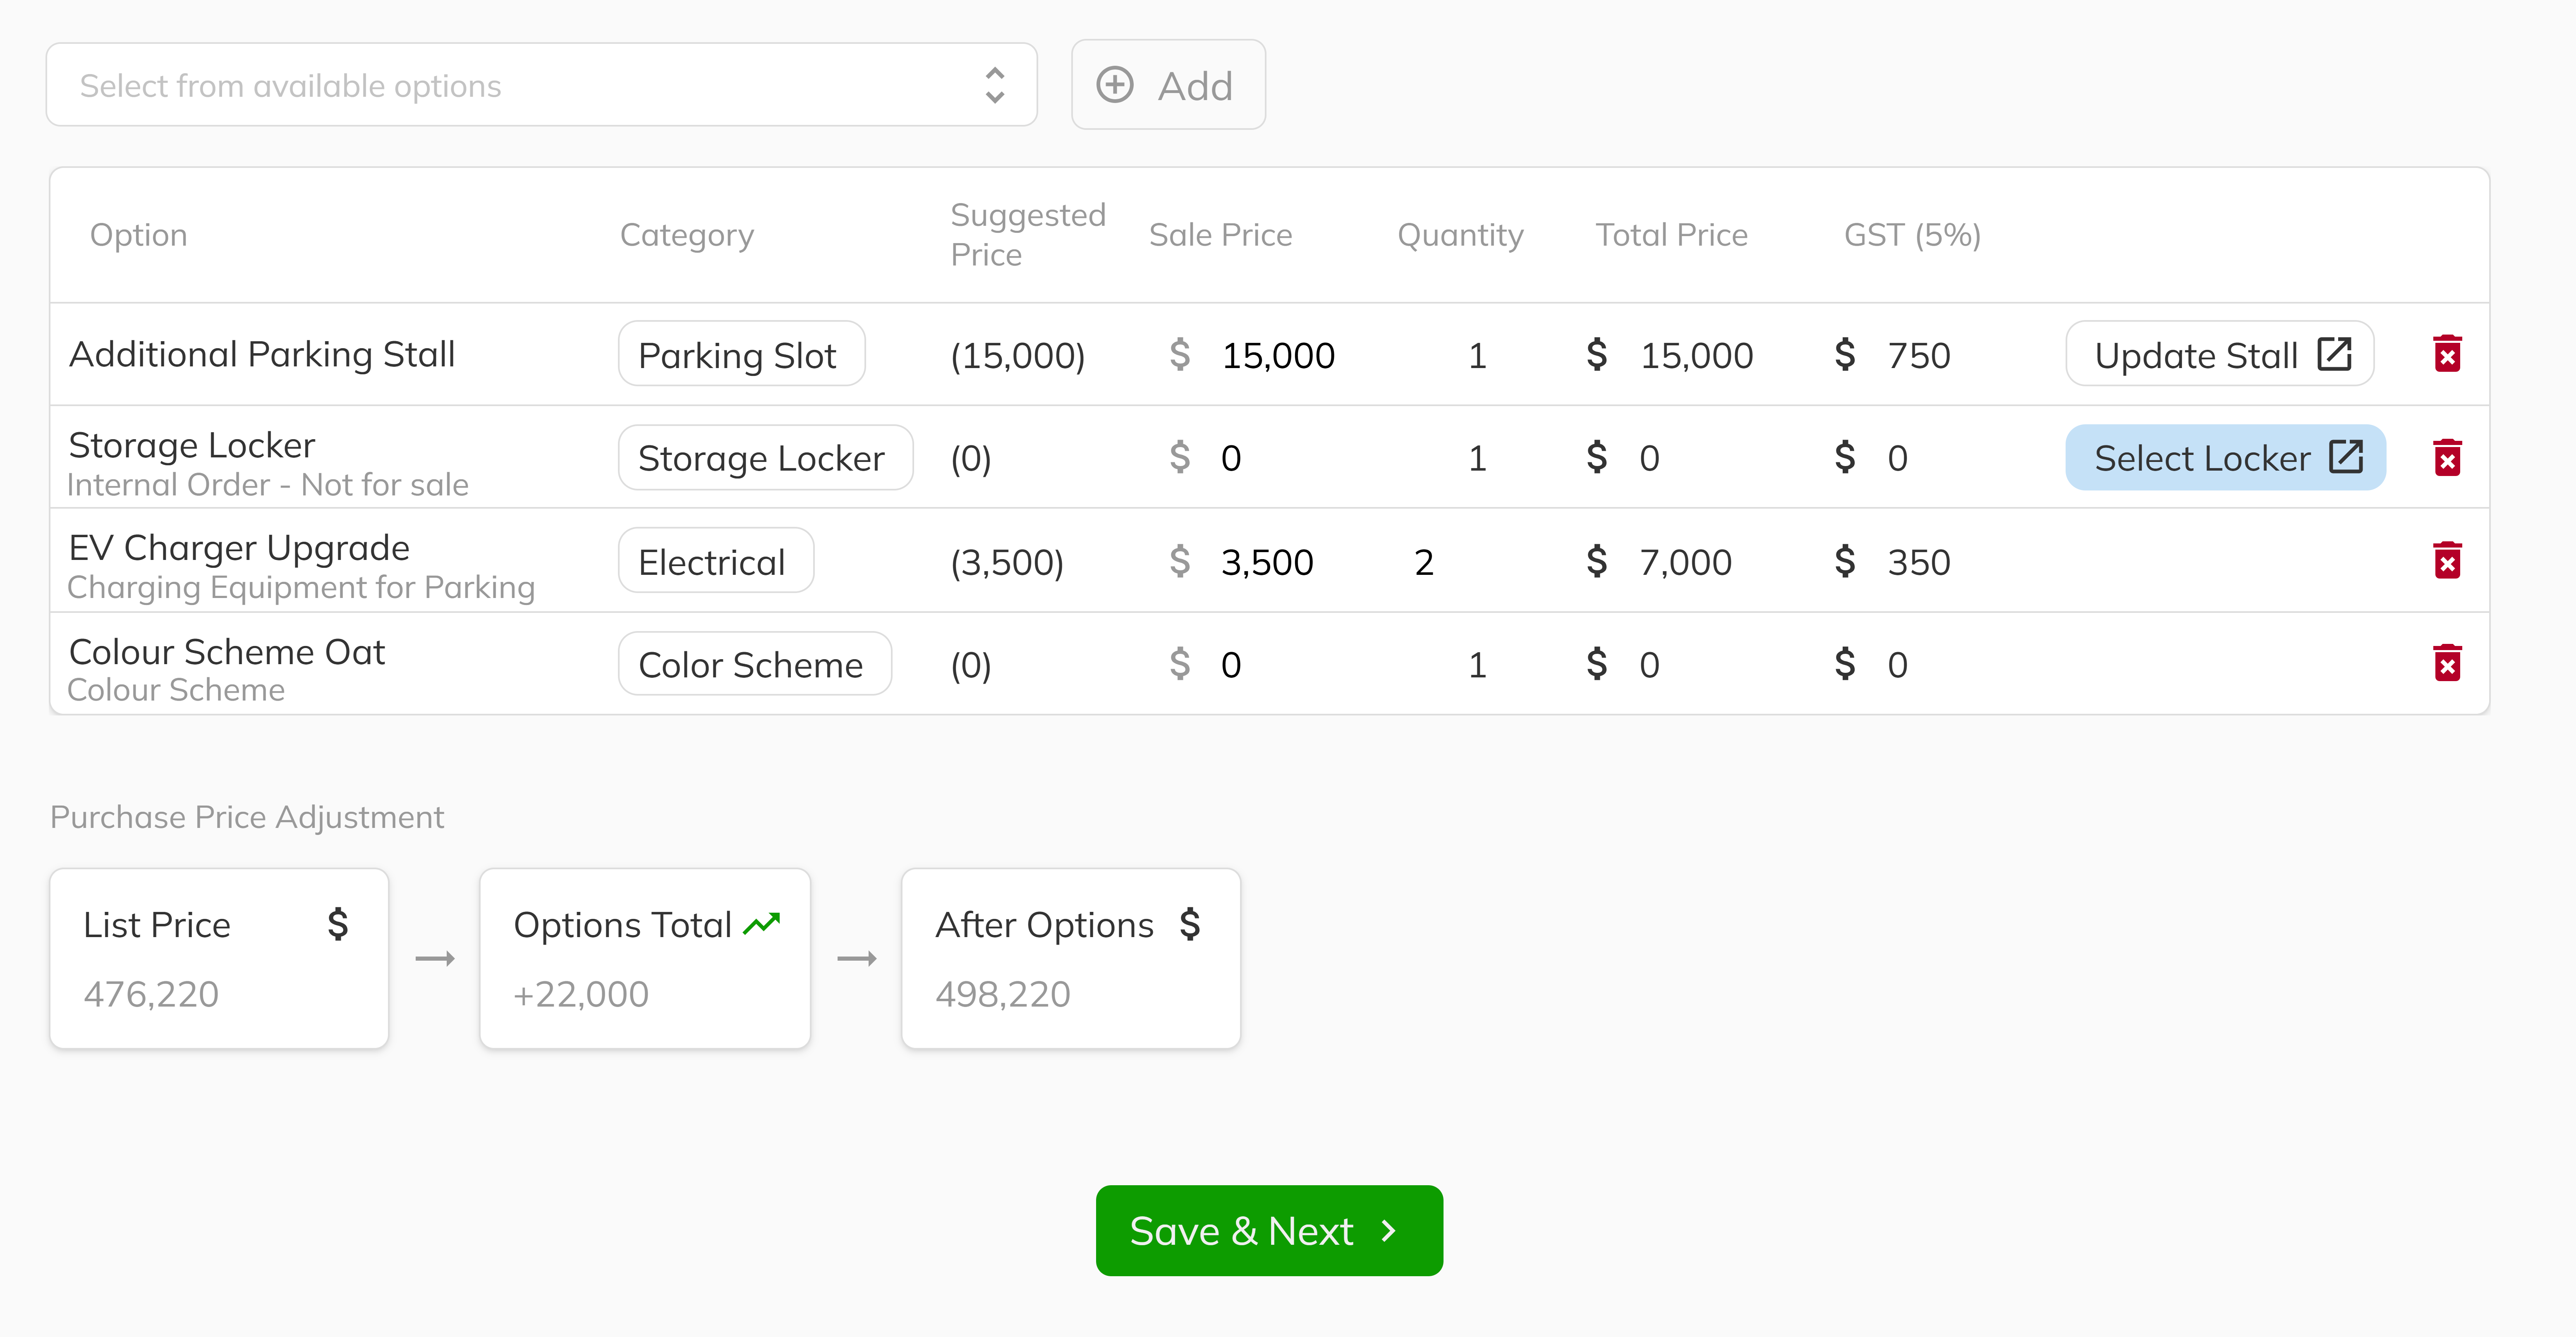
10. Configure Options and Upgrades
The Options section allows you to select available options if the option cutoff date hasn't passed. During this step, you can:
- Adjust the sales price for available options
- Modify the quantity of options
- Assign parking slots and storage lockers
- View color schemes that automatically populate when the category color scheme is selected within the contract
You can create, modify, or remove options at any time during the New Deal process. Once your options information is complete, click Save & Continue.
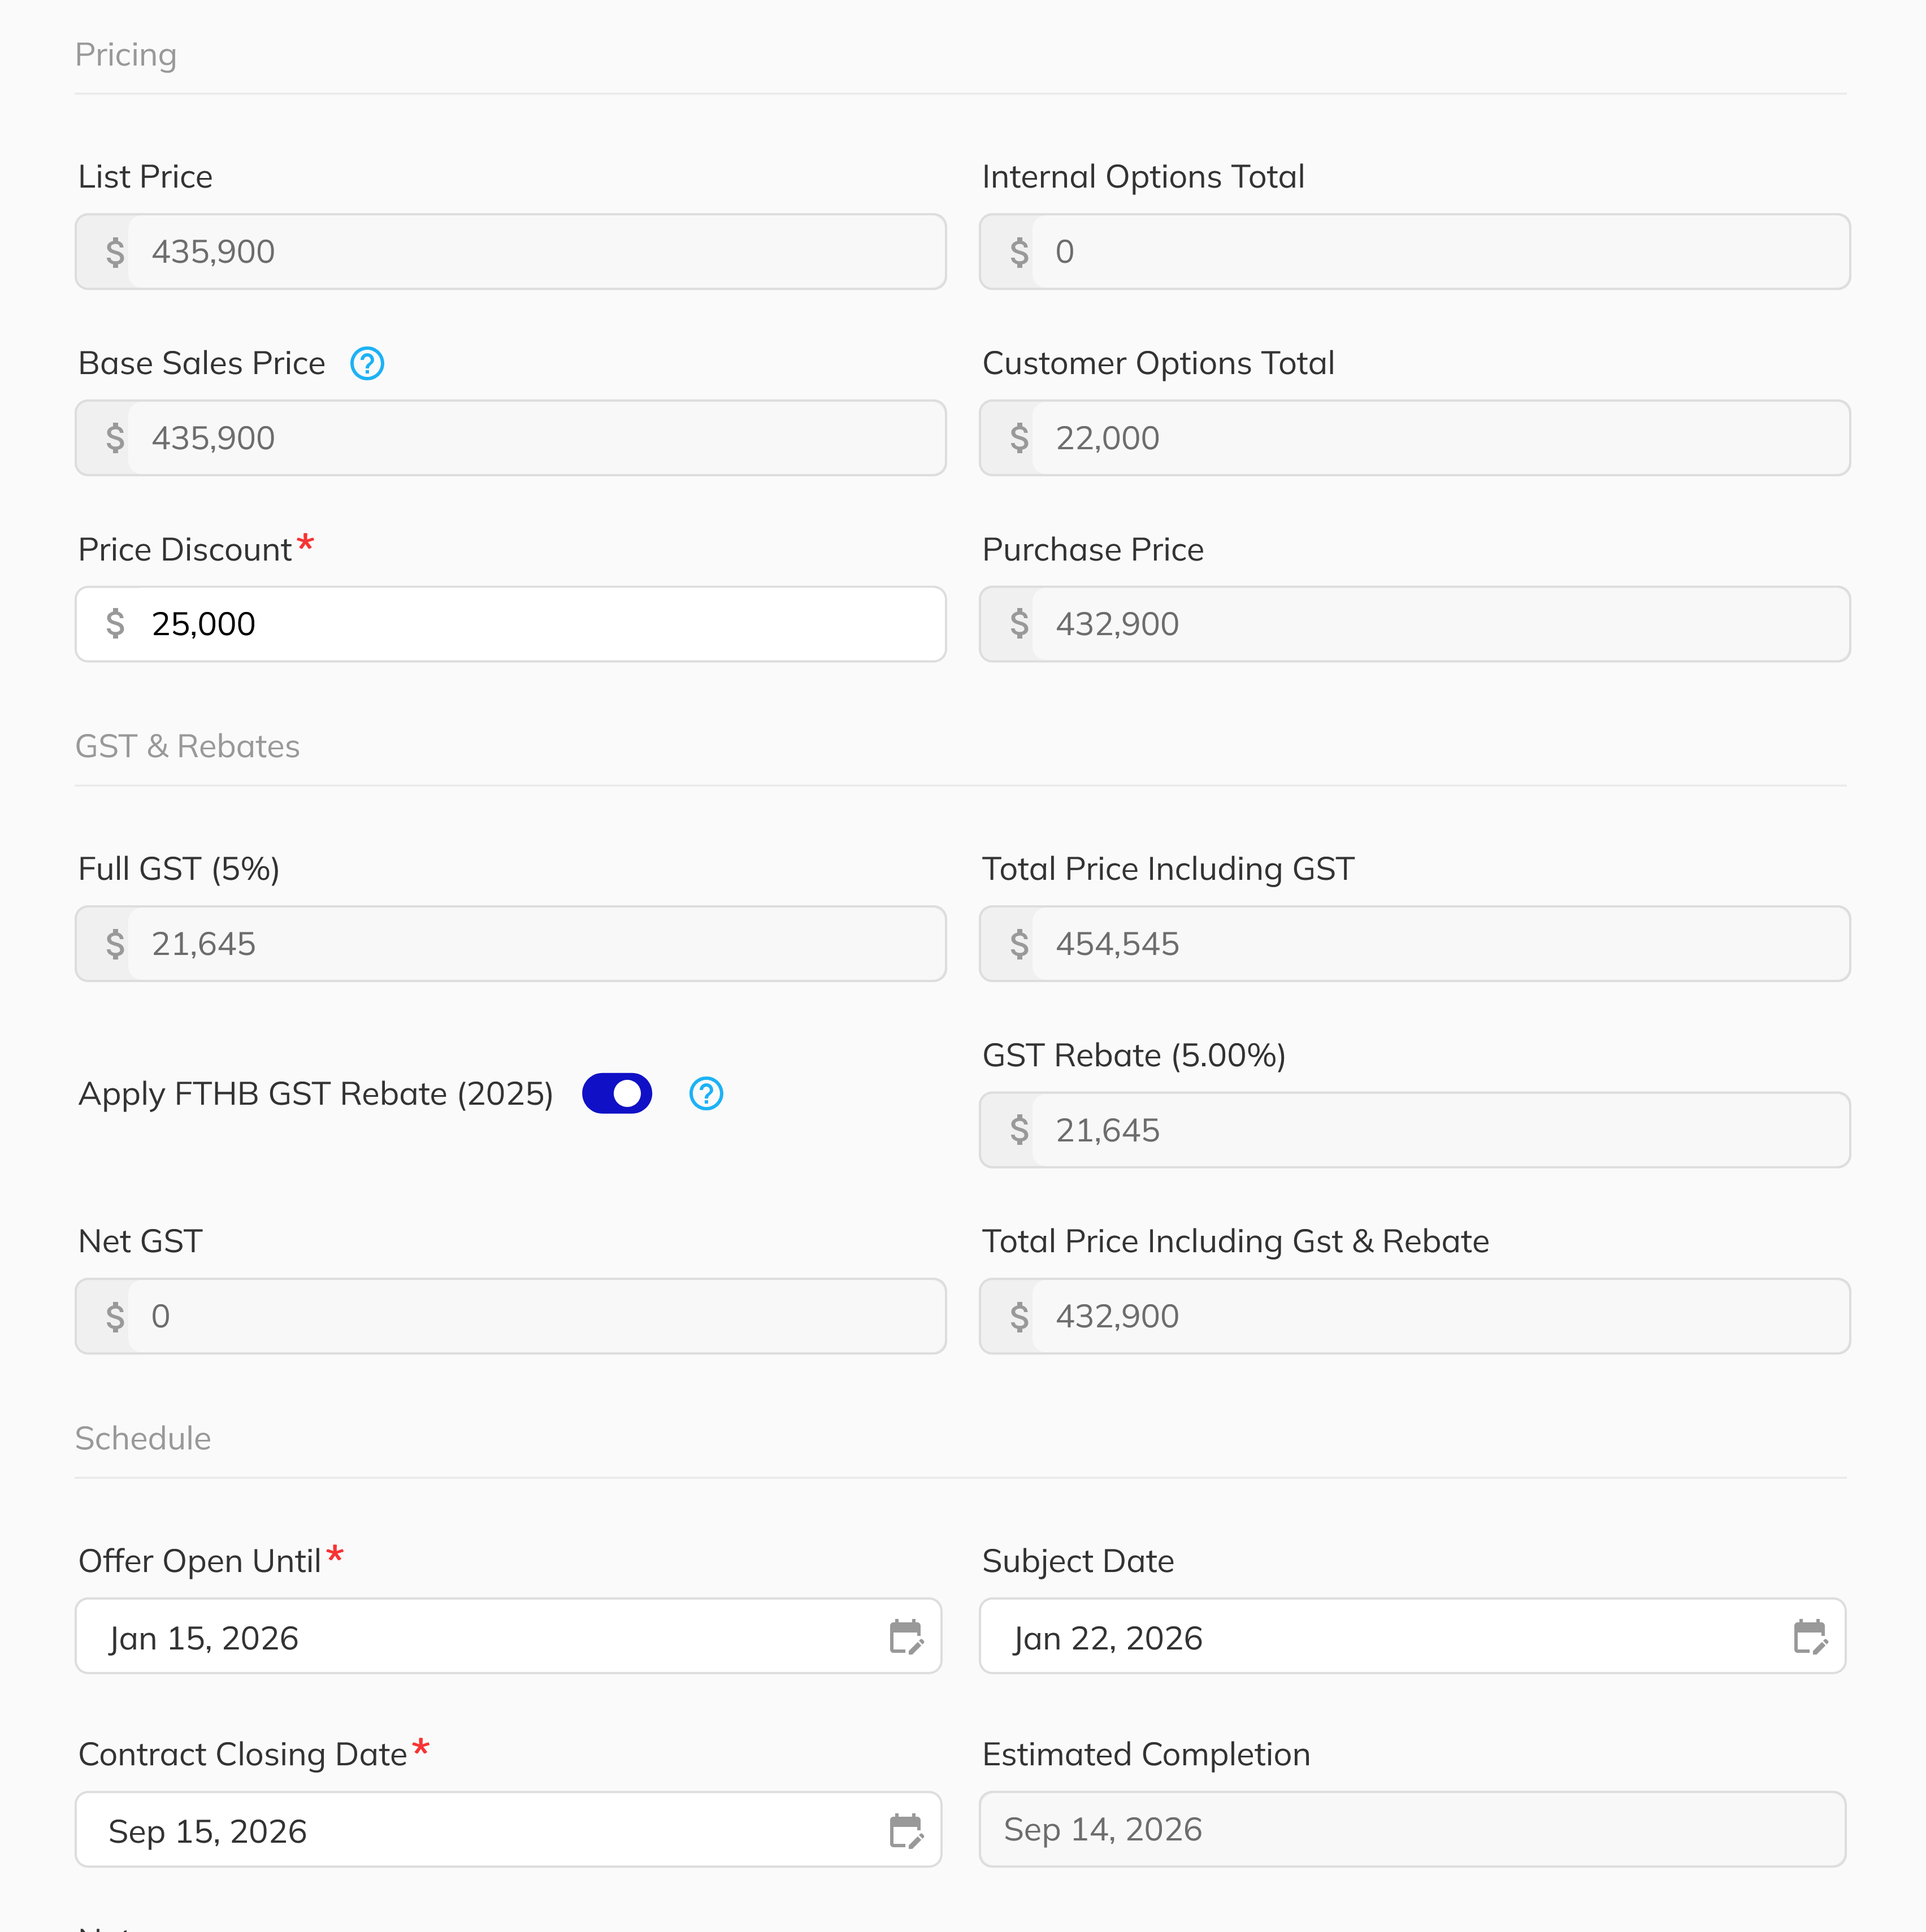
11. Set Contract Details
In the Contract Details section, modify:
- Price and discounts
- GST rebates
- Schedule items
- Notes about the deal
These values are used throughout the main contract and across the platform. Once your contract information is complete, click Save & Continue.
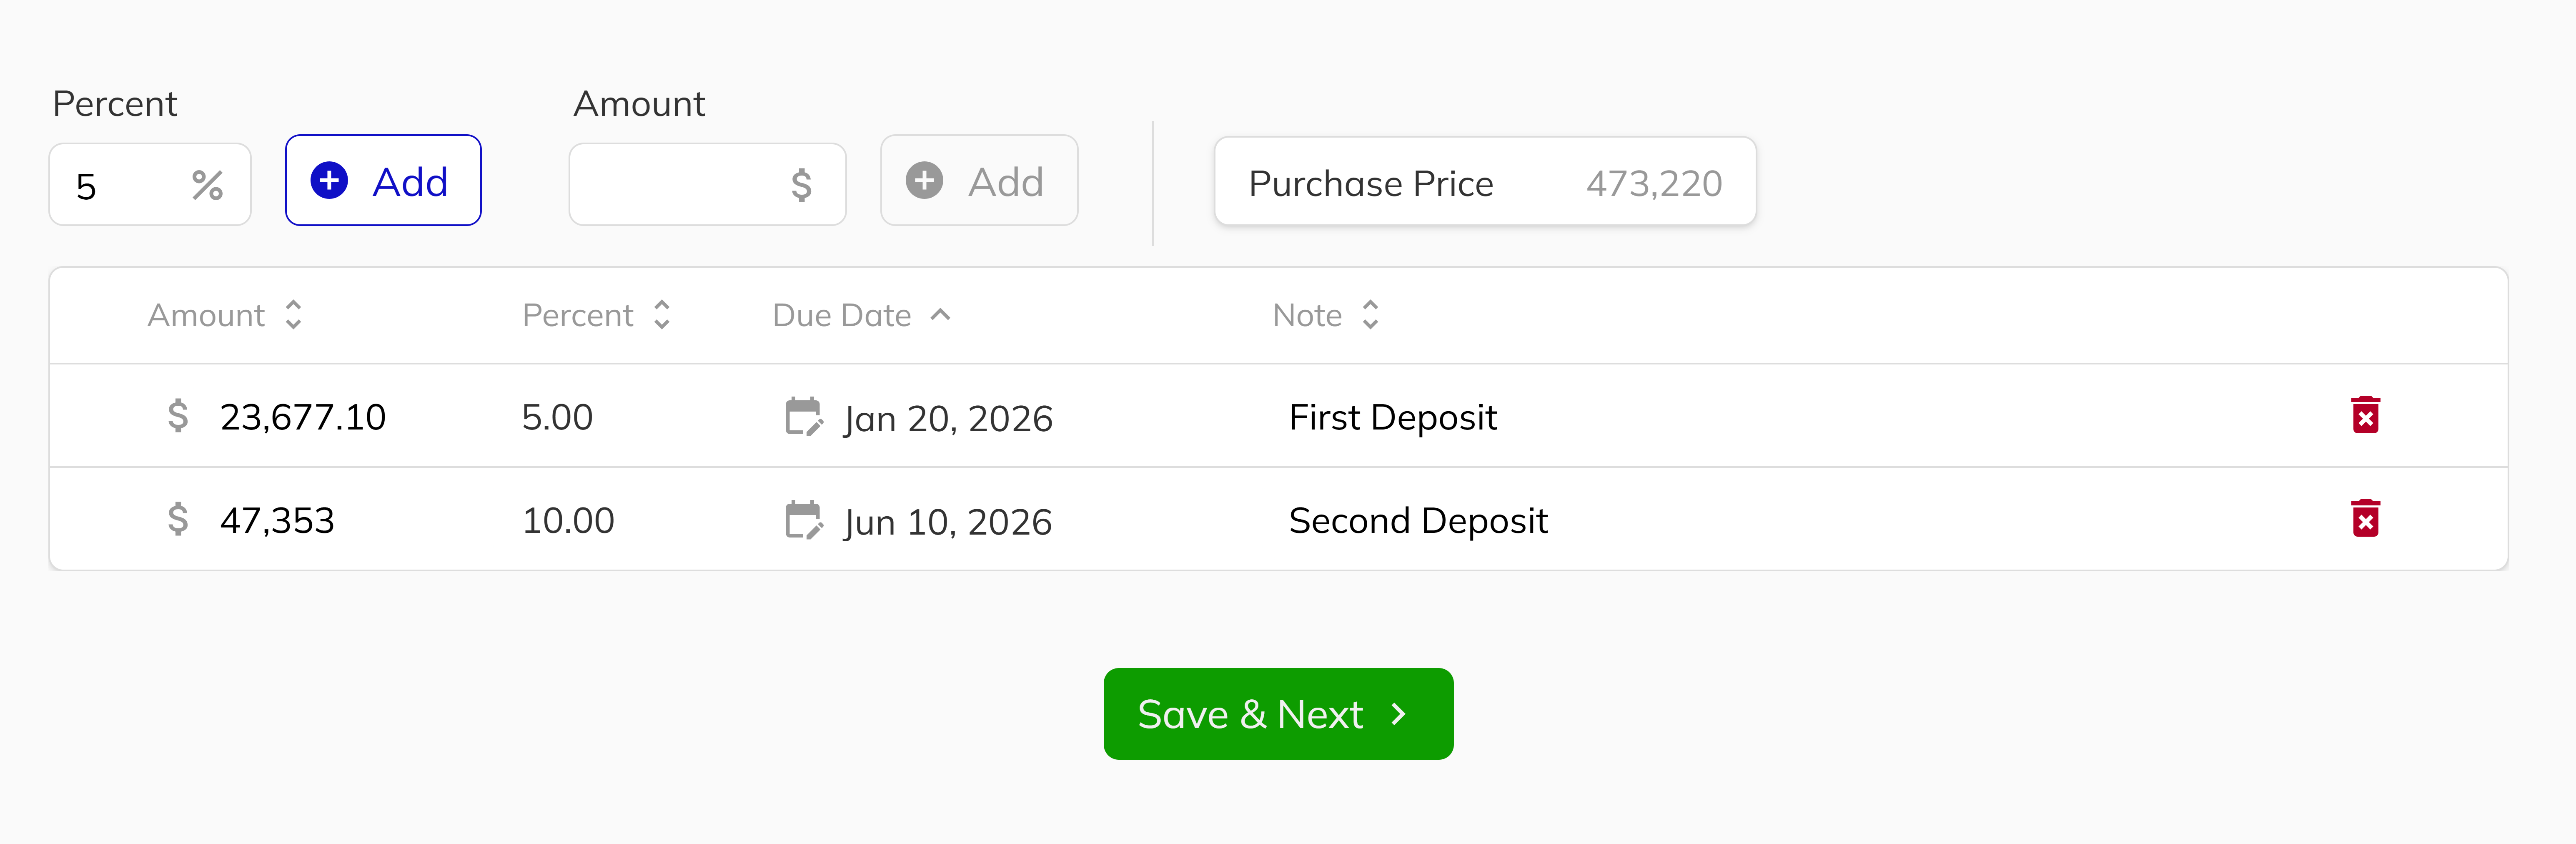
12. Configure Deposits
The Deposits section allows you to:
- Add deposit amounts as a percentage or fixed total
- Set deposit due dates
- Add notes for important deposit information
- Create, modify, or remove deposits as needed
You maintain full flexibility to adjust deposits during the new deal process. Once your deposits information is complete, click Save & Continue.
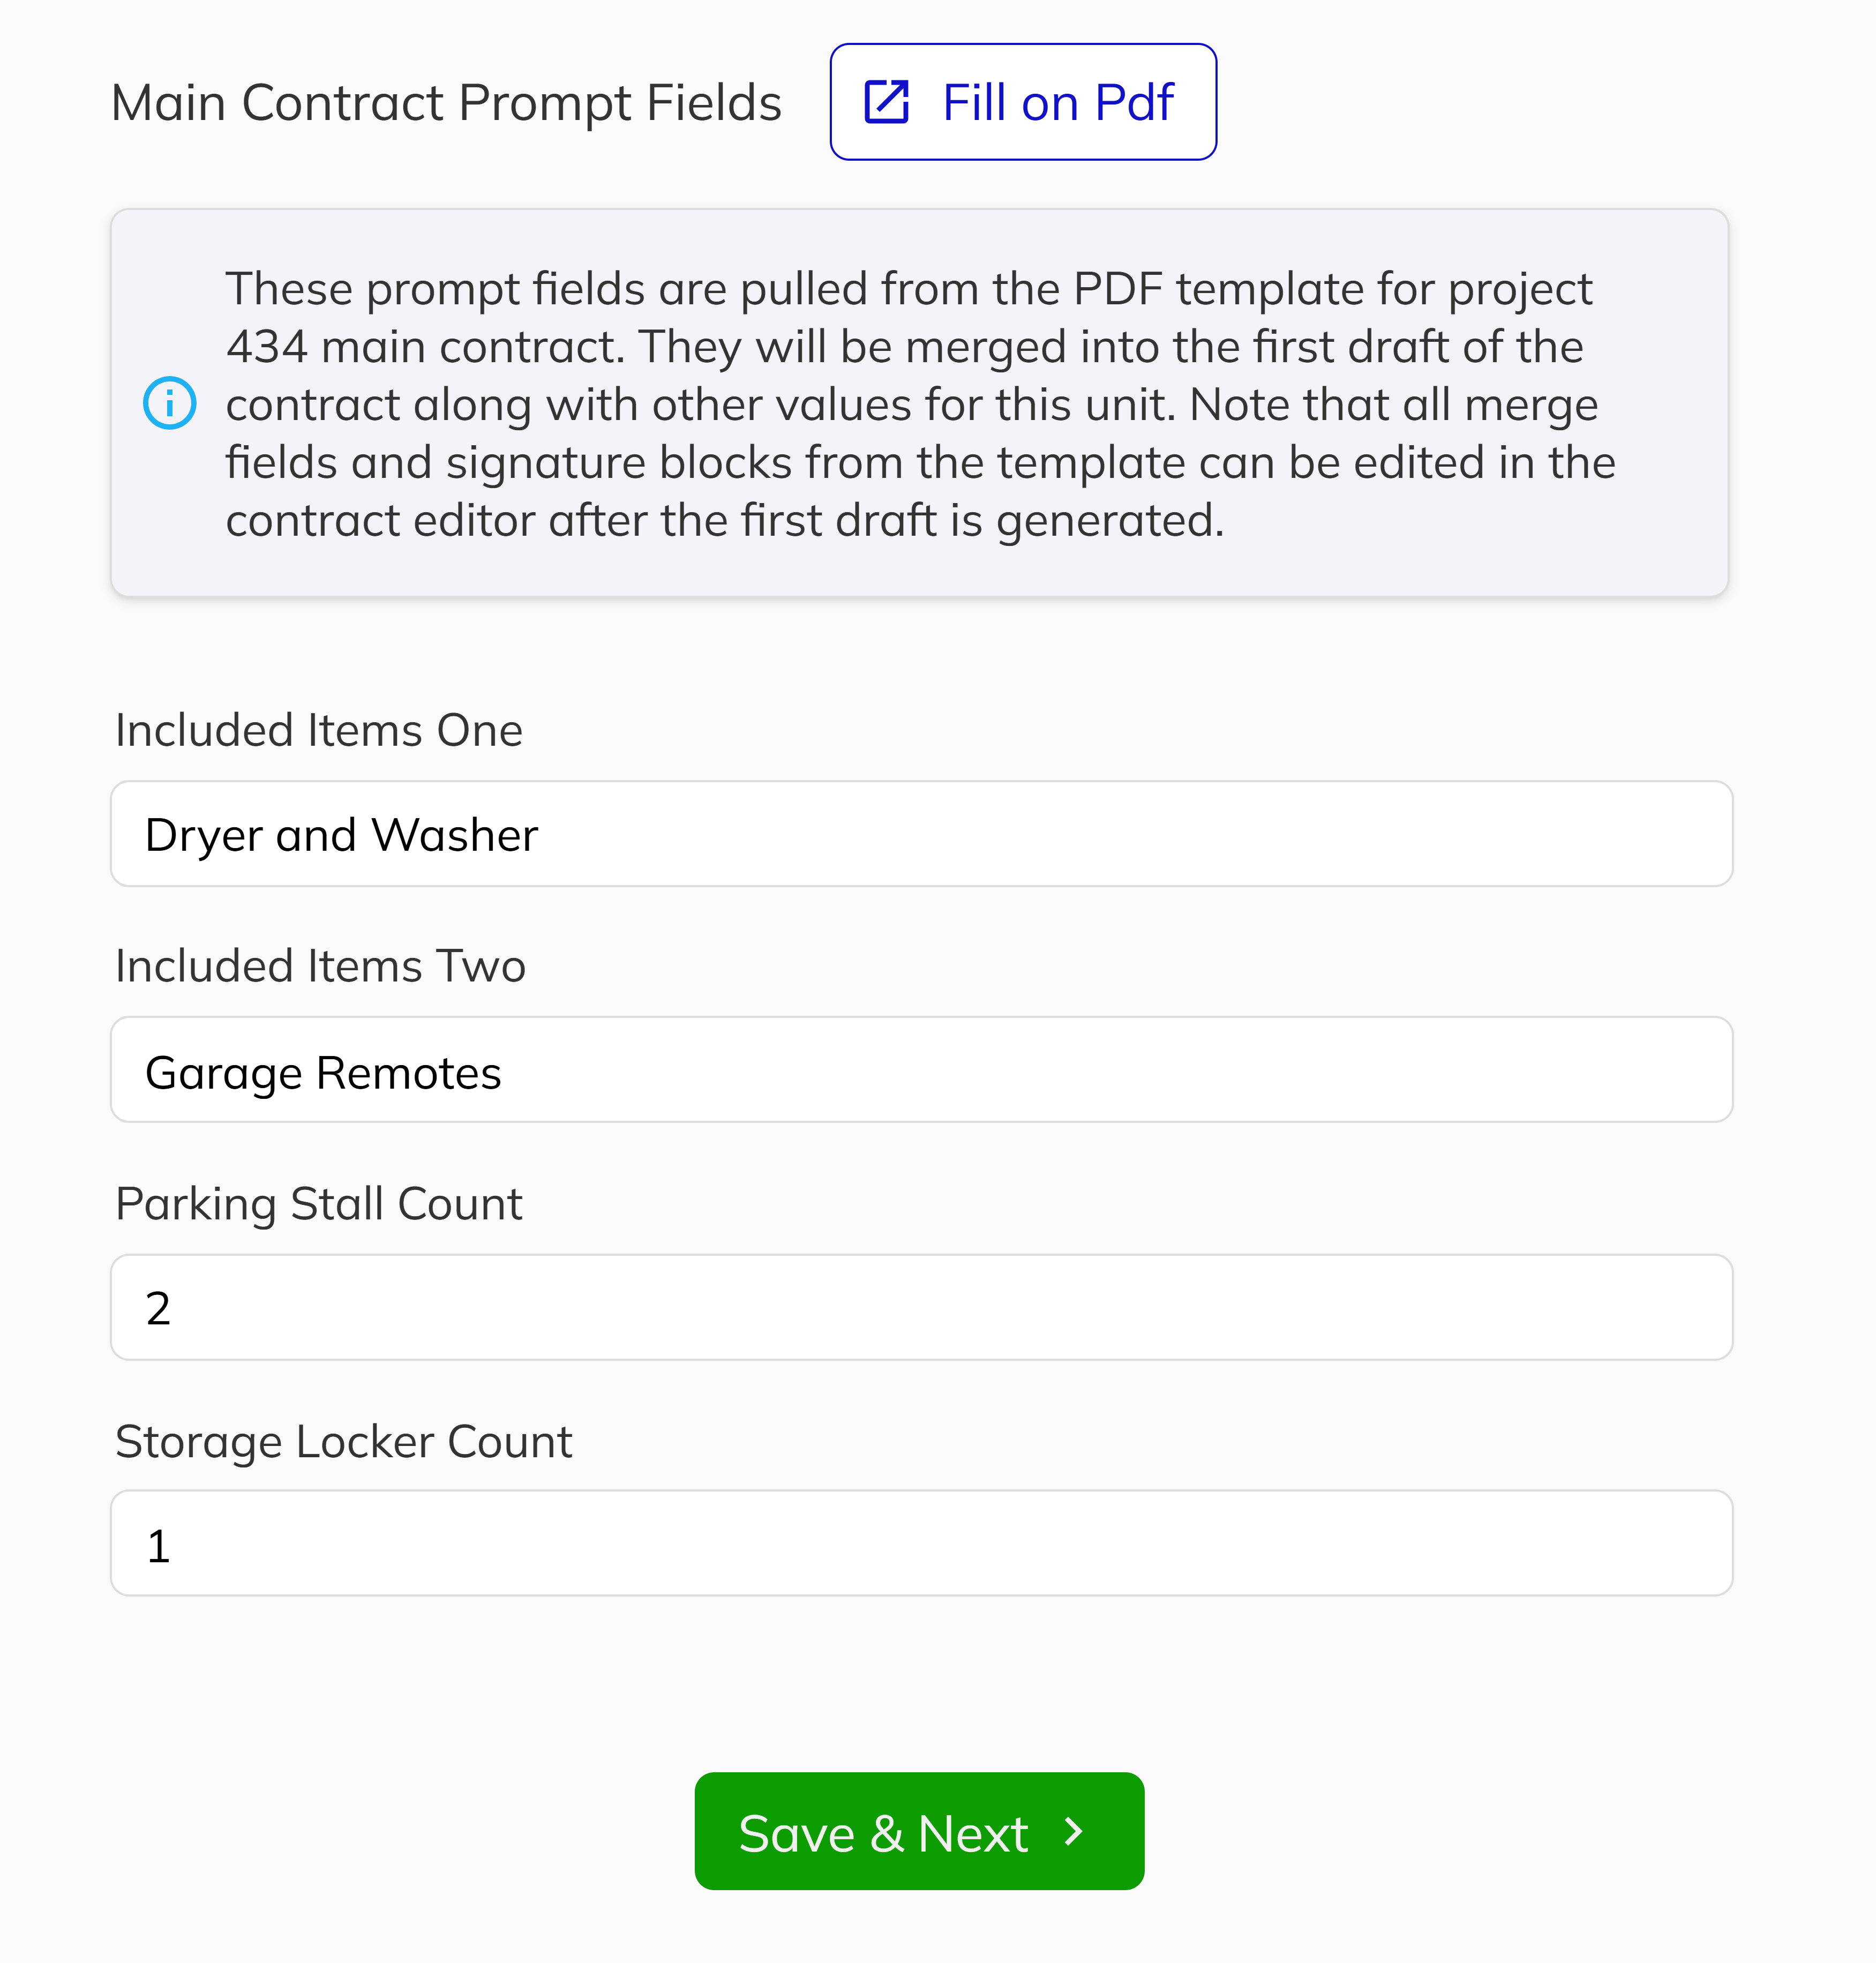
13. Complete Contract Prompts
Contract Prompts are used for any template fields that need to be filled in the main contract. Use the Fill on PDF feature to visually see the contract and identify which prompt fields require completion. Once your contract prompts details is complete, click Save & Continue.
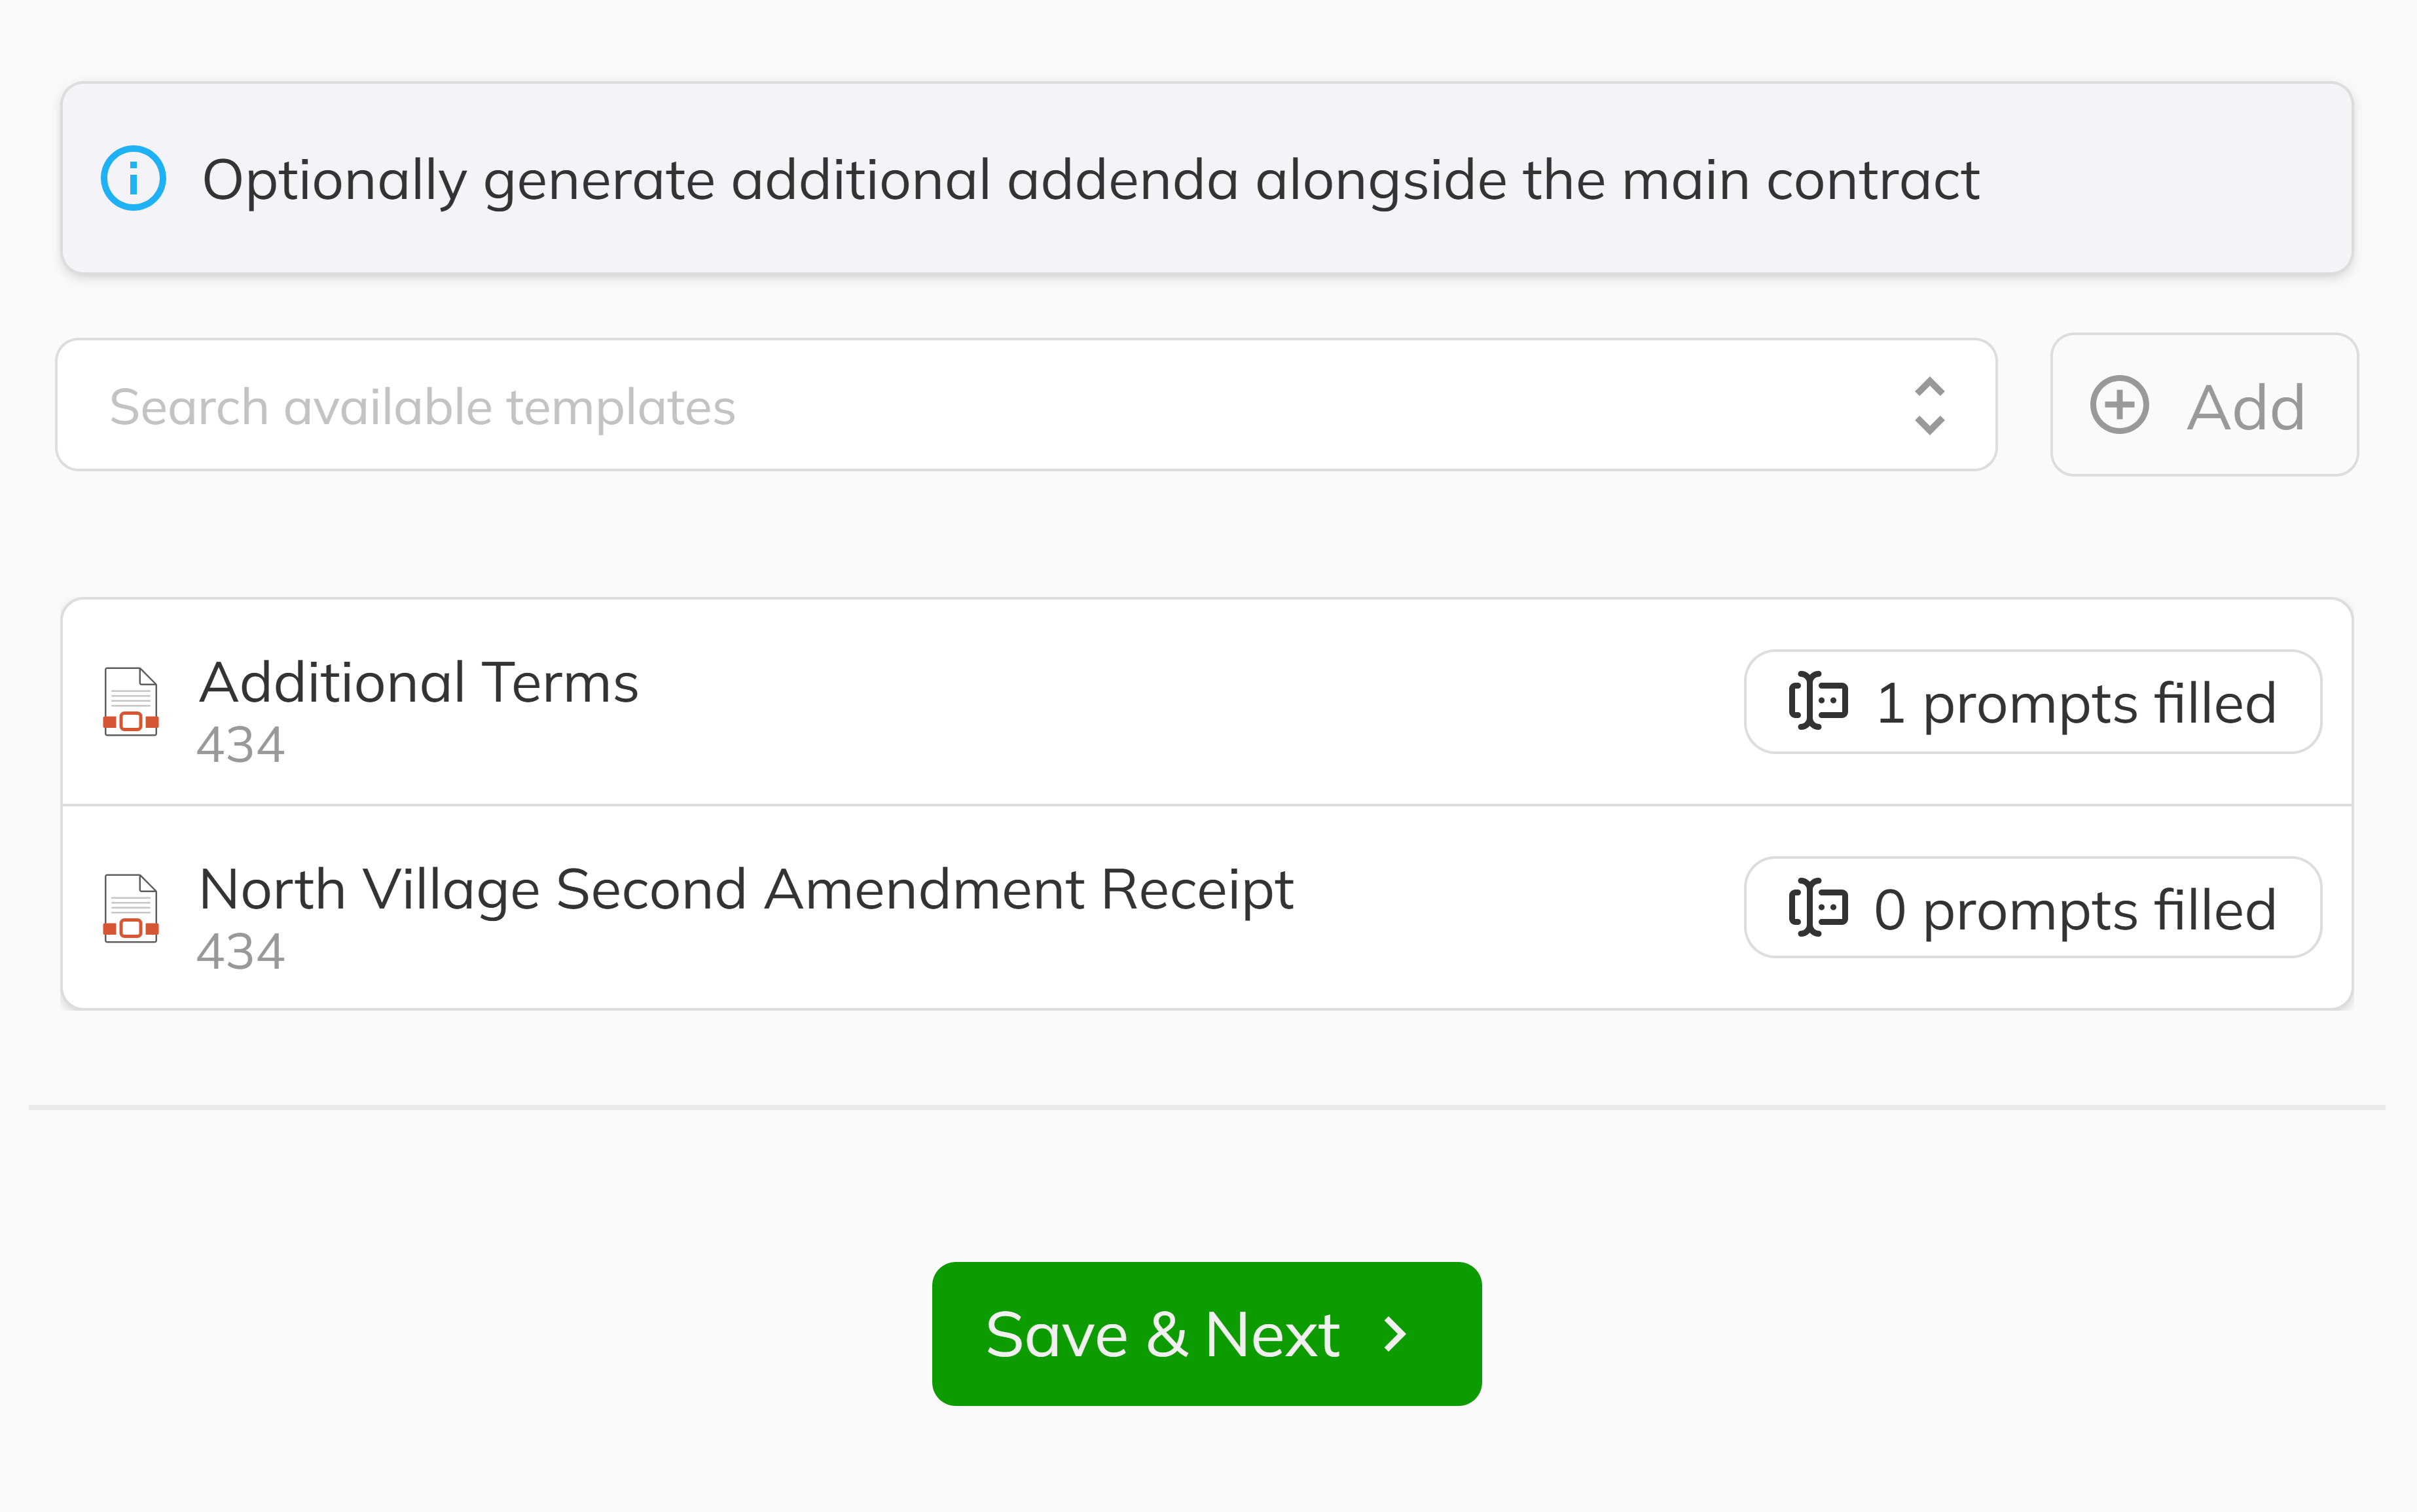
14. Add Addenda and Supporting Documents
The Addenda section enables you to add any additional documents during the New Deal process. When you add a document, a side panel appears with any required prompt fields that need to be signed. Again, use the Fill on PDF feature for a visual reference of document fields and signature requirements. Once your addenda and supporting documents information is complete, click Save & Continue.
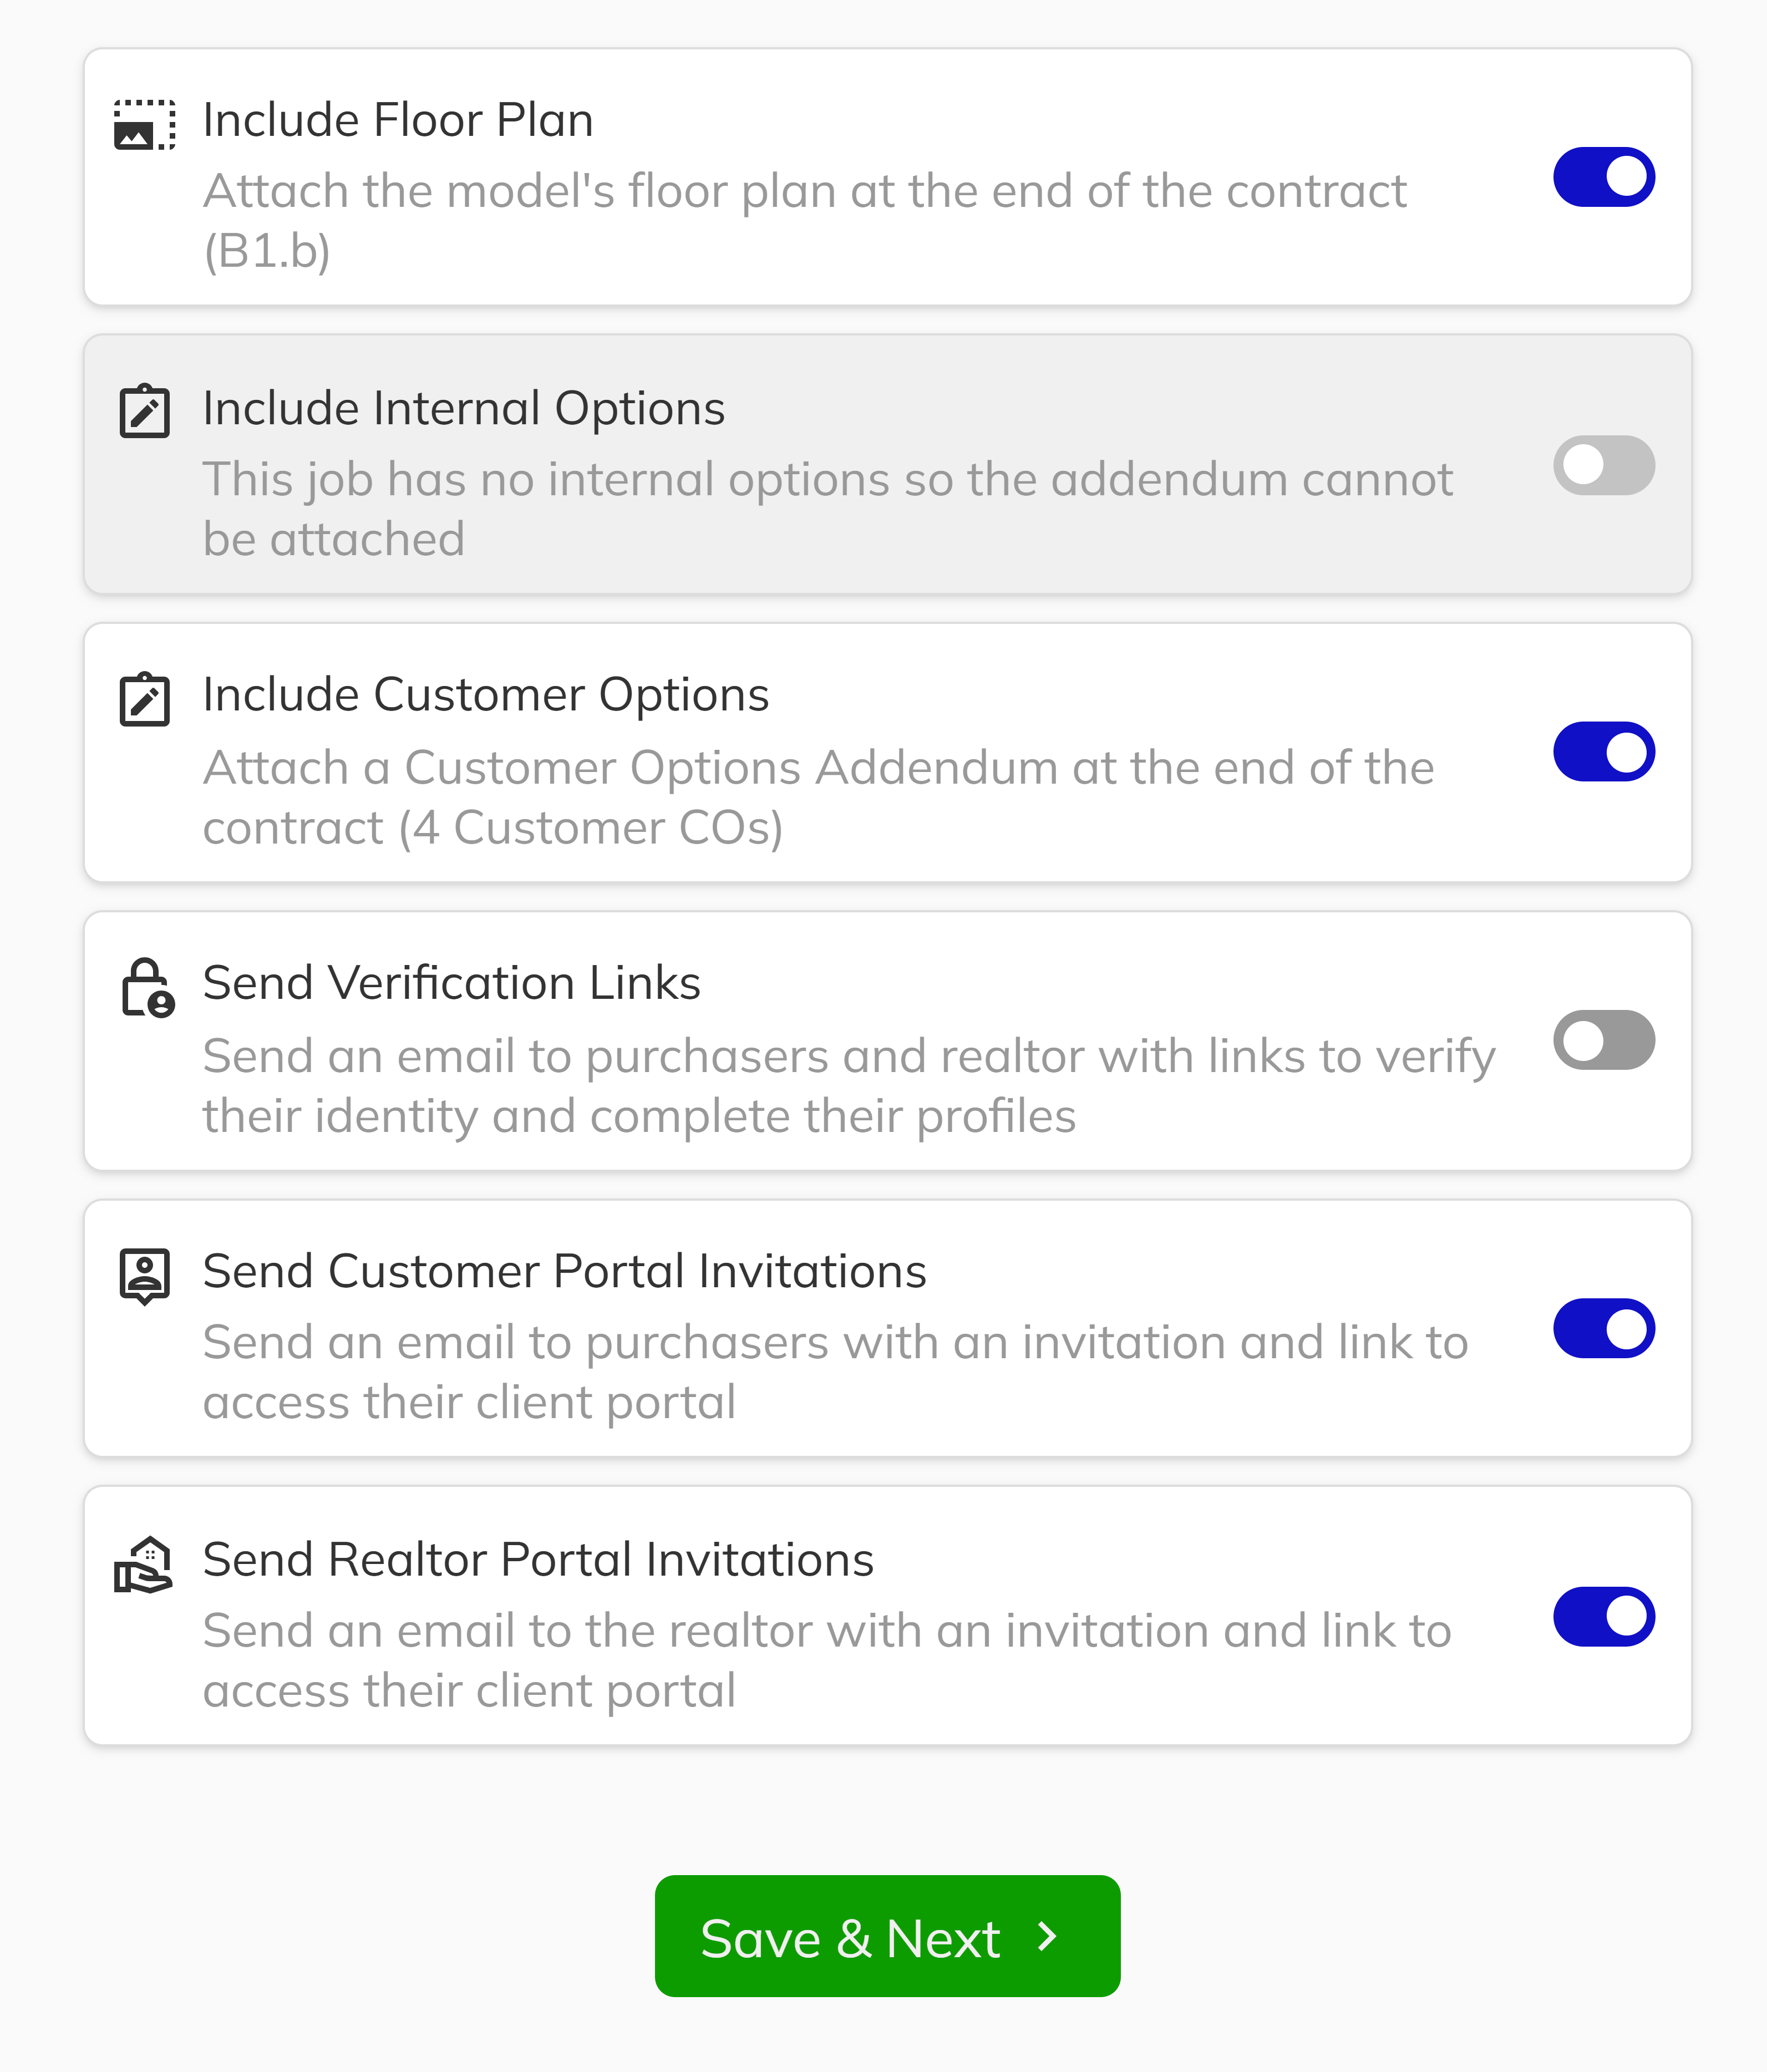
15. Configure Additional Supporting Documents and Communications
The Config section allows you to send support documents and emails. Available options are predefined and configured in the Project Config section of the Construction Workbench. Use this section to make manual modifications as needed for your deal. Once your addtional supporting documents and communcations documents configuration is complete, click Save & Continue.
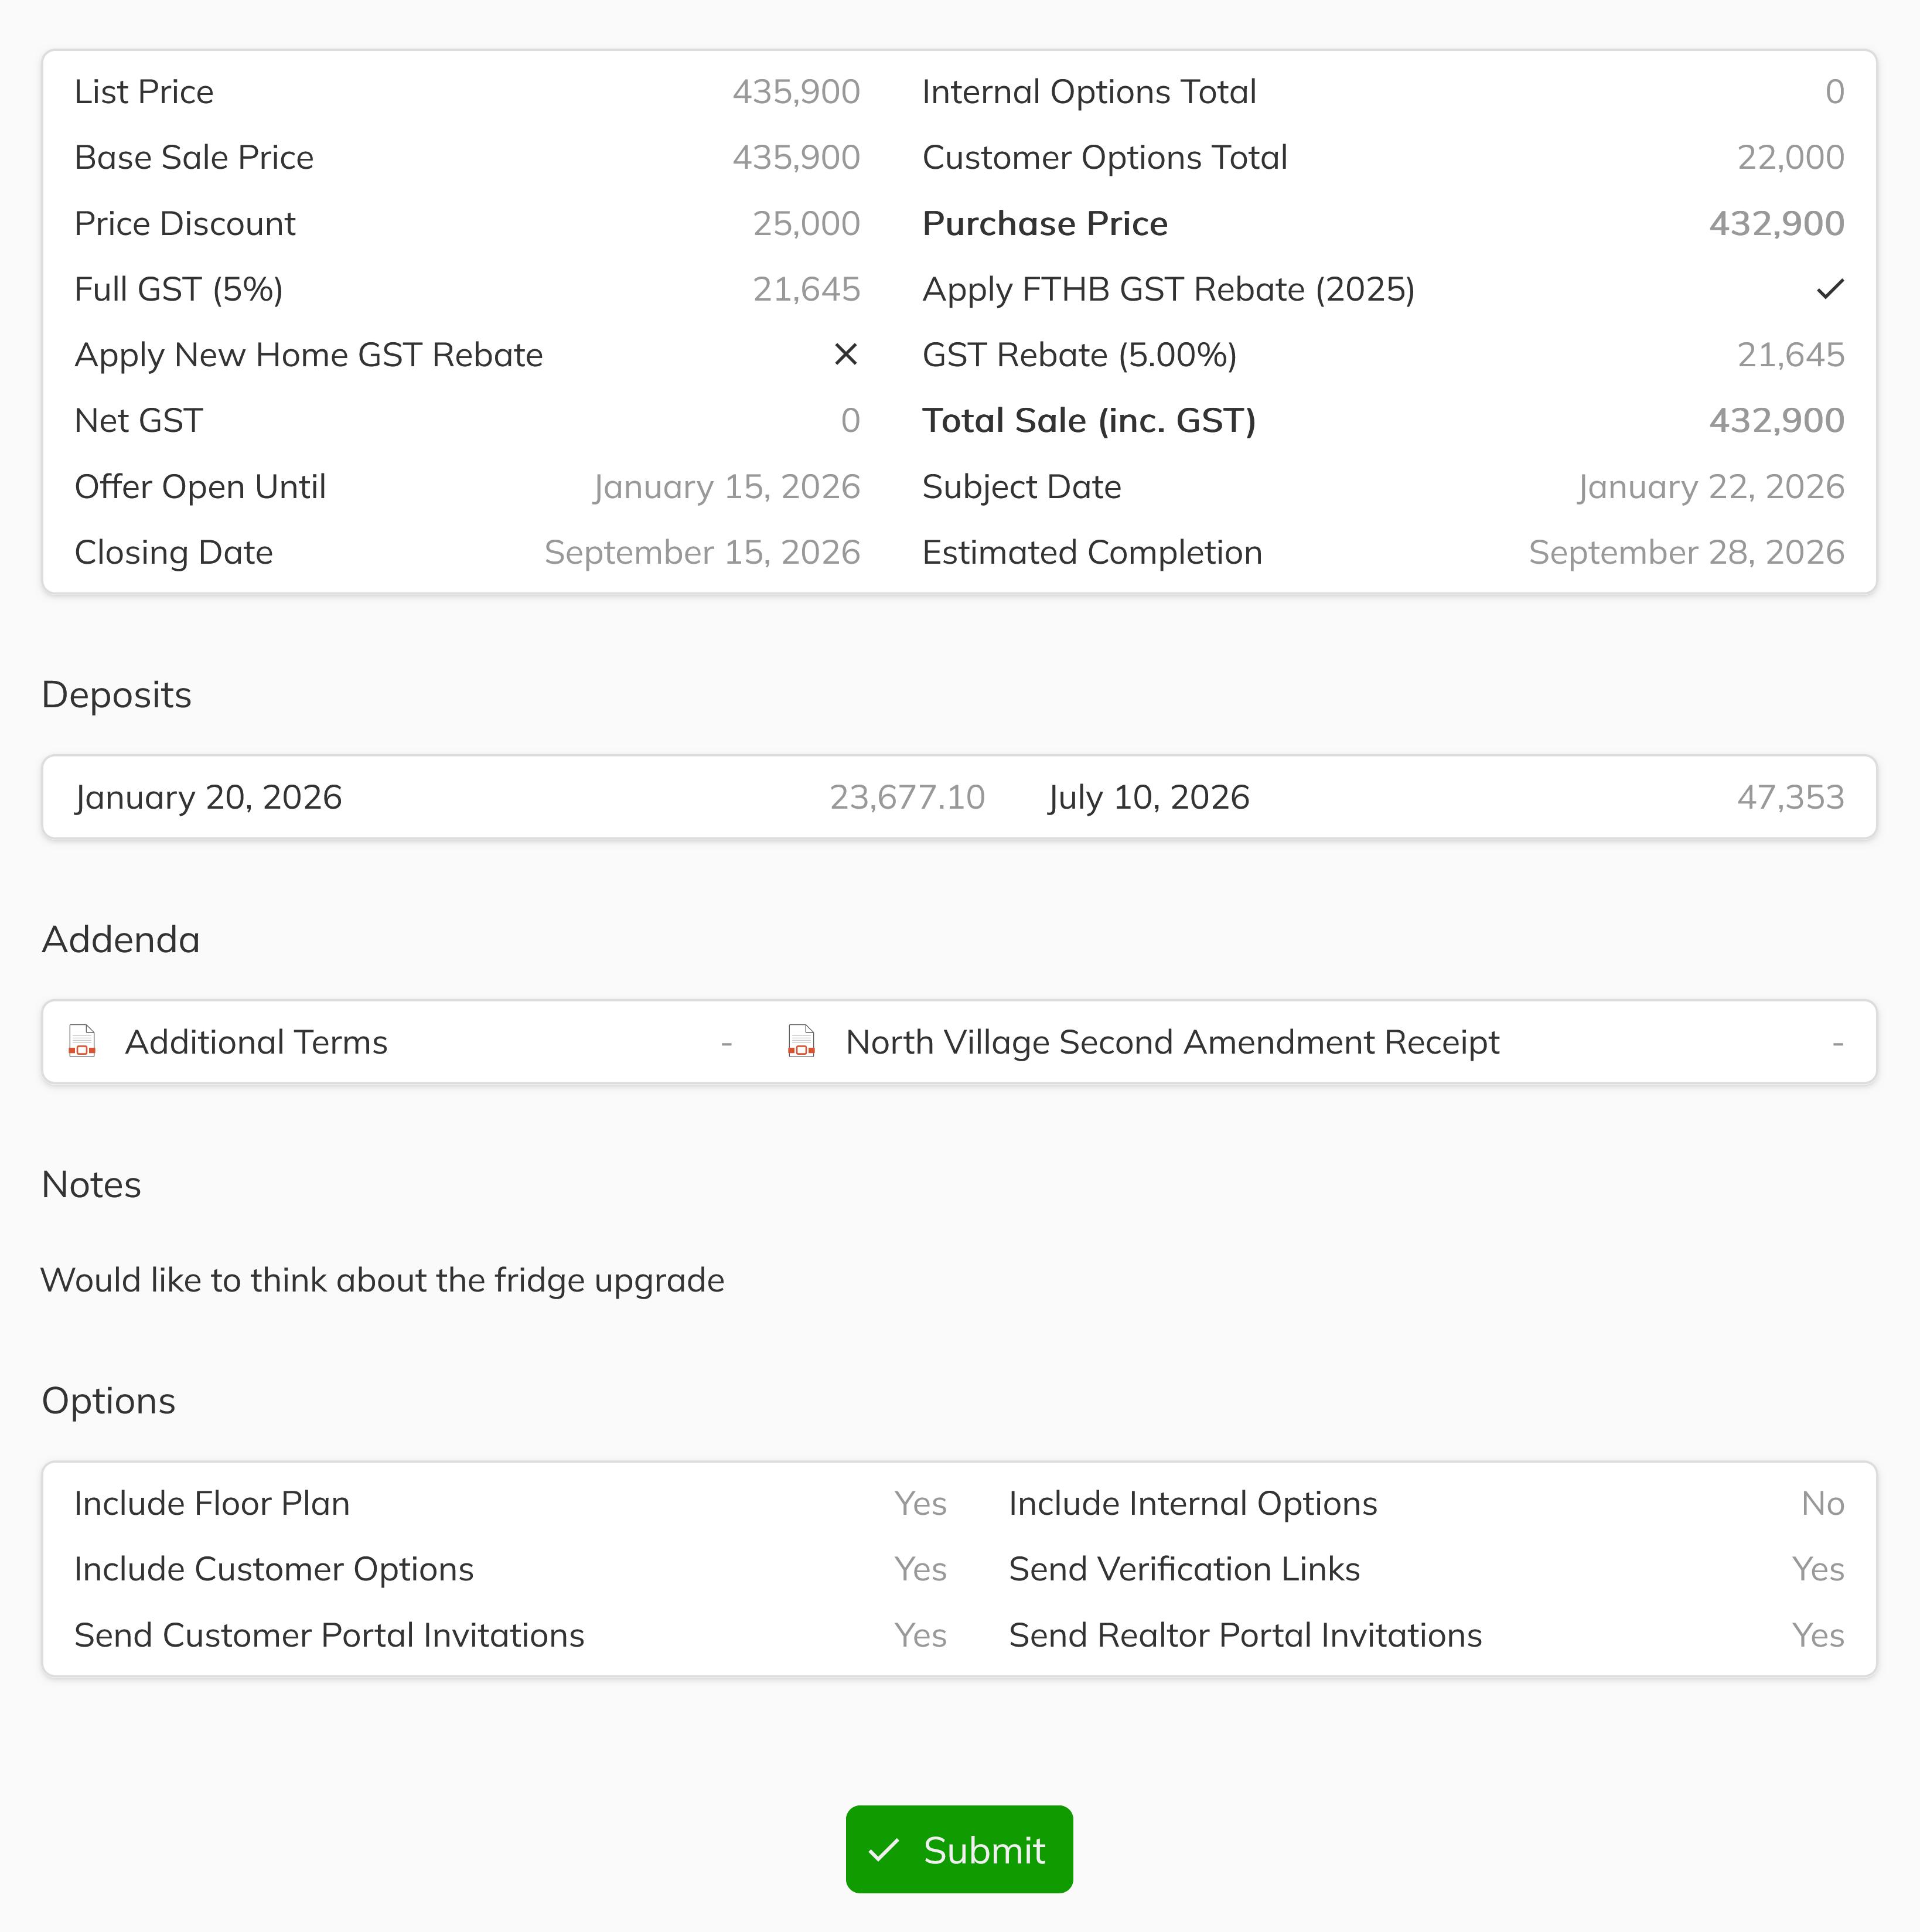
16. Review and Submit Your Deal
Review your deal on the Review page. To modify any section, click on the tab header for that section. Once all changes are complete, return to the Review tab, scroll to the bottom, and click Submit to finalize the New Deal process.
After submission, you'll be taken to the Unit View screen's document section, which displays the main contract and any additional documents created in the previous steps.
Congratulations! You have successfully navigated through the complete New Deal process. By working through each section—from linking reservations to verifying purchaser information, selecting options, configuring deposits, and preparing all necessary documentation—you have created a comprehensive sales agreement that is ready for execution. Your deal is now properly documented and configured for the next stages of contract execution and closing.