Sales Option Management
Once your options catalog is configured, sales staff can add them to individual deals. This guide covers the day-to-day workflow of working with Sales Options, from initial deal creation to post-sale modifications.
In this guide, we will cover:
- Adding options during new deal creation
- Adding Late Sales Options to existing deals
- Editing and removing Sales Options
- Creating custom option requests
How We Got Here
A purchaser has selected a home and is ready to customize it with upgrades and extras. Your administrators have already configured the available options in the Workbench (see Option Creation). Now it's time to record what this specific purchaser has chosen.
Adding Options During New Deal Creation
Options are configured as part of the New Deal workflow. When creating a new deal, you'll reach the Options step after setting up purchasers, realtors, and other deal details. From there you can browse available options for the unit's model, adjust pricing and quantities, and review your selections before continuing.
For a full walkthrough of this step, see Step 10: Configure Options and Upgrades in the New Deal Process guide.
Adding Options to Existing Deals (Late Sales Options)
Options added after the initial deal creation are called Late Sales Options. These typically require additional approval and may have different pricing or deadline considerations.
1. Access the Unit View Options Page
For deals already in progress, navigate to the Unit View by clicking on the unit from the Unit Manager or searching for it. Click on the Options tab to see all current Sales Options and add new ones.
The Options tab shows:
- All existing Sales Options with their status
- Total options value
- Approval status indicators

2. Add New Options
Click Add Option to launch the option selection workflow. The process is similar to adding options during deal creation, but with some differences:
- Options are automatically marked as Late Sales Options
- May require approval before becoming active (depending on configuration)
- Construction cutoff dates may restrict what can be added

Late Sales Options often require approval from a manager or construction team before they can proceed. The order will show a "Pending" status until approved. See Options Inbox for approval workflows.
Editing and Removing Sales Options
3. Modify Existing Sales Options
Click on any Sales Option card to open the detail panel. From here you can:
- Adjust the price or quantity (if not yet finalized)
- View the approval history — who approved and when
- See price change history — all modifications are logged
- Remove the option (if not yet finalized)
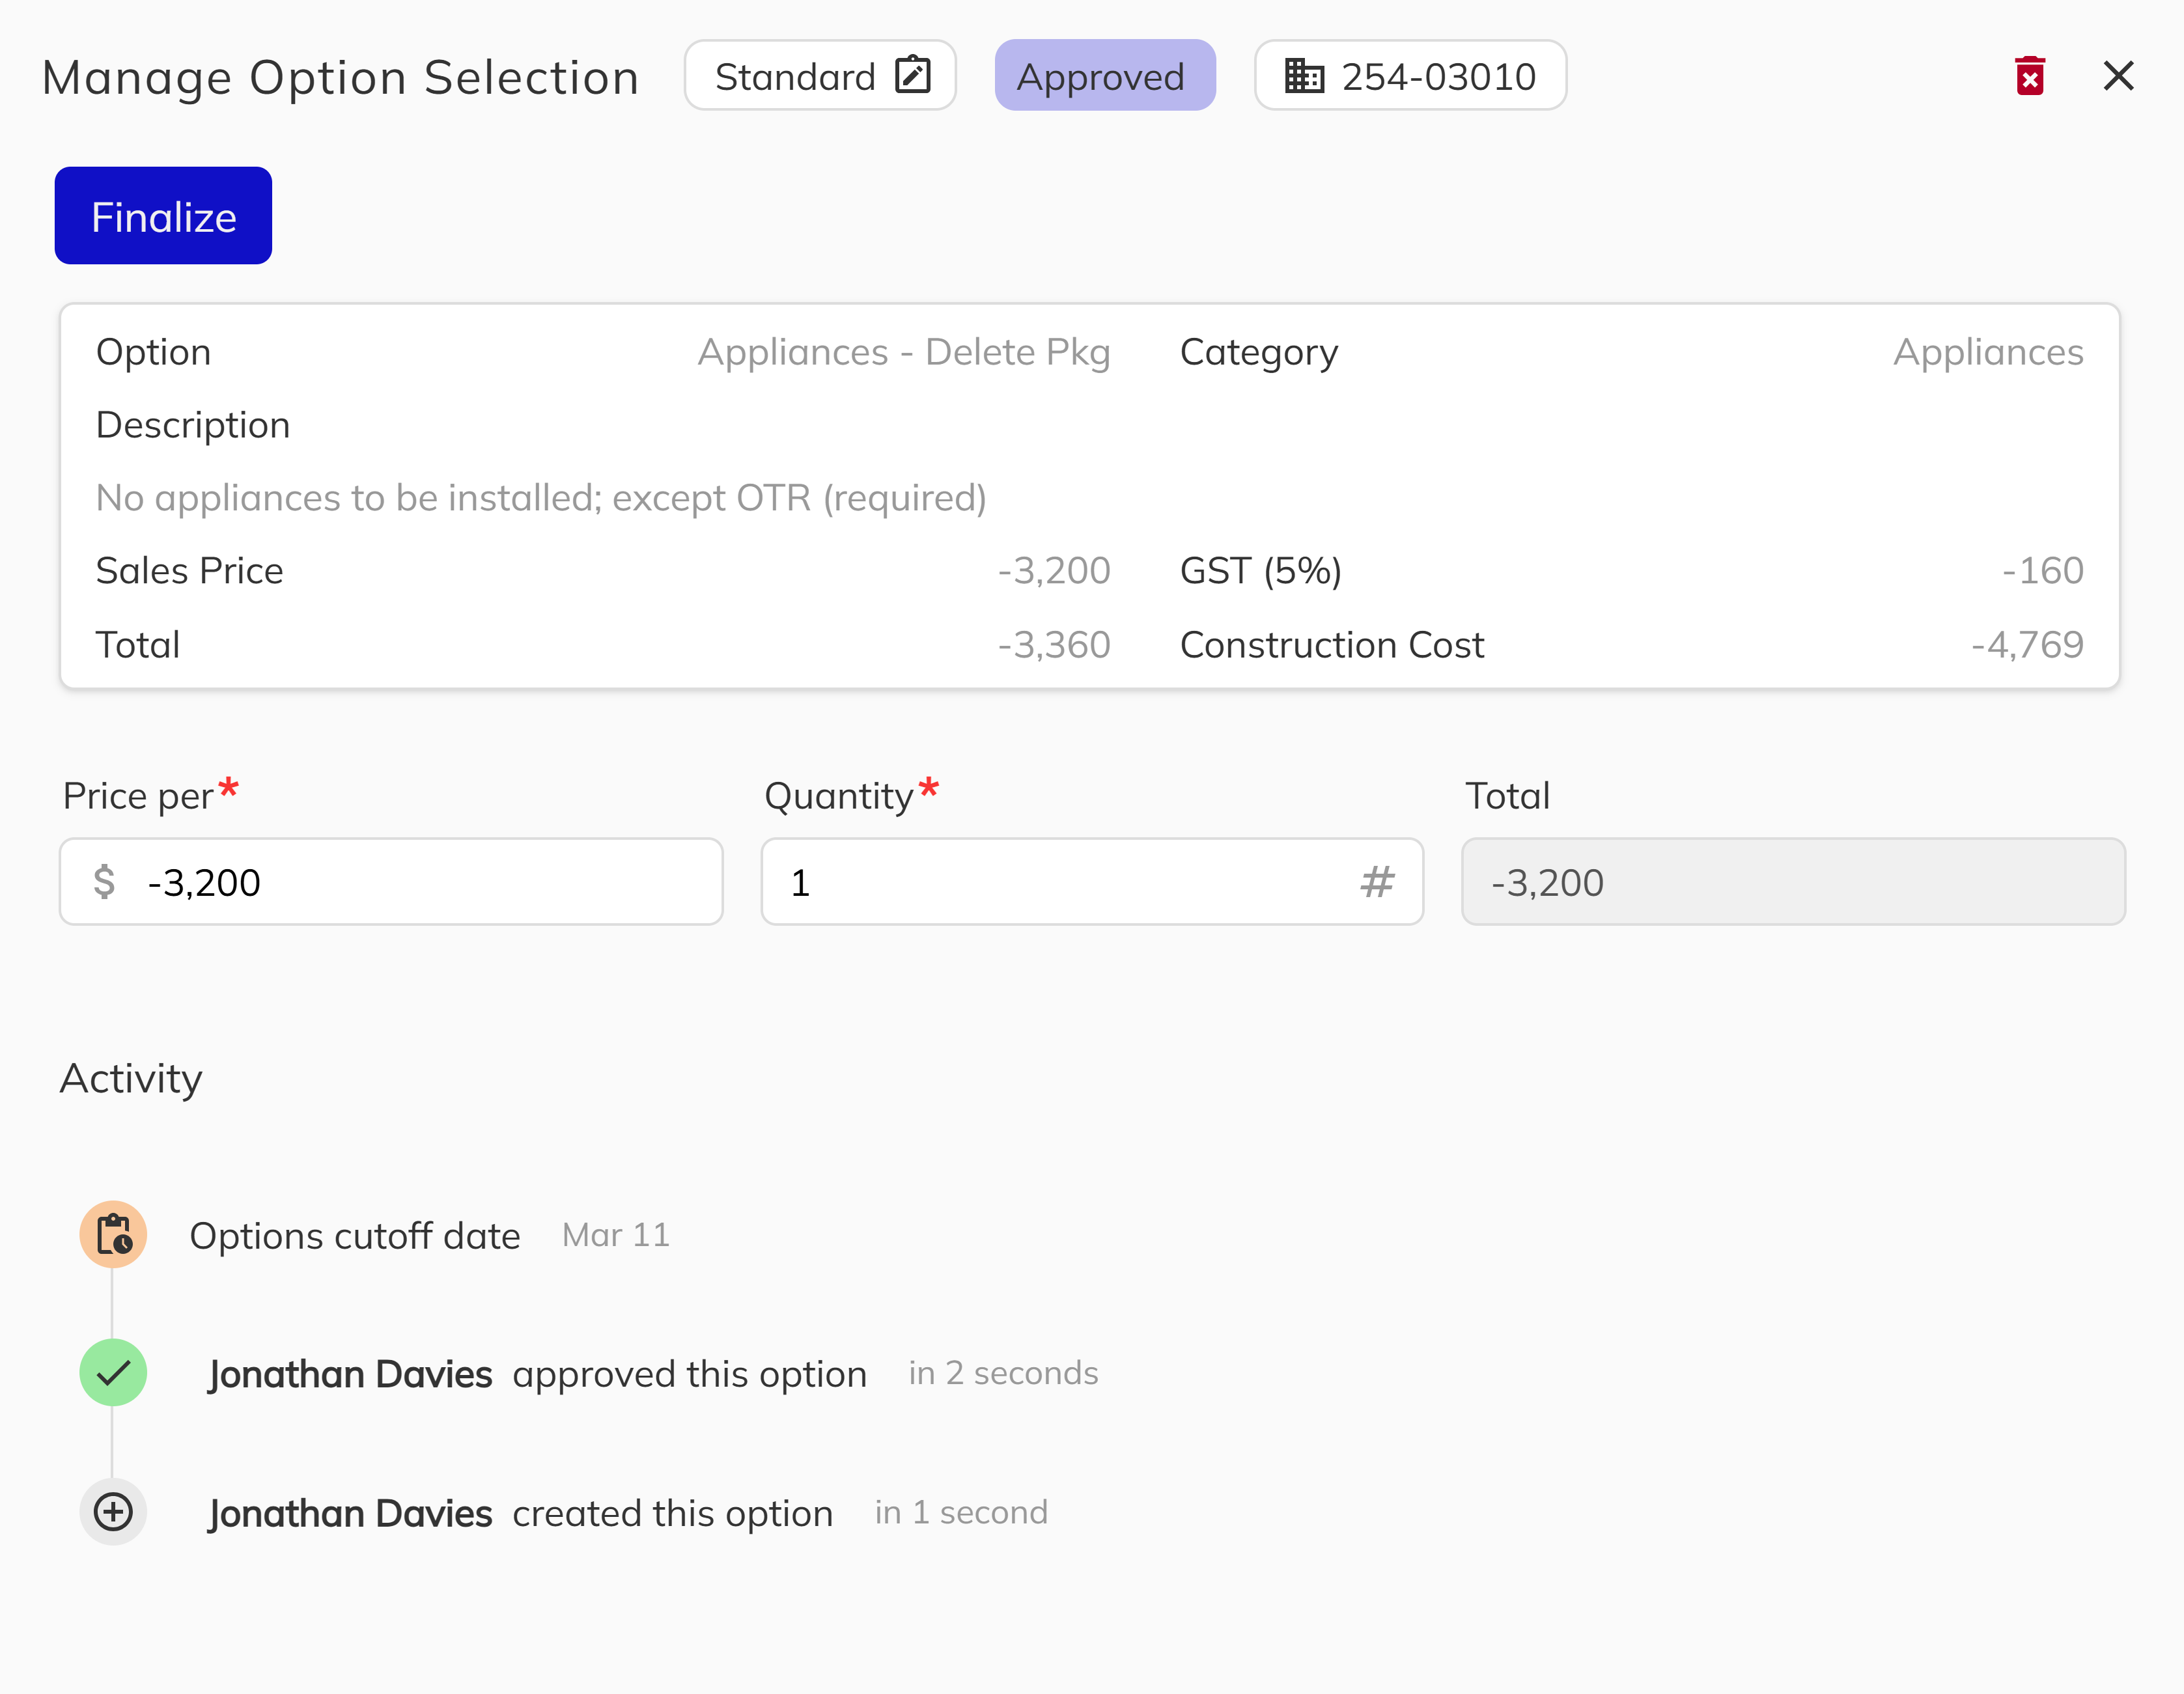
All price modifications are logged with timestamps and the staff member who made the change. This audit trail is important for contract accuracy and dispute resolution.
Sales Option Status Workflow
Sales Options move through the following statuses:
Pending → Approved → Finalized
  ↓
  Denied
| Status | What You Can Do |
|---|---|
| Pending | Edit, remove, or wait for approval |
| Approved | Edit price/quantity, finalize, or remove |
| Denied | View denial reason; create a new request if needed |
| Finalized | View only; cannot be modified |
Removing Sales Options
To remove a Sales Option that hasn't been finalized:
- Open the Sales Option detail panel
- Click Remove or Delete
- Confirm the removal
Finalized Sales Options cannot be removed—they're locked as part of the contract record.
Creating Custom Sales Option Requests
When a purchaser wants something not in your standard catalog, use the Custom Option Request feature.
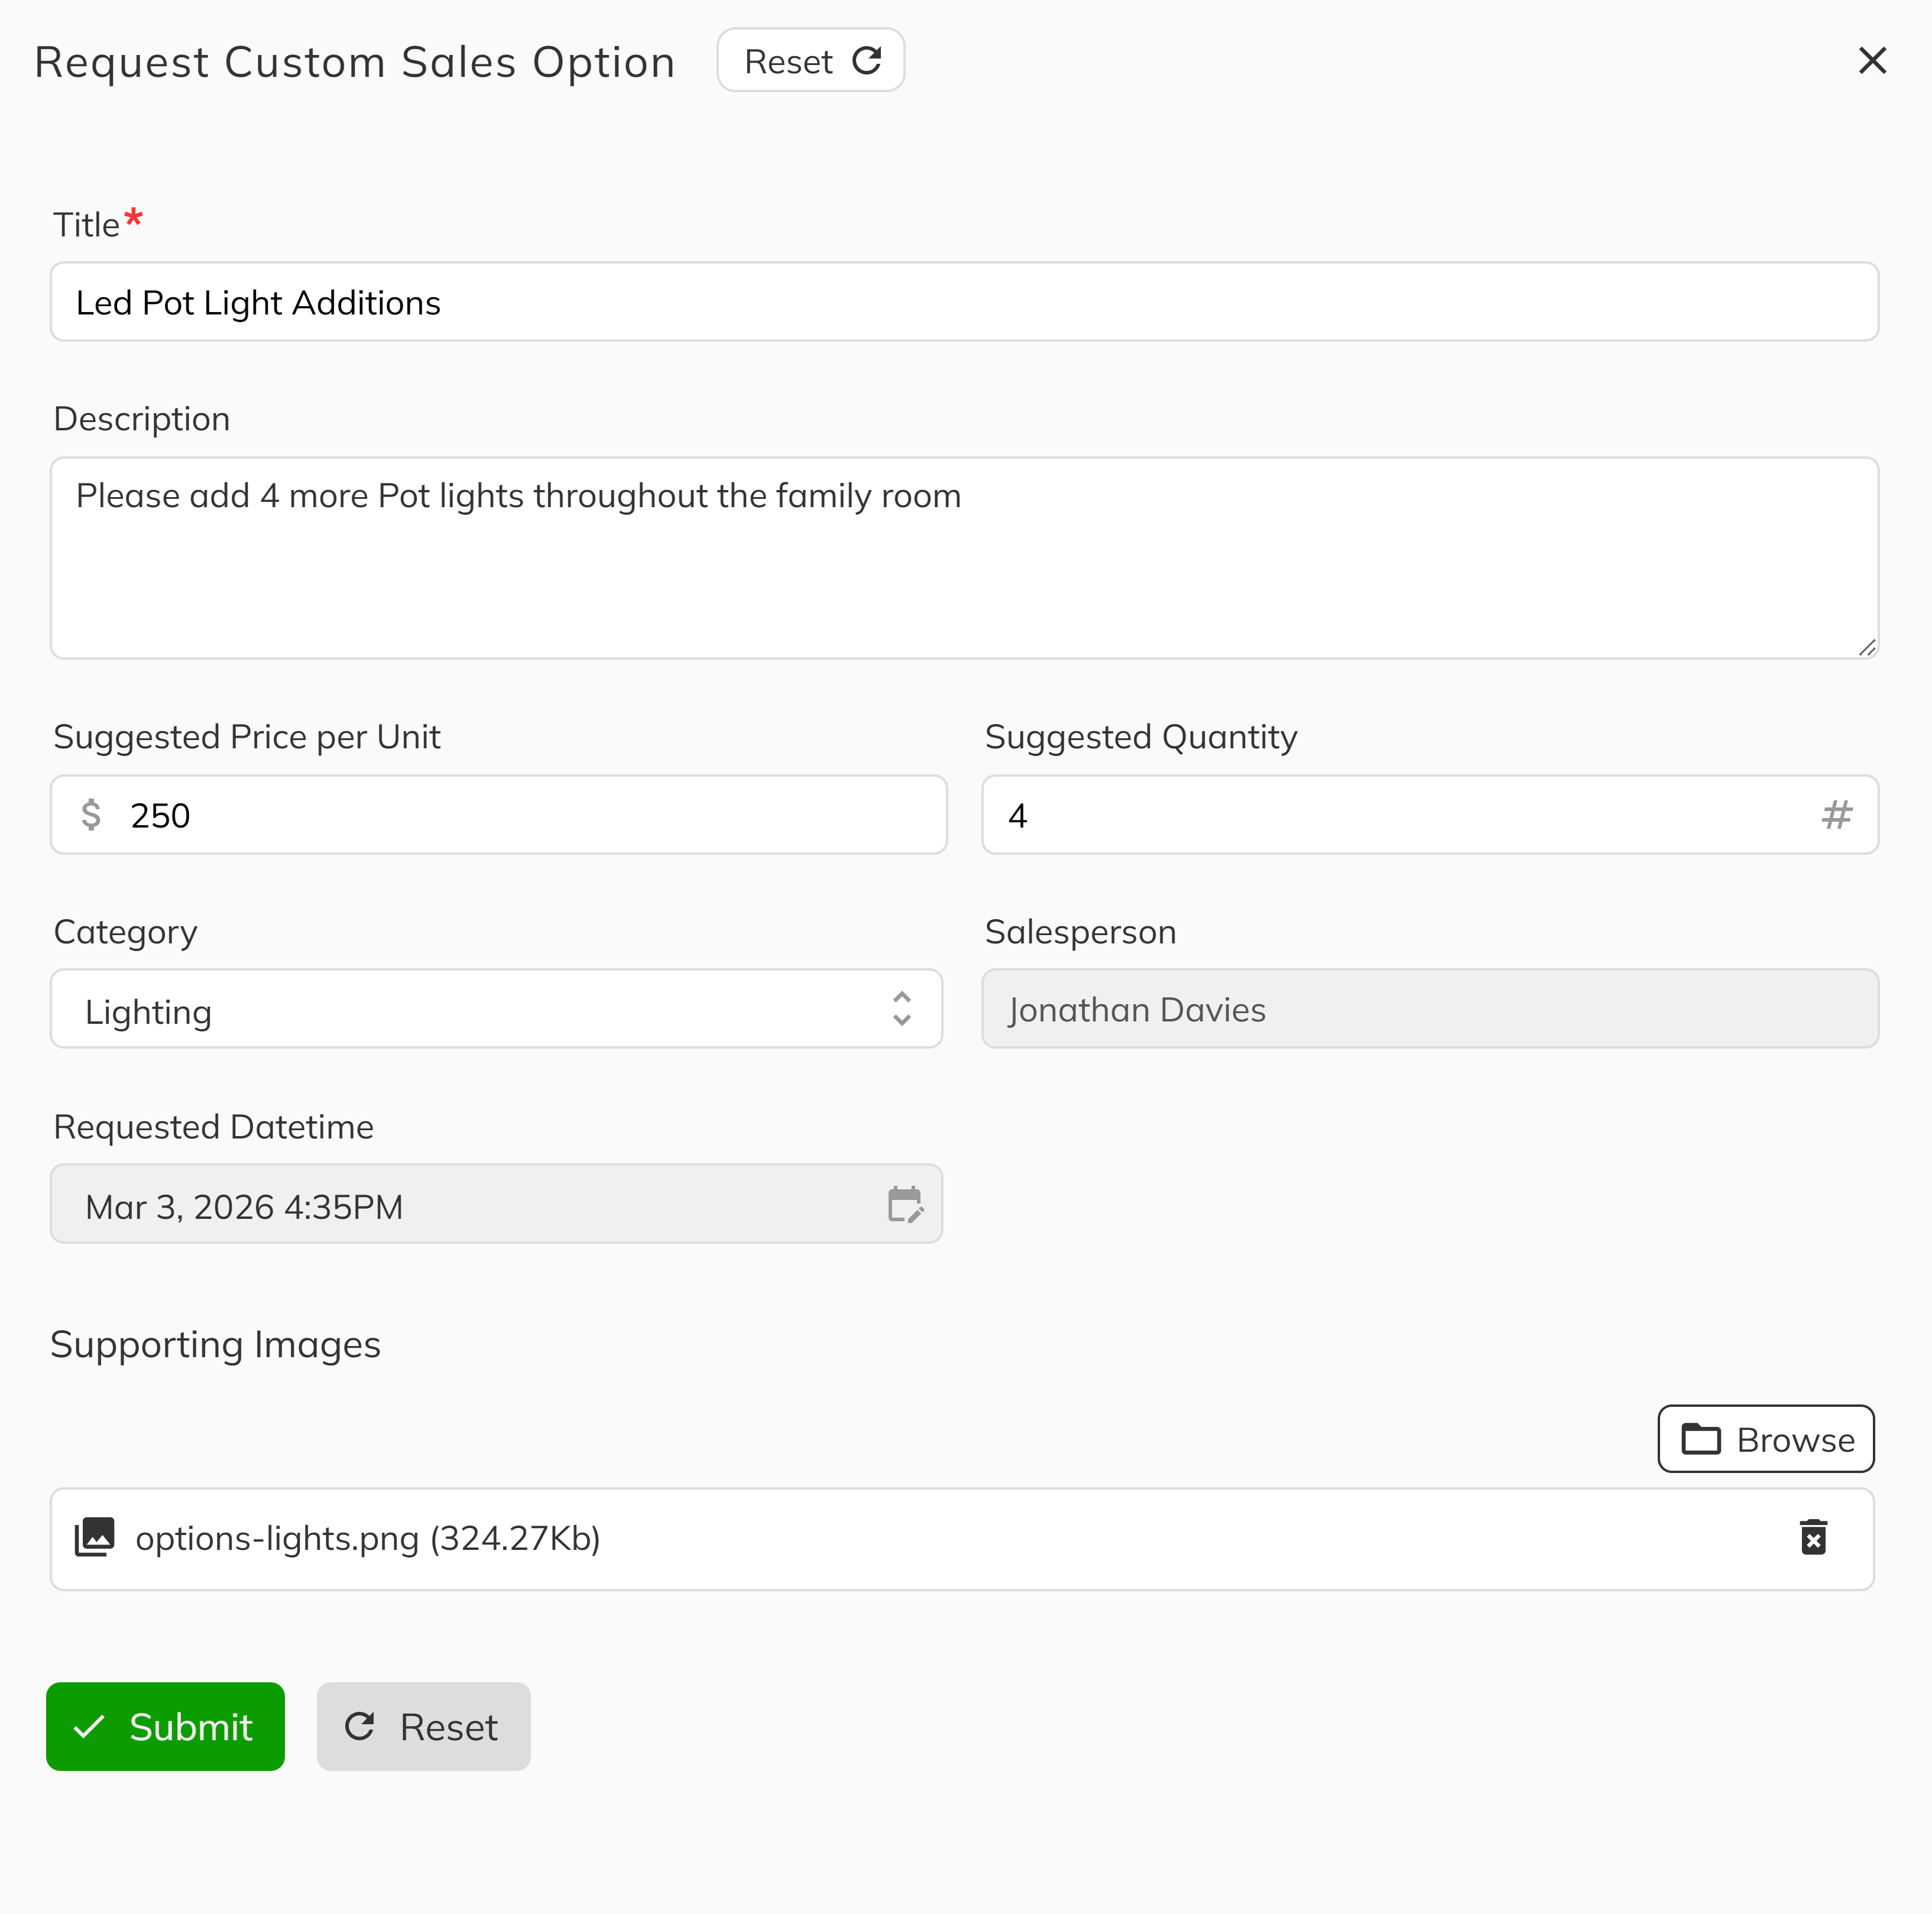
4. Request a Custom Option
Click Request Custom Option and provide:
- Title — A clear name for the requested item
- Description — Details about what's being requested
- Suggested price and quantity — Your estimate (can be adjusted during approval)
- Category — For organization
- Optional images — Photos or sketches of what's requested
What Happens Next
Custom requests are sent to the Options Inbox where authorized staff can:
- Review the request details
- Get pricing from construction/suppliers if needed
- Create a formal Sales Option
- Approve or deny the request
The requesting staff member is notified when the request is processed.
Include as much detail as possible in your custom requests. The more information you provide, the faster and more accurately the request can be processed. If you have specifications, measurements, or reference images, attach them.
Understanding Sales Option Types
Internal Sales Options
- Added during the initial deal creation
- Part of the original contract
- Typically don't require additional approval
- Included in base contract pricing
Late Sales Options
- Added after the initial contract is executed
- May trigger addendum requirements
- Often require approval from management or construction
- May be subject to construction cutoff dates
- Pricing may differ from standard options
Congratulations you've successfully learned how to manage Sales Options in the Sales App! You now know how to:
- Add options during new deal creation
- Add Late Sales Options to existing deals
- Edit and remove Sales Options
- Create custom option requests
- Understand the Sales Option status workflow
Your ability to accurately record purchaser selections ensures smooth contract processing and keeps construction informed of what's needed for each home.
Next Steps:
- Learn about special option types: Special Option Categories
- Process approvals: Options Inbox