Unit Models
Unit Models are the foundation of your project's inventory in Pluto Systems. A Unit Model defines a home or unit template — its name, physical dimensions, floor layout, elevation variants, and uploaded resources like floor plans and cover photos. Every unit in a project is linked to a Unit Model, which means the model's attributes flow through to sales documents, the Client Portal, Customer Connect, and everywhere else unit information is displayed.
In this guide, we will cover:
- What a Unit Model is and the data it holds.
- Creating a new Unit Model through the Workbench.
- Assigning Unit Models to individual units.
How We Got Here
Your organization has a project set up in the Workbench with buildings and units ready to be configured. Before units can be priced, marketed, or sold, each one needs a Unit Model that describes its physical characteristics. The Workbench Models tab is where you define these templates, and the Units tab is where you link them to individual inventory.
What Makes Up a Unit Model
A Unit Model captures everything that describes a particular floor plan or home design. Understanding the key components will help you fill out the creation workflow accurately.
| Component | Description |
|---|---|
| Model Name | The primary identifier (e.g., "A1", "Evergreen"). Must be unique within the project. |
| Marketing Name | An optional public-facing name used in sales and marketing content. |
| Bedrooms & Bathrooms | Room counts that appear in details in app and documents. |
| Square Footage | Area values broken down by floor, plus optional deck, patio, porch, and garage areas. |
| Garage | Garage type (Attached, Detached, or None) and garage style. Available for low-density projects. |
| Feature Toggles | Boolean flags such as Den, Loft, Flexroom, Legal Suite, Master on Main, Finished Basement, Rooftop, and Penthouse. |
| Floors | Individual floor levels with square footage and a designation of which floor is the main floor. Applicable to non-apartment projects. |
| Elevations | Named design variants (e.g., "A", "B", "Craftsman") that primarily affect the exterior appearance of the unit. Available for low-density projects. |
| Resources | Uploaded files including a floor plan document and a cover photo (public render) displayed in the Client Portal and Customer Connect. |
The fields you see during model creation depend on your project type. High-density (apartment/condo) projects show a simplified set — a single main-floor square footage, deck areas, and the Penthouse toggle. Low-density (single-family, multi-family) projects include garage details, width, additional outdoor areas, floors, and elevations.
Creating a Unit Model
1. Navigate to Models Section in Workbench
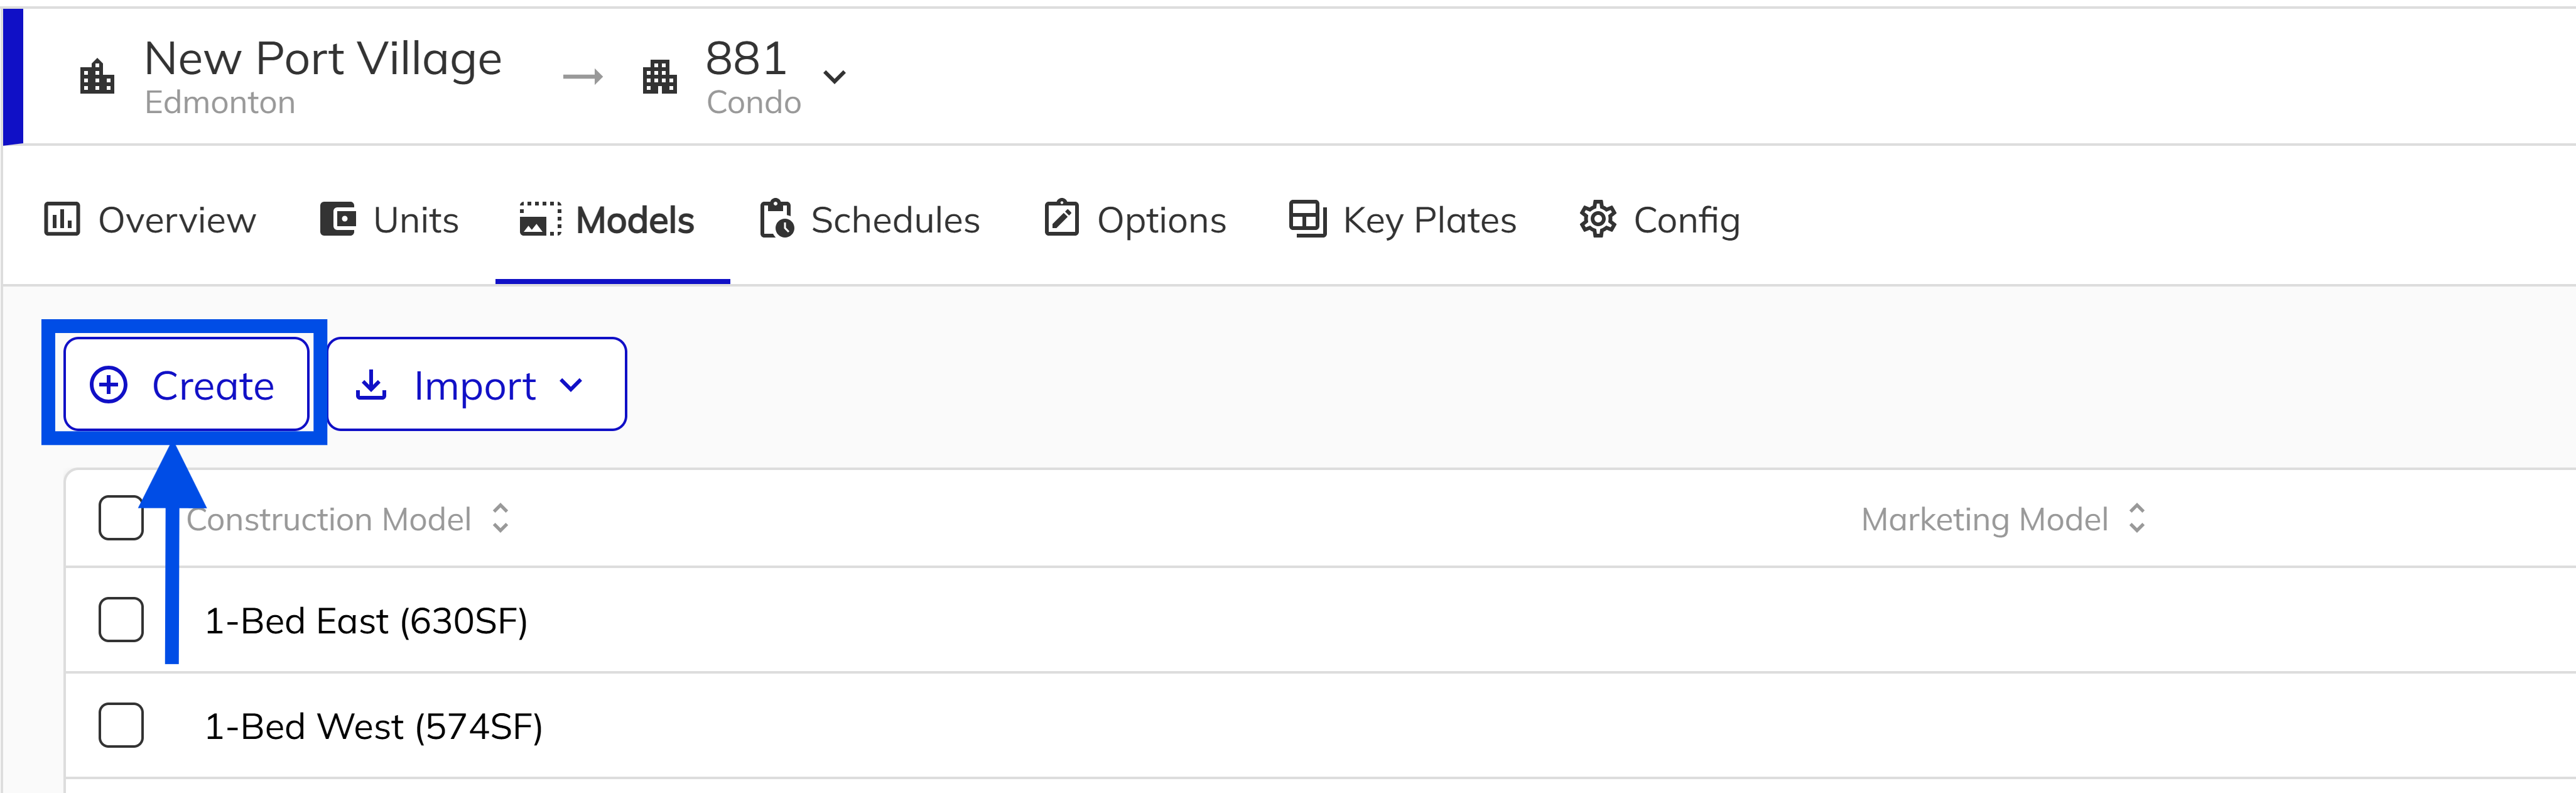
Open the Workbench and select your project from the project list. Navigate to the Models tab within the project. You will see a grid listing all existing models. Left Click the Create button in the toolbar to open the Create Model workflow panel.
2. Name Your Model
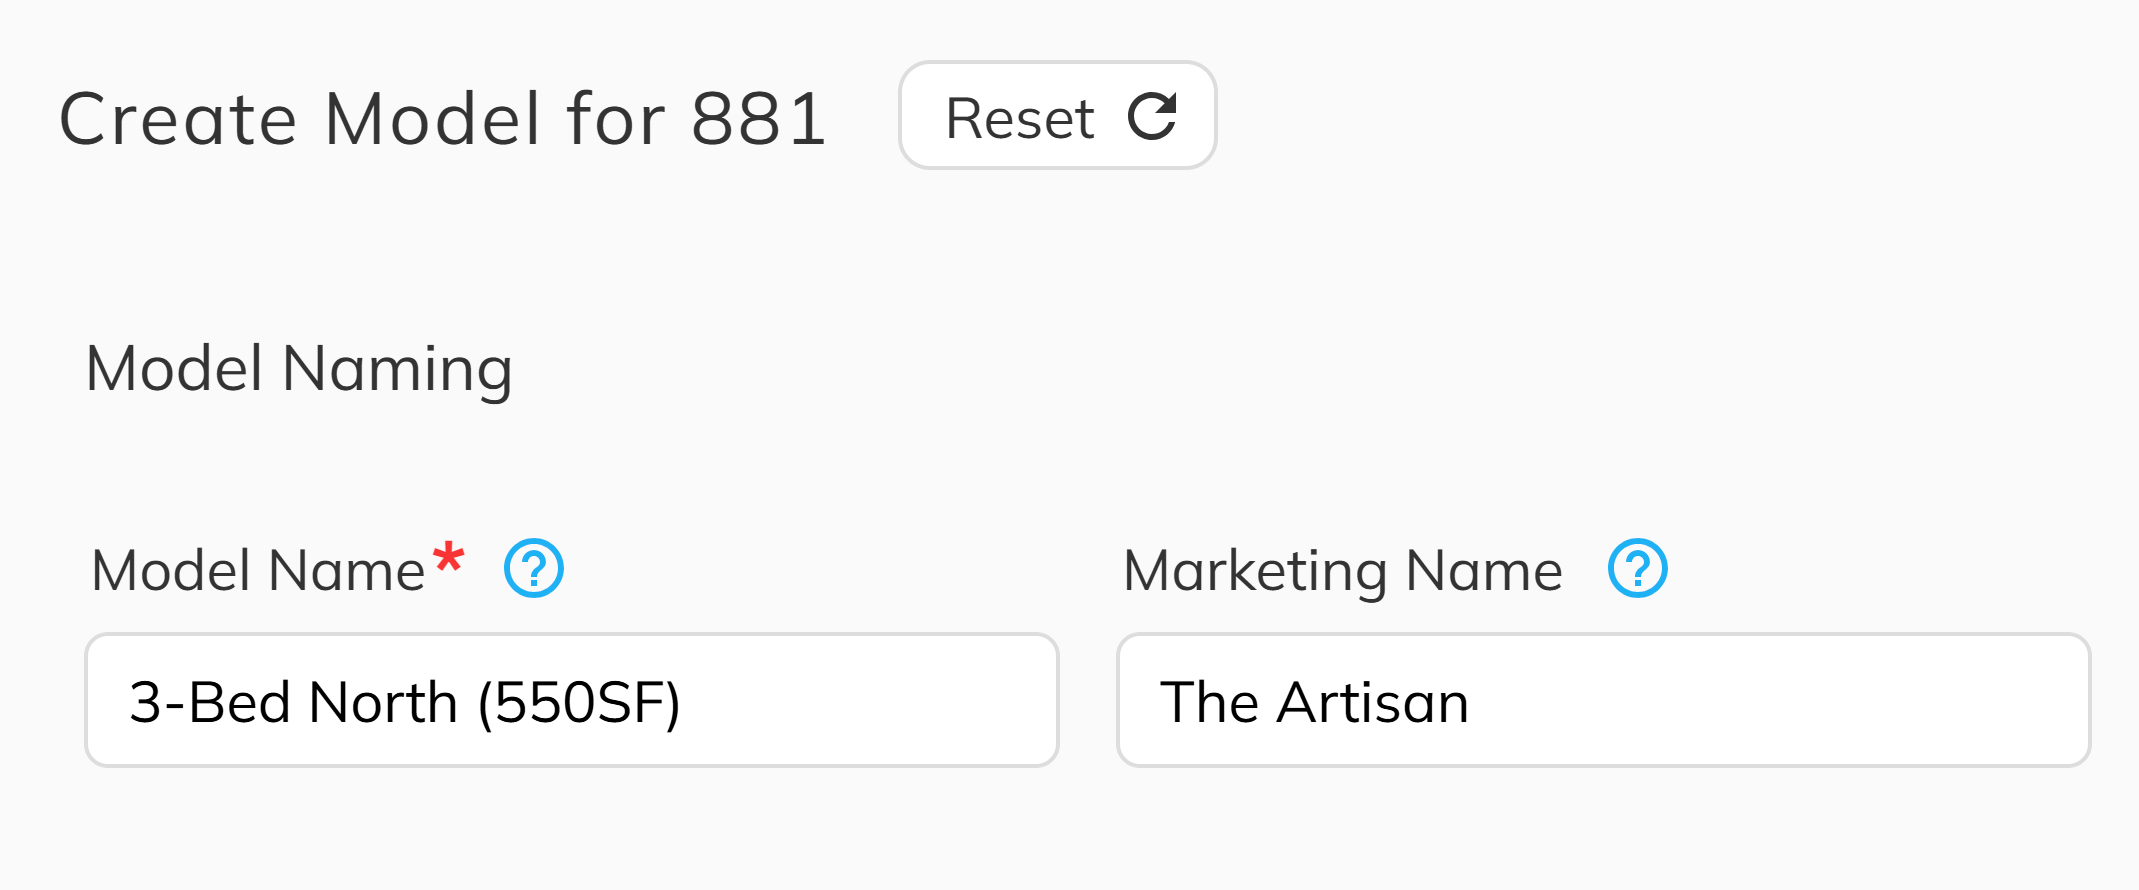
Enter a Model Name — this is the primary identifier that must be unique within the project (e.g., "A1", "The Willow"). Optionally provide a Marketing Name for public-facing content. The workflow will not let you proceed if the model name is already in use or the field is not filled in.
3. Fill In the Details
Enter the model's physical attributes:
- Bedrooms and Bathrooms (bathrooms accept half values like 2.5).
- Garage Type and Garage Style (low-density projects only).
- Square footage values for decks, patio, porch, and garage as applicable.
- Toggle any applicable feature flags such as Den, Loft, Flexroom, Legal Suite, and others.

The image for step 3 is displaying the Detials section for a high dentisty unit.
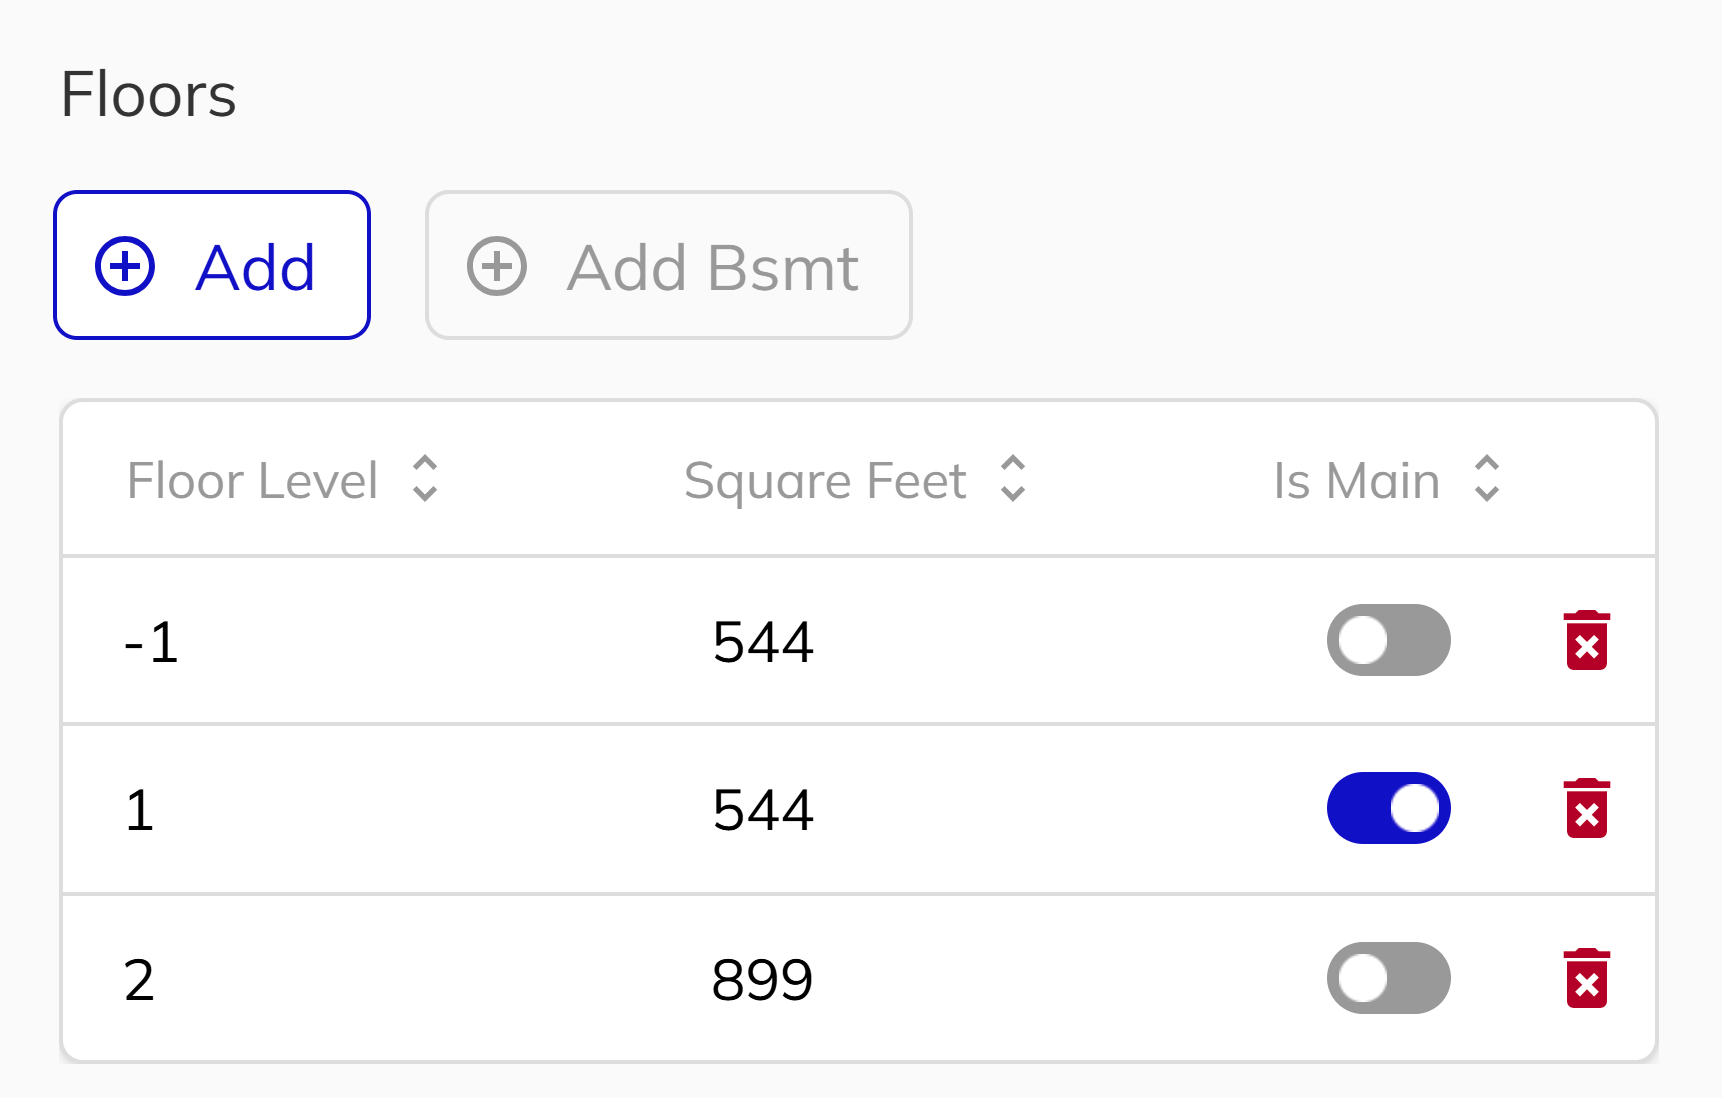
4. Define Your Floors
This step only appears for single-family and multi-family projects. Apartment/condo projects skip directly to resources.
Add each floor level, specify its square footage, and mark one floor as the Main Floor. You can also add a basement level. The total square footage is calculated automatically from all floor entries (excluding unfinished basements).
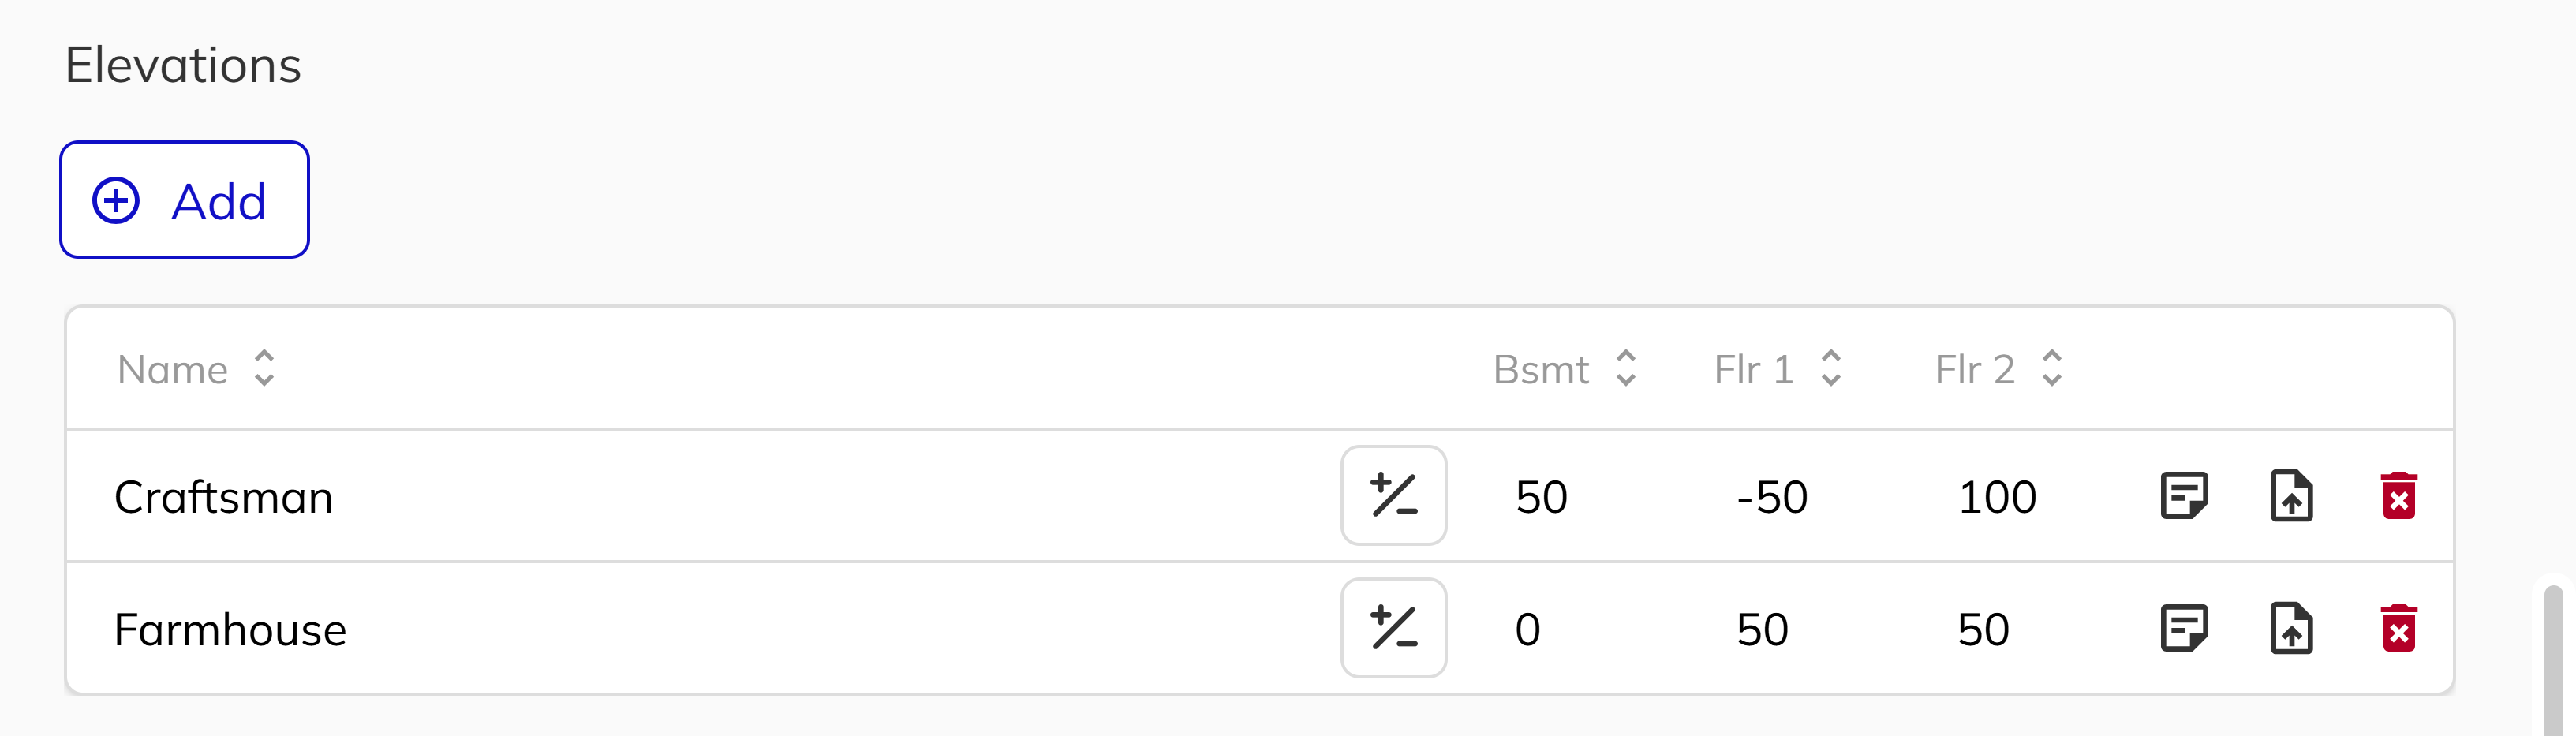
5. Add Elevations
This step only appears for single-family and multi-family projects.
Elevations represent exterior design variants of the same floor plan. Click Add to create an elevation, assign it a name (e.g., "A", "Craftsman"), and optionally specify per-floor square footage adjustments if the elevation changes the footprint. You can also add a description and upload an elevation drawing for reference.
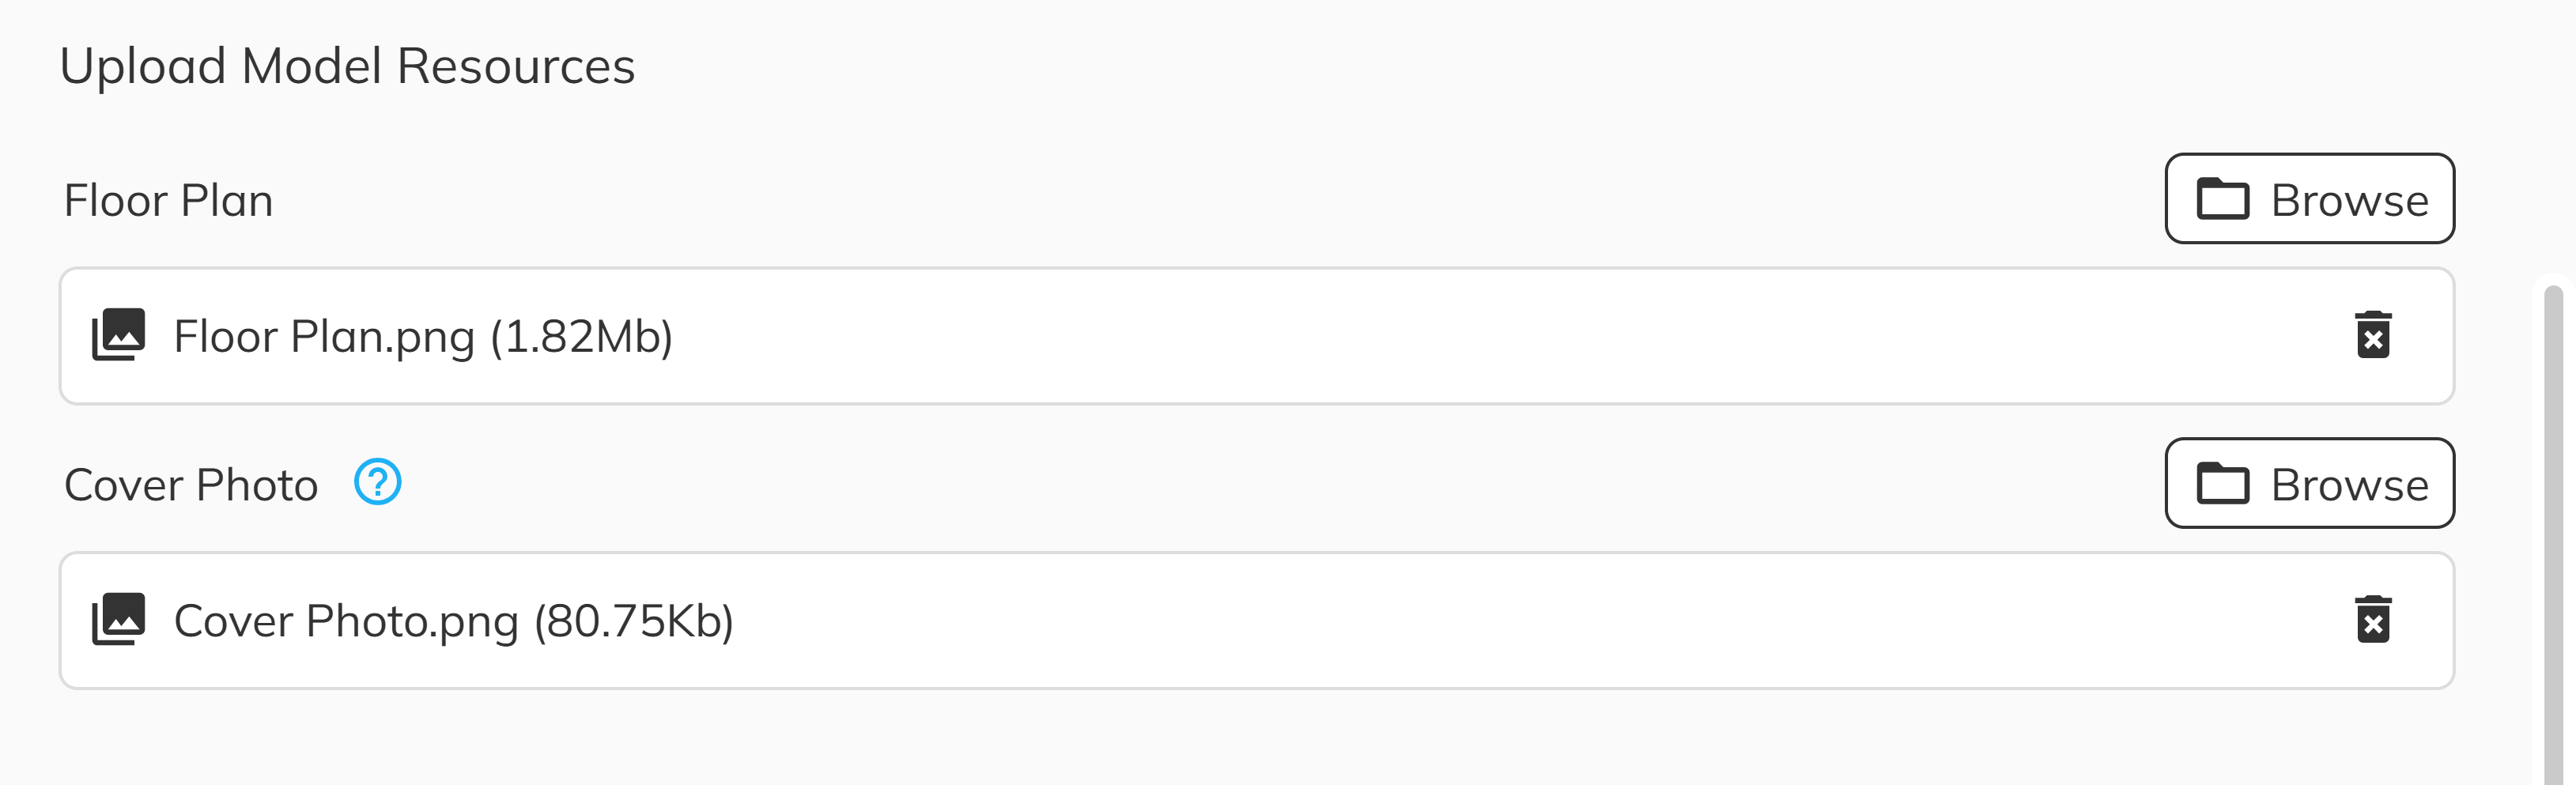
6. Upload Model Resources
Upload a Floor Plan document and a Cover Photo (public render). The cover photo is displayed in the Client Portal and Customer Connect, so use a high-quality image that represents the model. Both uploads are optional at creation time and can be added or changed later in the model panel.
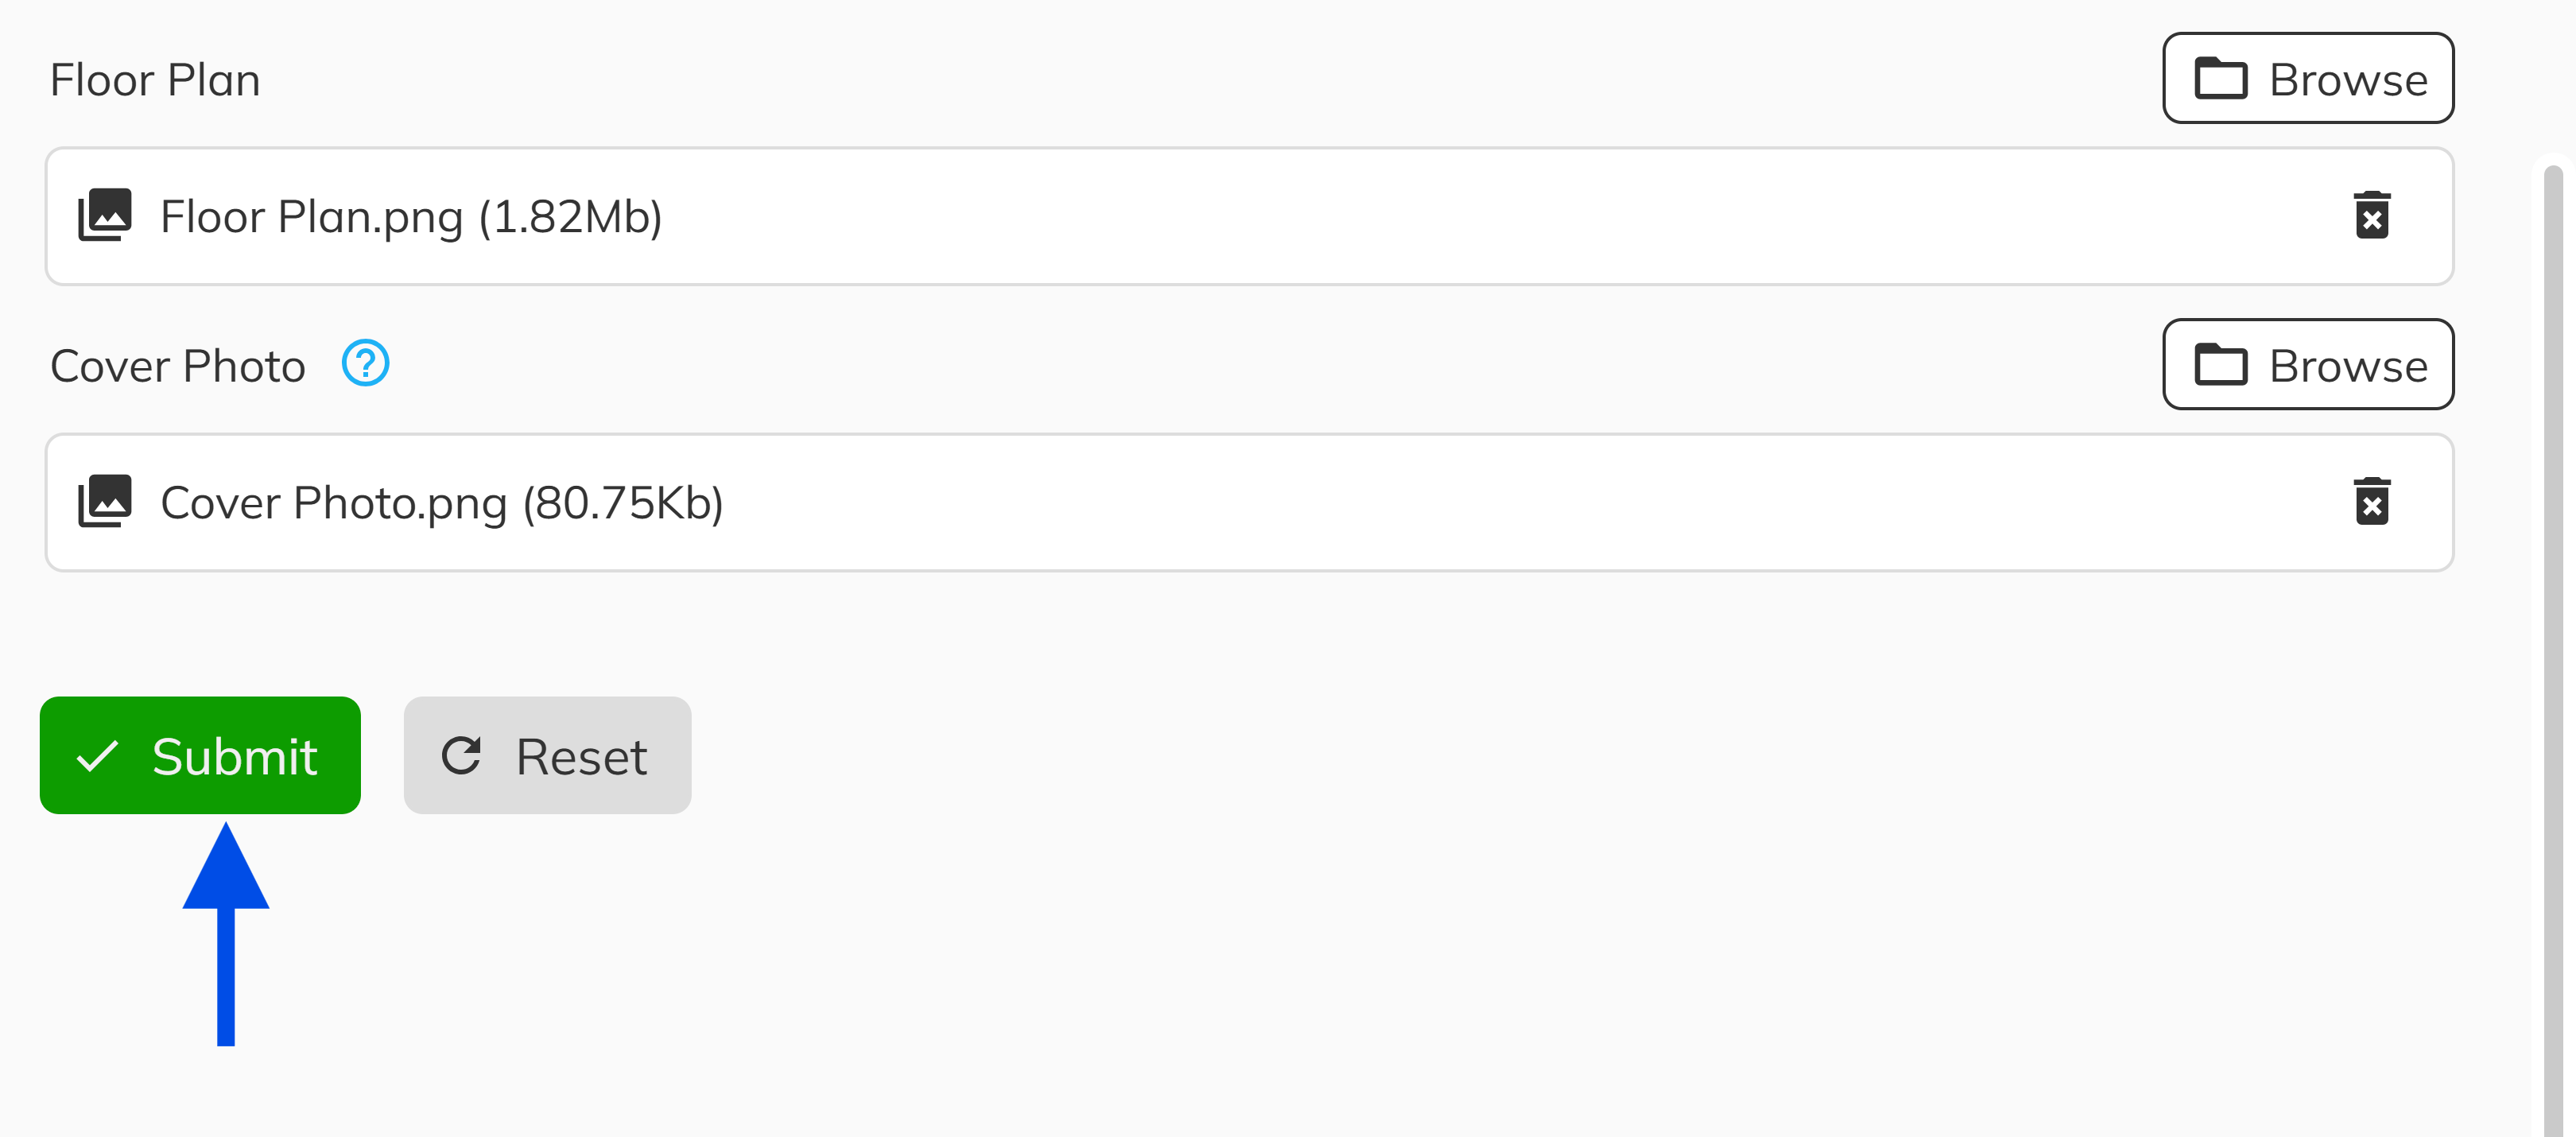
7. Submit and Create
Review the workflow steps to ensure all are marked complete. Click Submit to create the model. The system will save the model record and upload any attached files. You will see confirmation toasts for each successful upload. The new model now appears in the Models grid and is ready to be assigned to units.
You can also import models from a CSV file or from another project using the Import dropdown on the Models page. This is useful when multiple projects share similar floor plans.
Assigning Unit Models to Units
Once your models are created, the next step is to link them to the individual units in your project. This assignment is what connects all of a model's attributes — square footage, floor plans, cover photos, and features — to each specific unit.
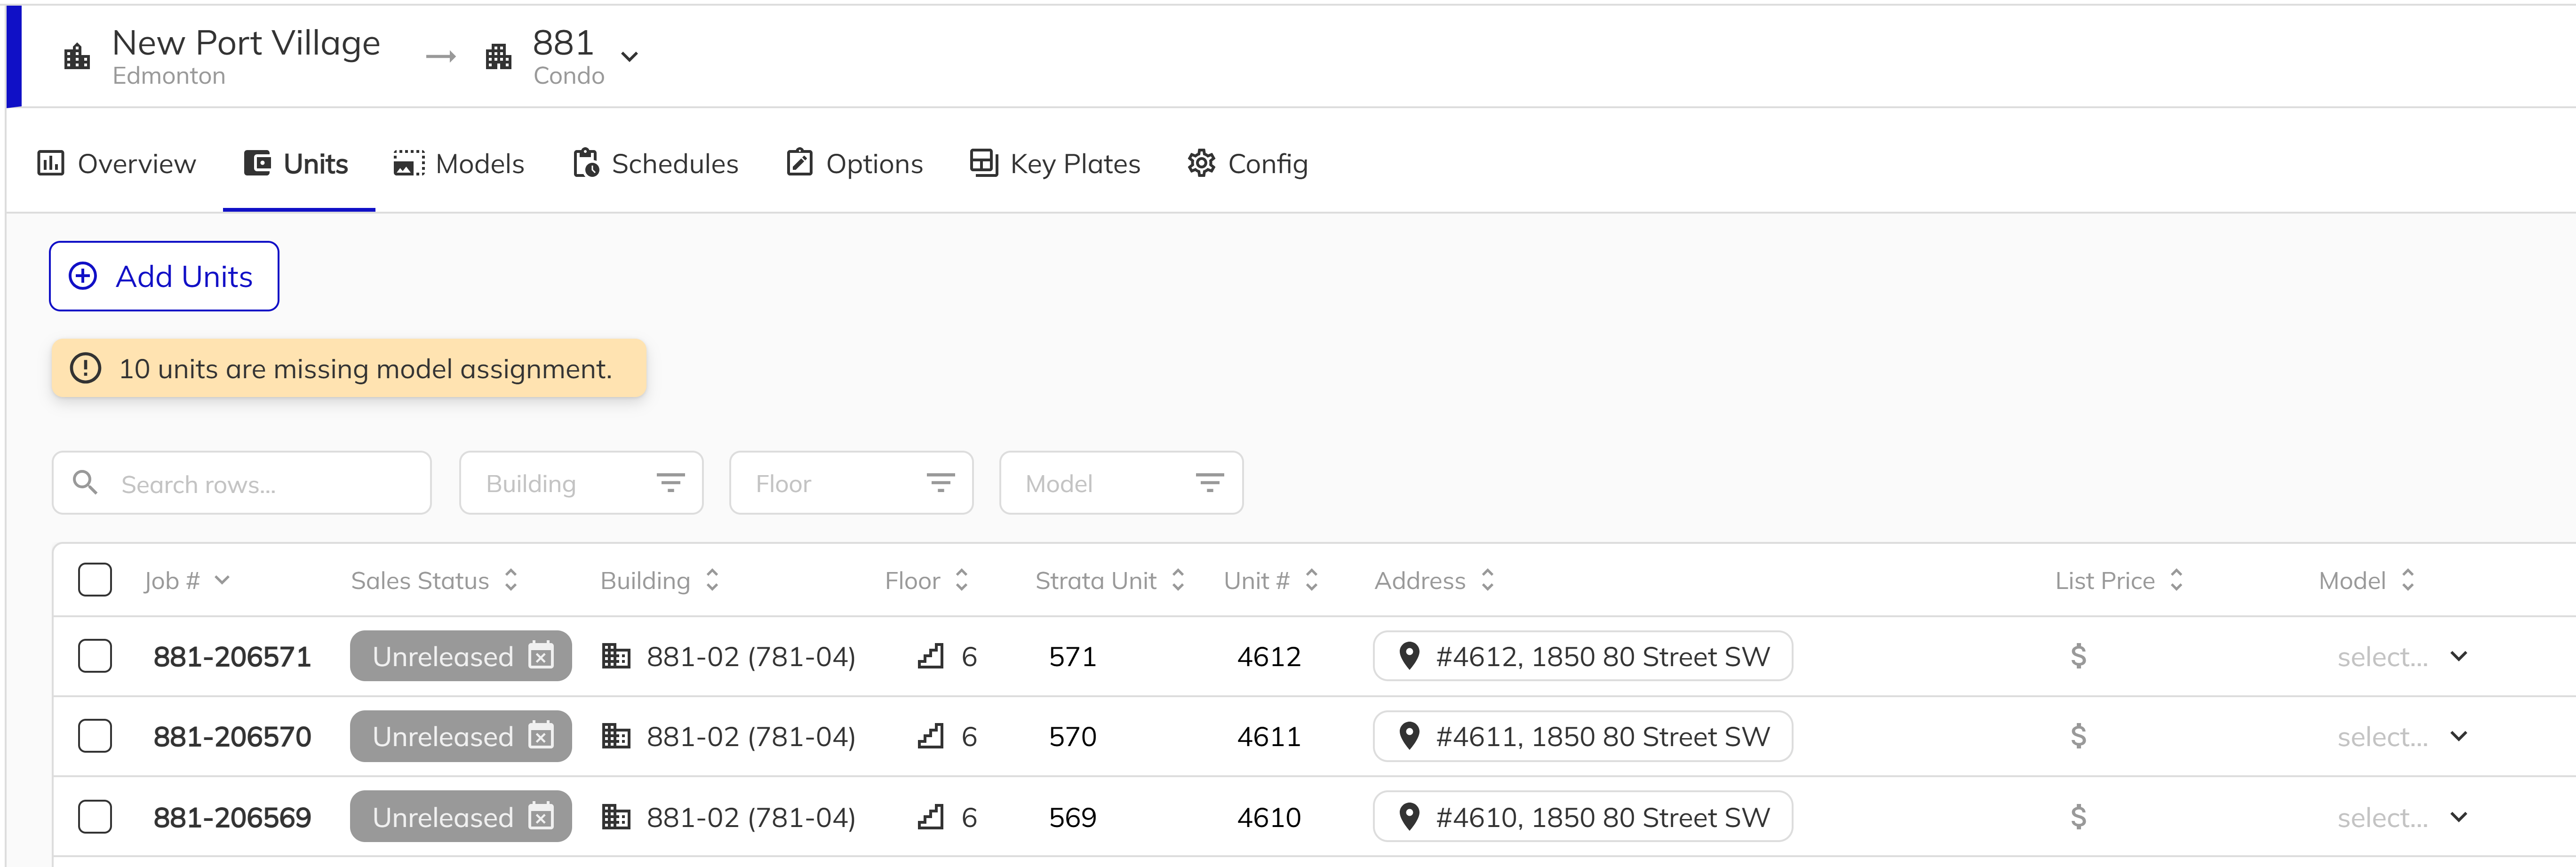
1. Open the Units Tab
Navigate to the Units tab within your project in the Workbench. You will see a grid of all units in the project, including their building, floor, address, and current model assignment.
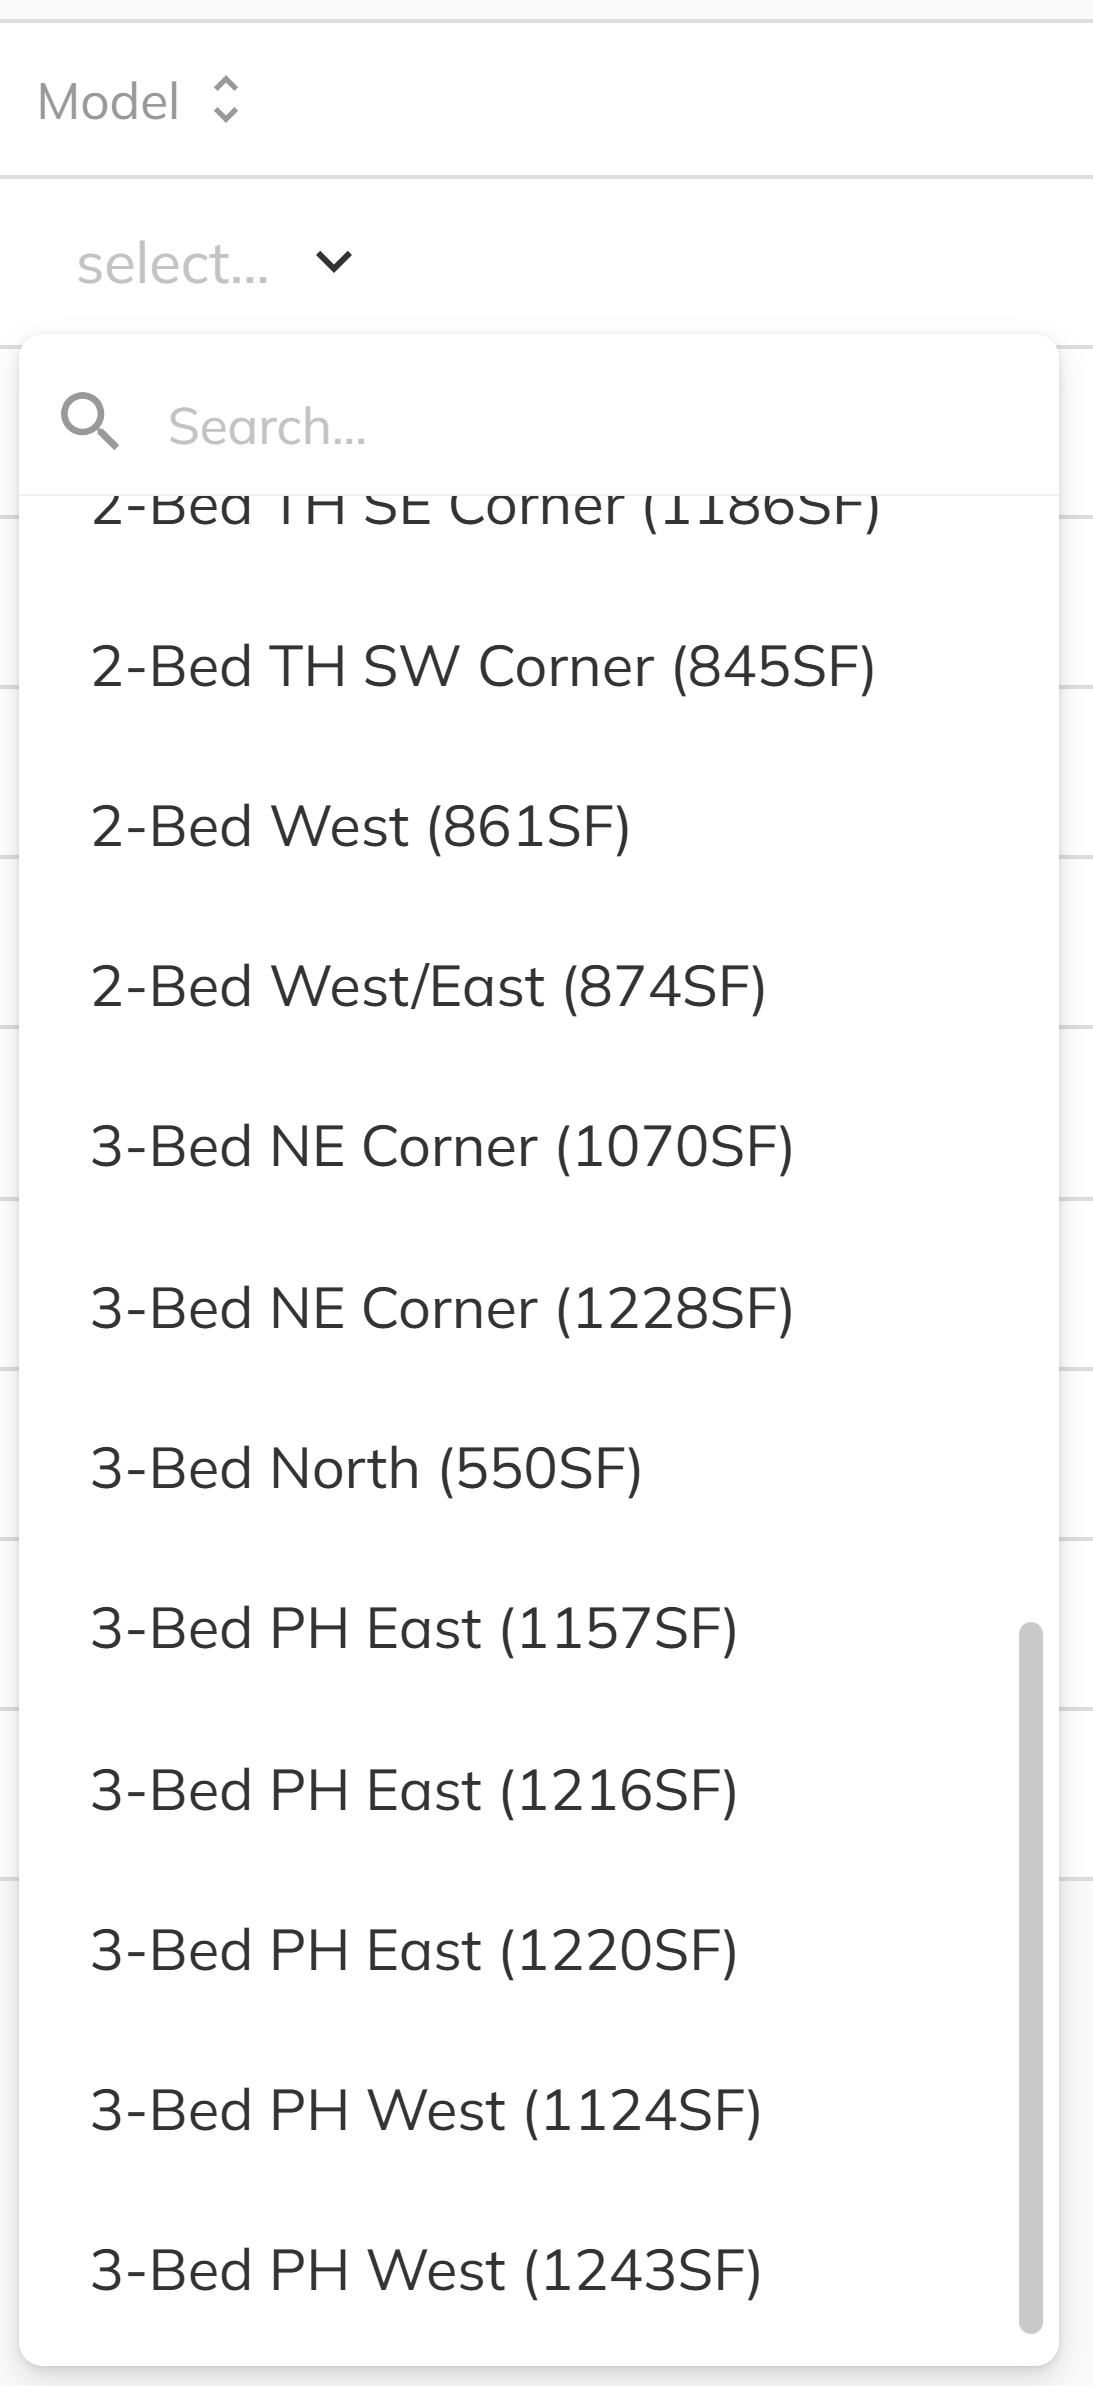
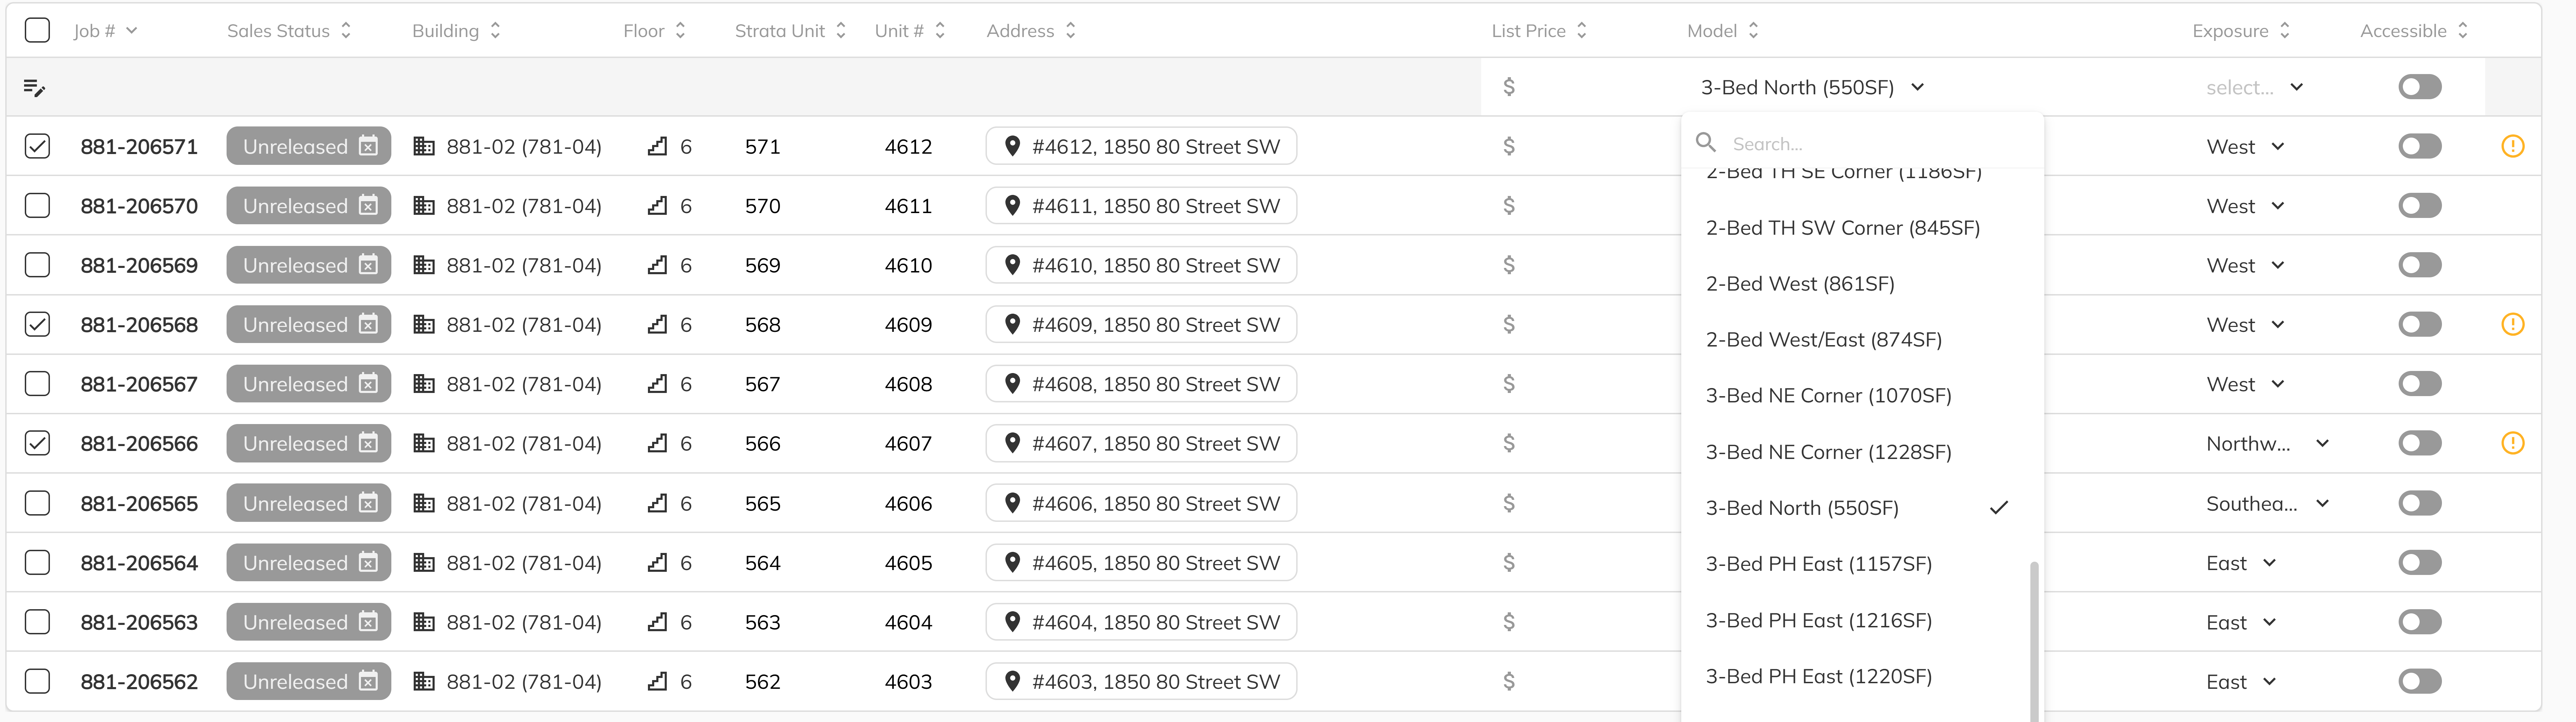
2. Assign a Model to a Unit
Locate the Model column in the units grid. Click on the model dropdown for a unit and select the appropriate model from the list. The dropdown displays all models in the project sorted by model name, and supports searching to quickly find the right one.
3. Mass Assign Models
To assign the same model to multiple units at once, select the units you want to update using the checkboxes in the grid. Then use the Mass Edit capability on the Model column to set the model for all selected units in one action. This is especially efficient when setting up a new building where many units share the same floor plan.
4. Save Your Changes
After assigning models, click Save to persist the changes. The system will update all modified units and their associated model data will begin appearing throughout the platform — in sales documents, the Client Portal, Customer Connect, and anywhere else unit details are referenced.

Units without a model assignment will display a warning. All units should have a model assigned before they are released for sale, as model data is required for document generation, pricing displays, and portal listings.
Congratulations! You have successfully created Unit Models for your project and assigned them to your inventory. Your units now carry all of the model's physical attributes, floor plans, and cover photos and purchaser-facing experiences across the platform. If you need to adjust individual unit attributes that differ from the base model, see the Unit Model Overrides guide.