Vendor Management: Create, Edit, and Assign Vendors
This guide walks you through the full vendor lifecycle in the Workbench—from creating a vendor company, configuring Trade and Supplier categories, assigning the vendor to a project, and adding contacts with roles that control how notifications and workflows behave across the app.
In this guide, we will cover:
- Creating a new vendor
- Editing vendor details
- Assigning a vendor to a project
- Understanding vendor categories (Trade and Supplier)
- Adding contacts and managing contact roles
How We Got Here
Your project has buildings and Units ready for construction coordination, and you need vendor companies assigned so work orders, inspections, and operational workflows reference the correct trade or supplier. Before any of that can happen, an administrator must create the vendor record, categorize it, assign it to the relevant project buildings, and link at least one contact with the appropriate role.
Building Your Roster
1. Navigate to the Vendors page
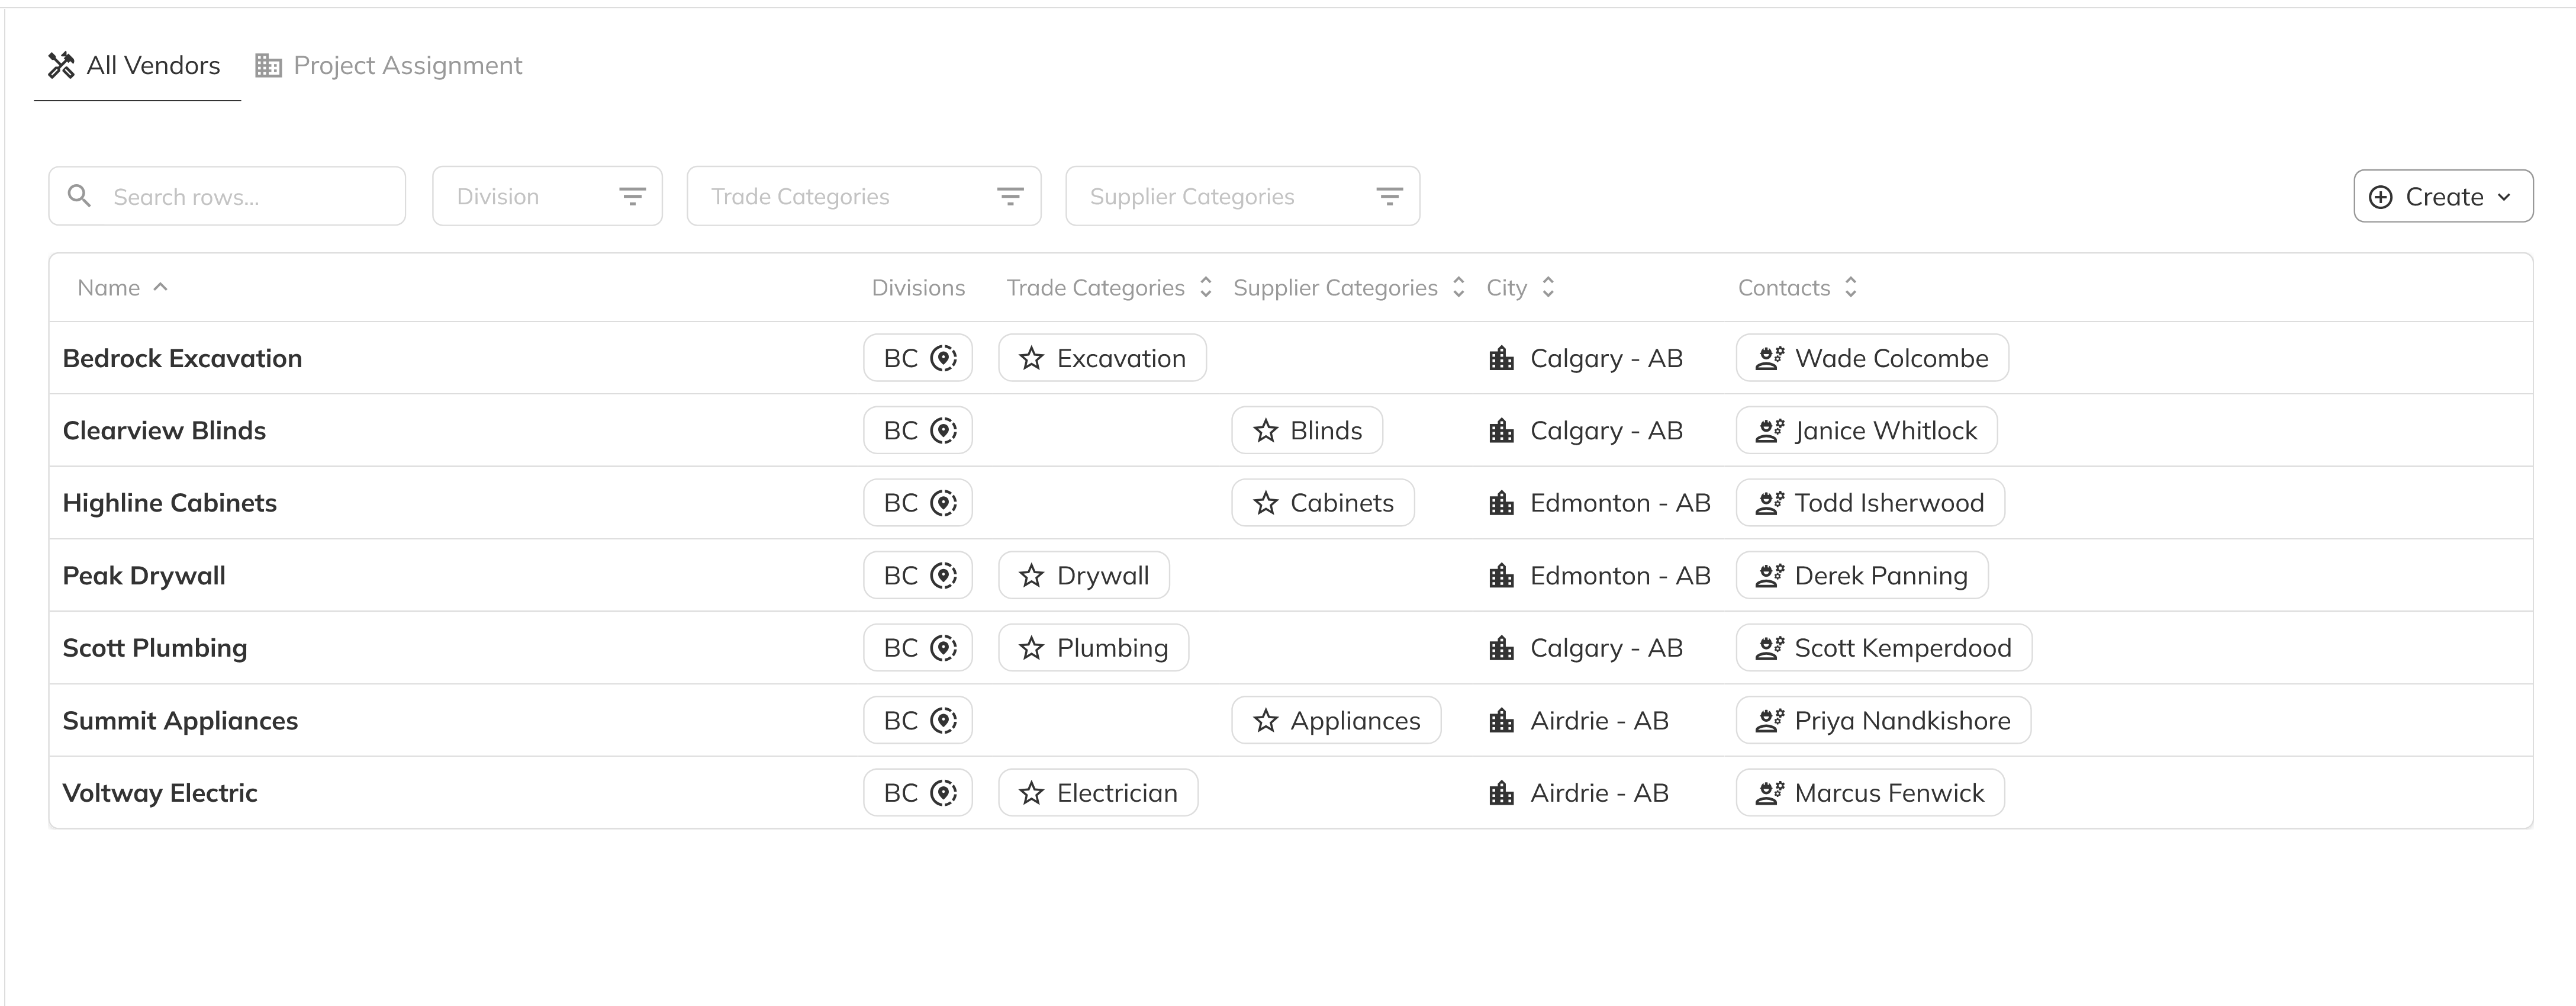
Open the Workbench and click Vendors in the side navigation. You will land on a page with two tabs: All Vendors and Project Assignment. Start on the All Vendors tab to see every vendor across all projects.
2. Click Create and choose New Vendor
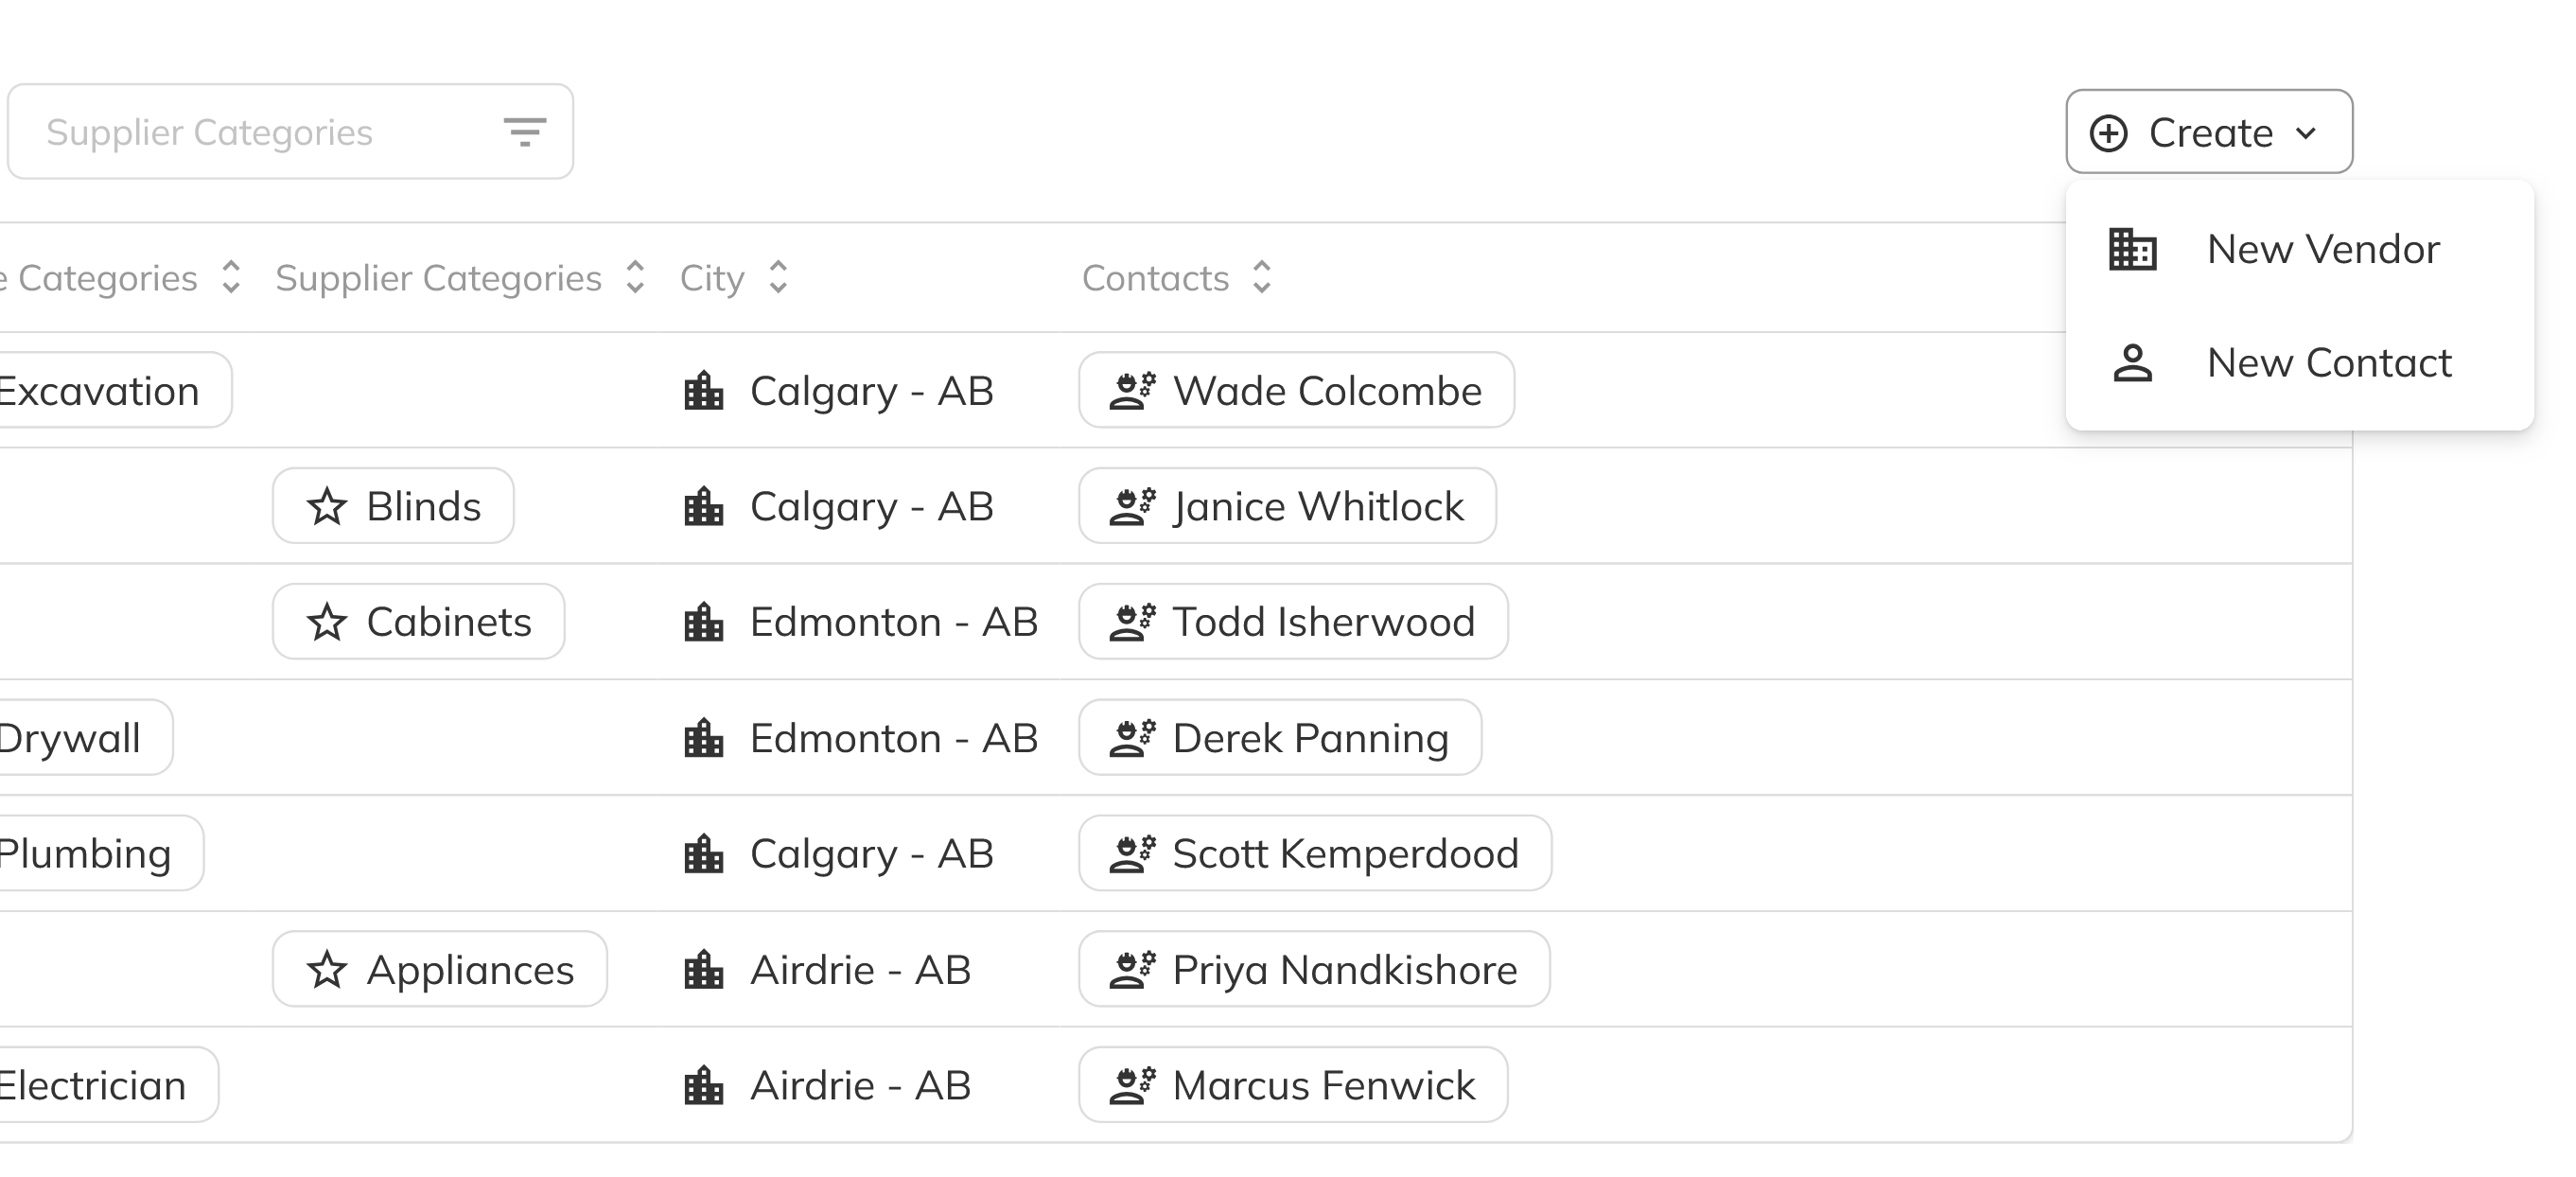
Click the Create button in the top-right corner and select New Vendor from the dropdown. A side panel opens with the vendor creation form.
3. Fill in the company details
Complete the required and optional fields for the vendor company:
| Field | Description |
|---|---|
| Name | The legal or operating name of the vendor (required) |
| Division(s) | Select which divisions this vendor belongs to |
| Country | Country of operation |
| Province | Province or state |
| City | City where the vendor is based |
| Phone | Main business phone number |
| Primary email address | |
| GST Number | Tax registration number (up to 50 characters) |
| Comments | Internal notes about the vendor |
The form also includes a full mailing address block: Unit Number, Street Number, Street Name, Street Type, Street Direction, and Postal Code.
4. Save the vendor
Click Save to create the vendor record. It will appear in the All Vendors grid, showing its name, divisions, categories, city, and contacts at a glance.
Fine-Tuning Vendor Details
1. Open the vendor detail panel
Click on any vendor row in the grid to open the detail side panel. From here you can view and edit all company information, categories, contacts, and project assignments.
2. Update company or address fields
Edit any of the company or address fields as needed—name, phone, email, GST number, comments, or mailing address—then save to update the record across all linked projects.
3. Archive or delete a vendor
From the panel actions menu you can Archive a vendor (soft-disable without losing history) or Delete it entirely if no assignments exist. Archived vendors no longer appear in assignment dropdowns but remain visible in historical records.
Wiring Up to a Project
1. Switch to the Project Assignment tab
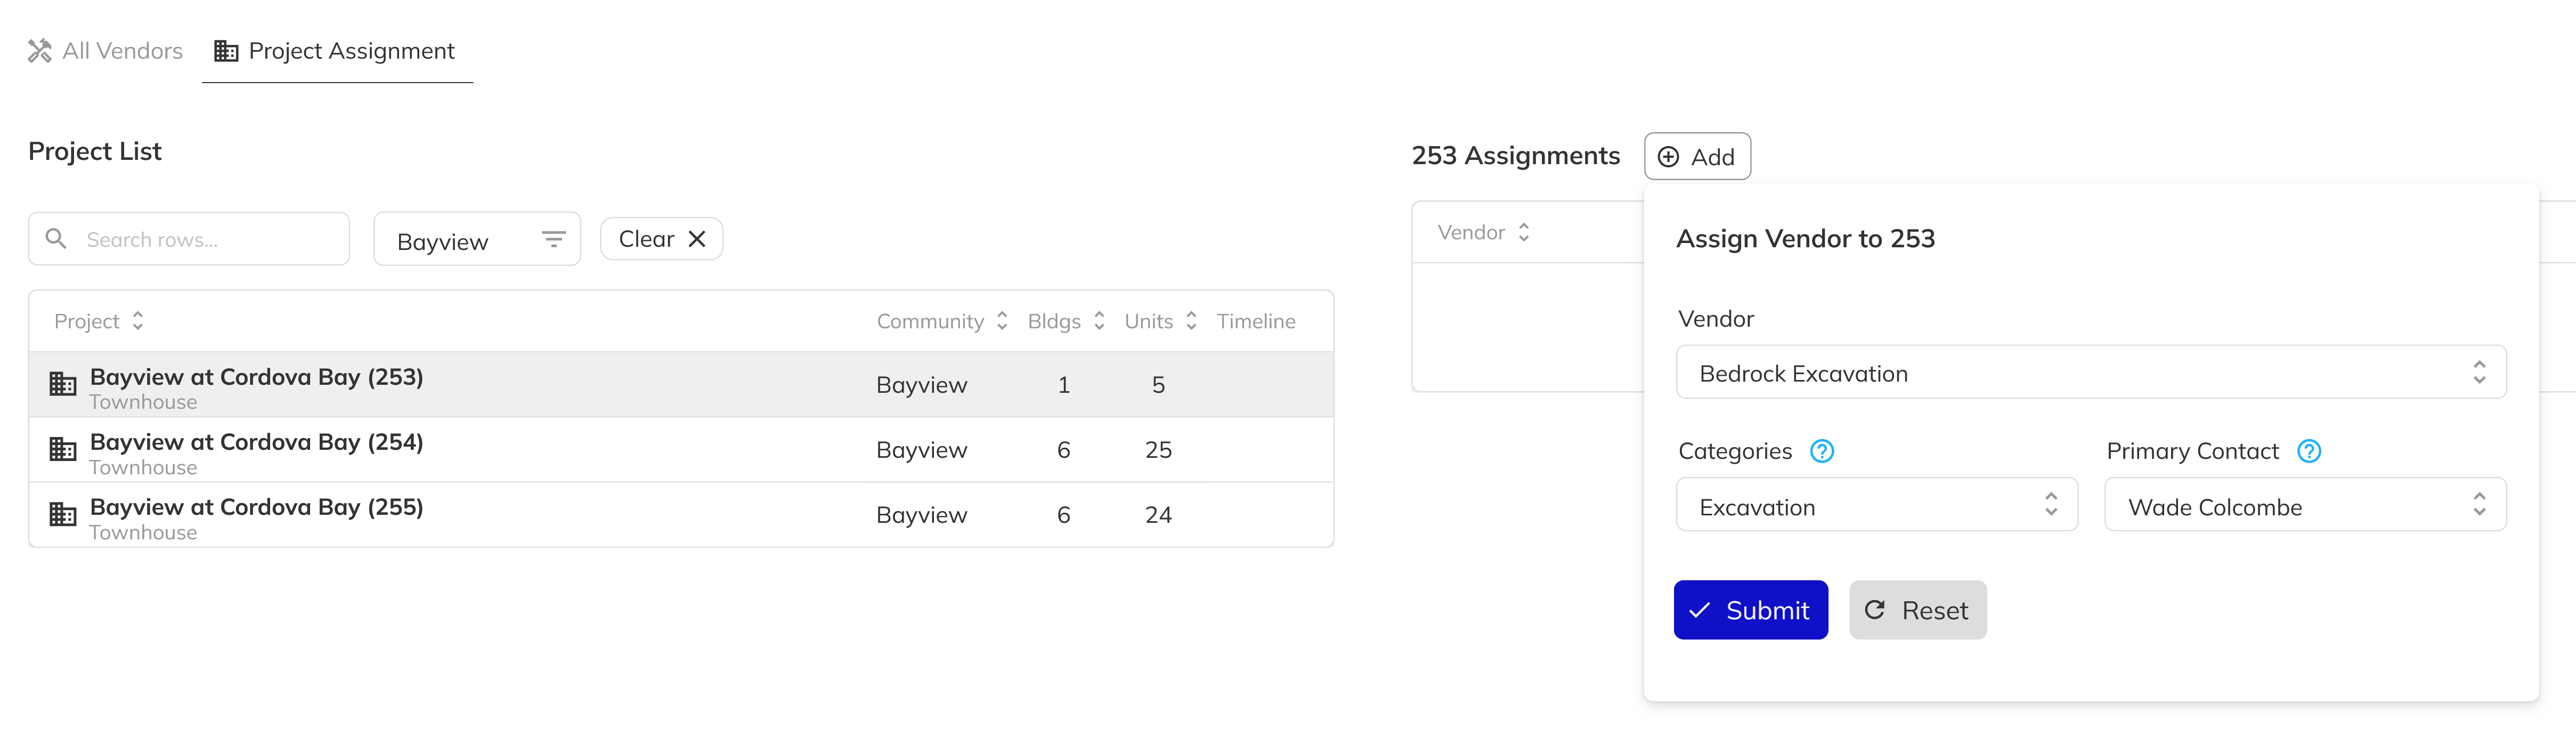
Click the Project Assignment tab on the Vendors page. You'll see a grid of all projects with columns for community, building count, Unit count, and timeline.
2. Select a project and click Assign Vendor
Click on the project row to expand it and view currently assigned vendors in the right panel. Click the Add button to open the assignment form.
3. Configure the assignment
Fill in the assignment fields:
| Field | Description |
|---|---|
| Vendor | Select the vendor company (only unassigned vendors appear) |
| Categories | Choose which of the vendor's Trade and Supplier categories apply to this project |
| Primary Contact | Select from the vendor's linked contacts |
| Buildings | Toggle between "All Buildings" or select specific buildings |
When you assign a vendor to "All Buildings," the system creates an assignment record for every building in that project. If you select specific buildings, only those are linked.
4. Verify the assignment
After saving, the vendor appears in the project's assignment panel showing the vendor name, primary contact, linked categories, and assigned buildings. You can remove or modify assignments from the row action menu.
Categories and Suppliers
Vendor categories are user-defined labels that classify what a vendor does. Every category belongs to one of two types:
| Type | Purpose |
|---|---|
| Trade | Represents a construction trade the vendor performs (e.g., Electrical, Plumbing, Framing) |
| Supplier | Represents a material or product the vendor supplies (e.g., Lumber, Fixtures, Appliances) |
1. Managing categories in Admin
Categories are created and maintained in Admin → Domain → Vendor Categories. From that page you can add, rename, or remove Trade and Supplier categories that become available to all vendors.
2. Linking categories to a vendor
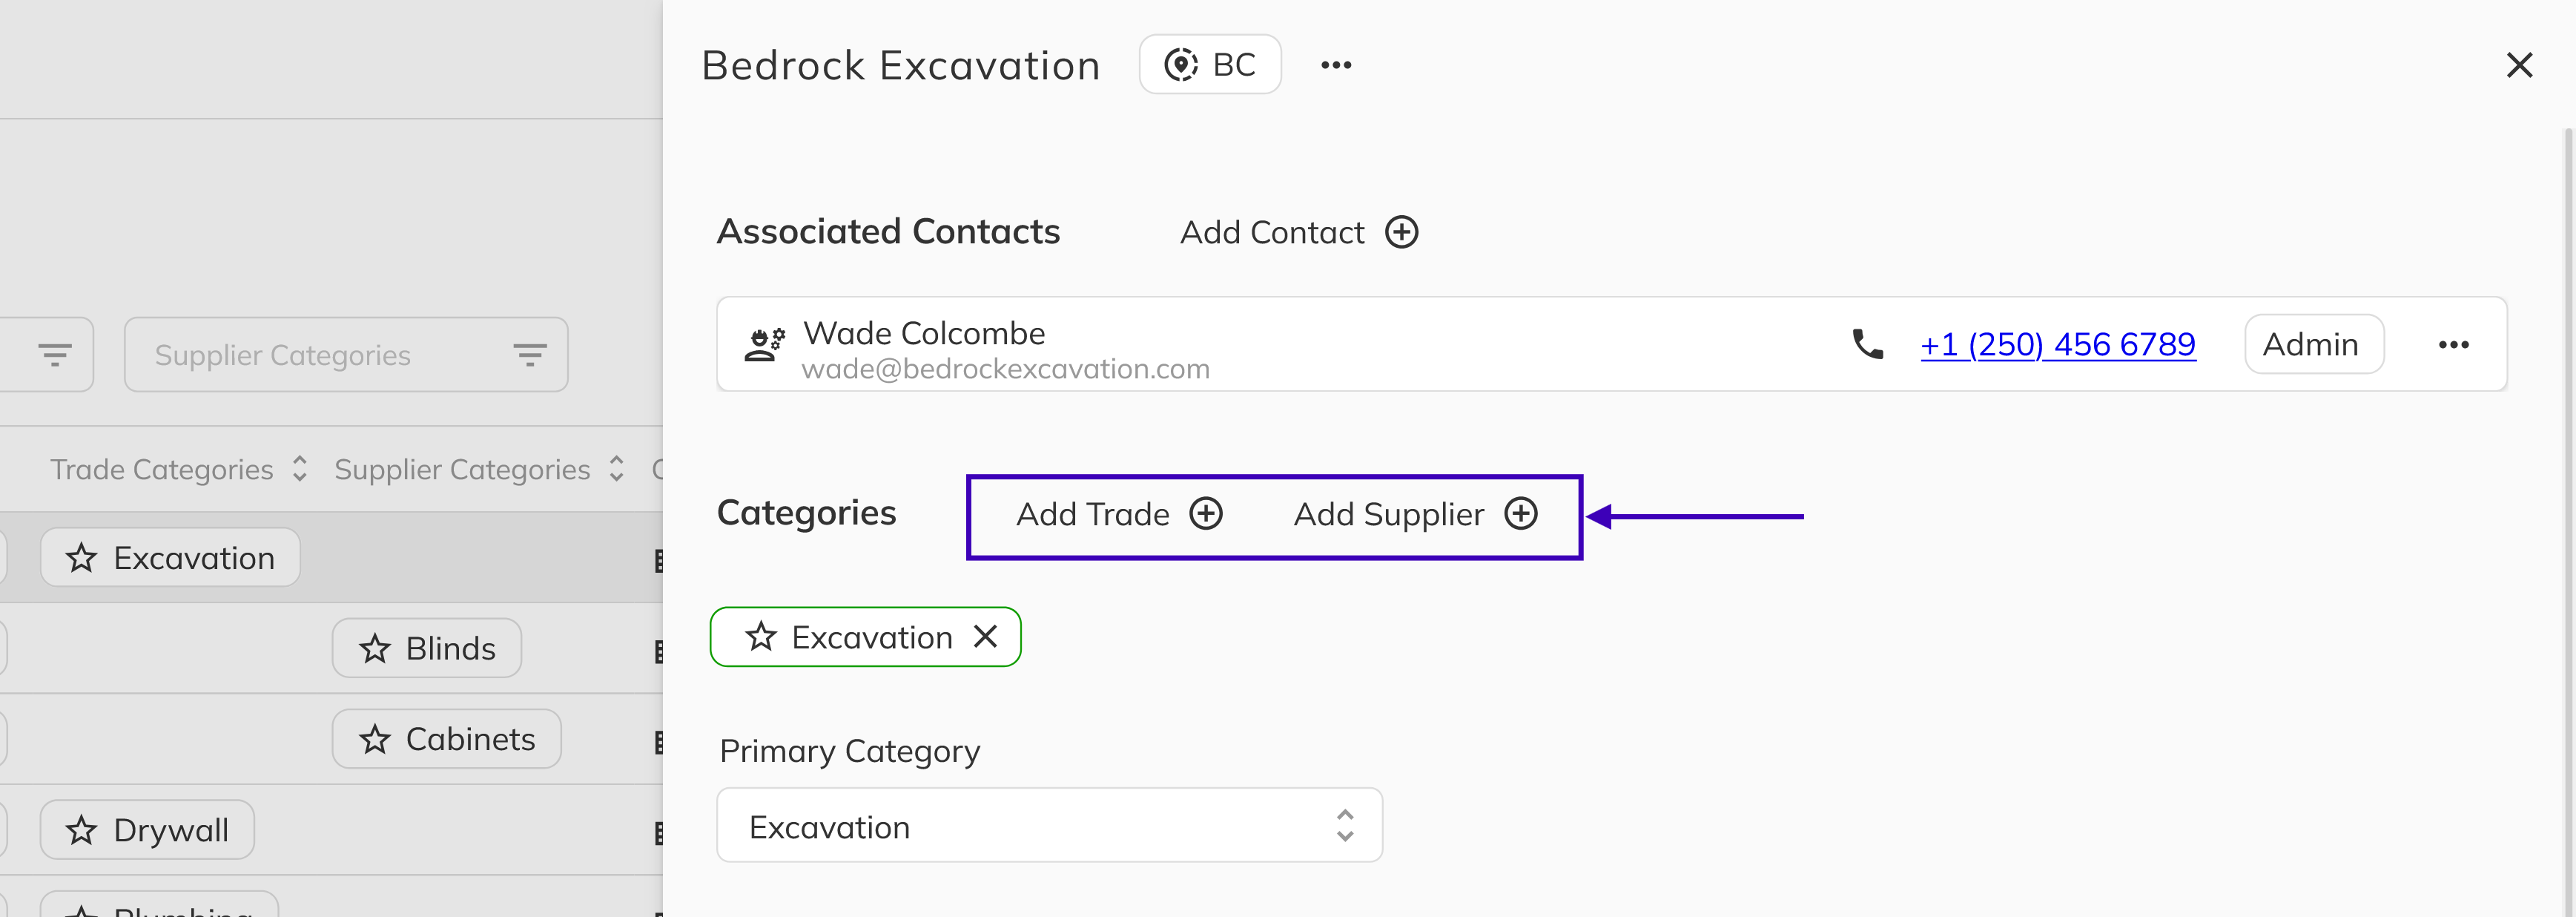
On the vendor detail panel, use the Add Trade or Add Supplier dropdowns to attach categories. You can mark one category as the Primary Category, which is highlighted with a star icon in the vendor grid and used as the default in assignment workflows.
3. How categories flow into work orders and inspections
When you assign a vendor to a project, you choose which categories apply. Those categories then appear in Inspection Templates and Work Orders:
- Inspection Template Items reference a
VendorCategoriesIdso the system knows which trade is responsible for each checklist item. - Work Orders sent to vendors use the vendor's primary contact and company name as the recipient, populating merge fields like
workOrder-recipientTitle(vendor company name) in generated documents.
This means keeping categories accurate directly impacts which vendor receives work orders and how inspection items are grouped by trade.
Avoid creating duplicate categories with slightly different names (e.g., "Electrical" vs "Electric"). A consistent category list makes filtering, reporting, and assignment much faster.
Contacts and Roles
1. Add a new contact to a vendor
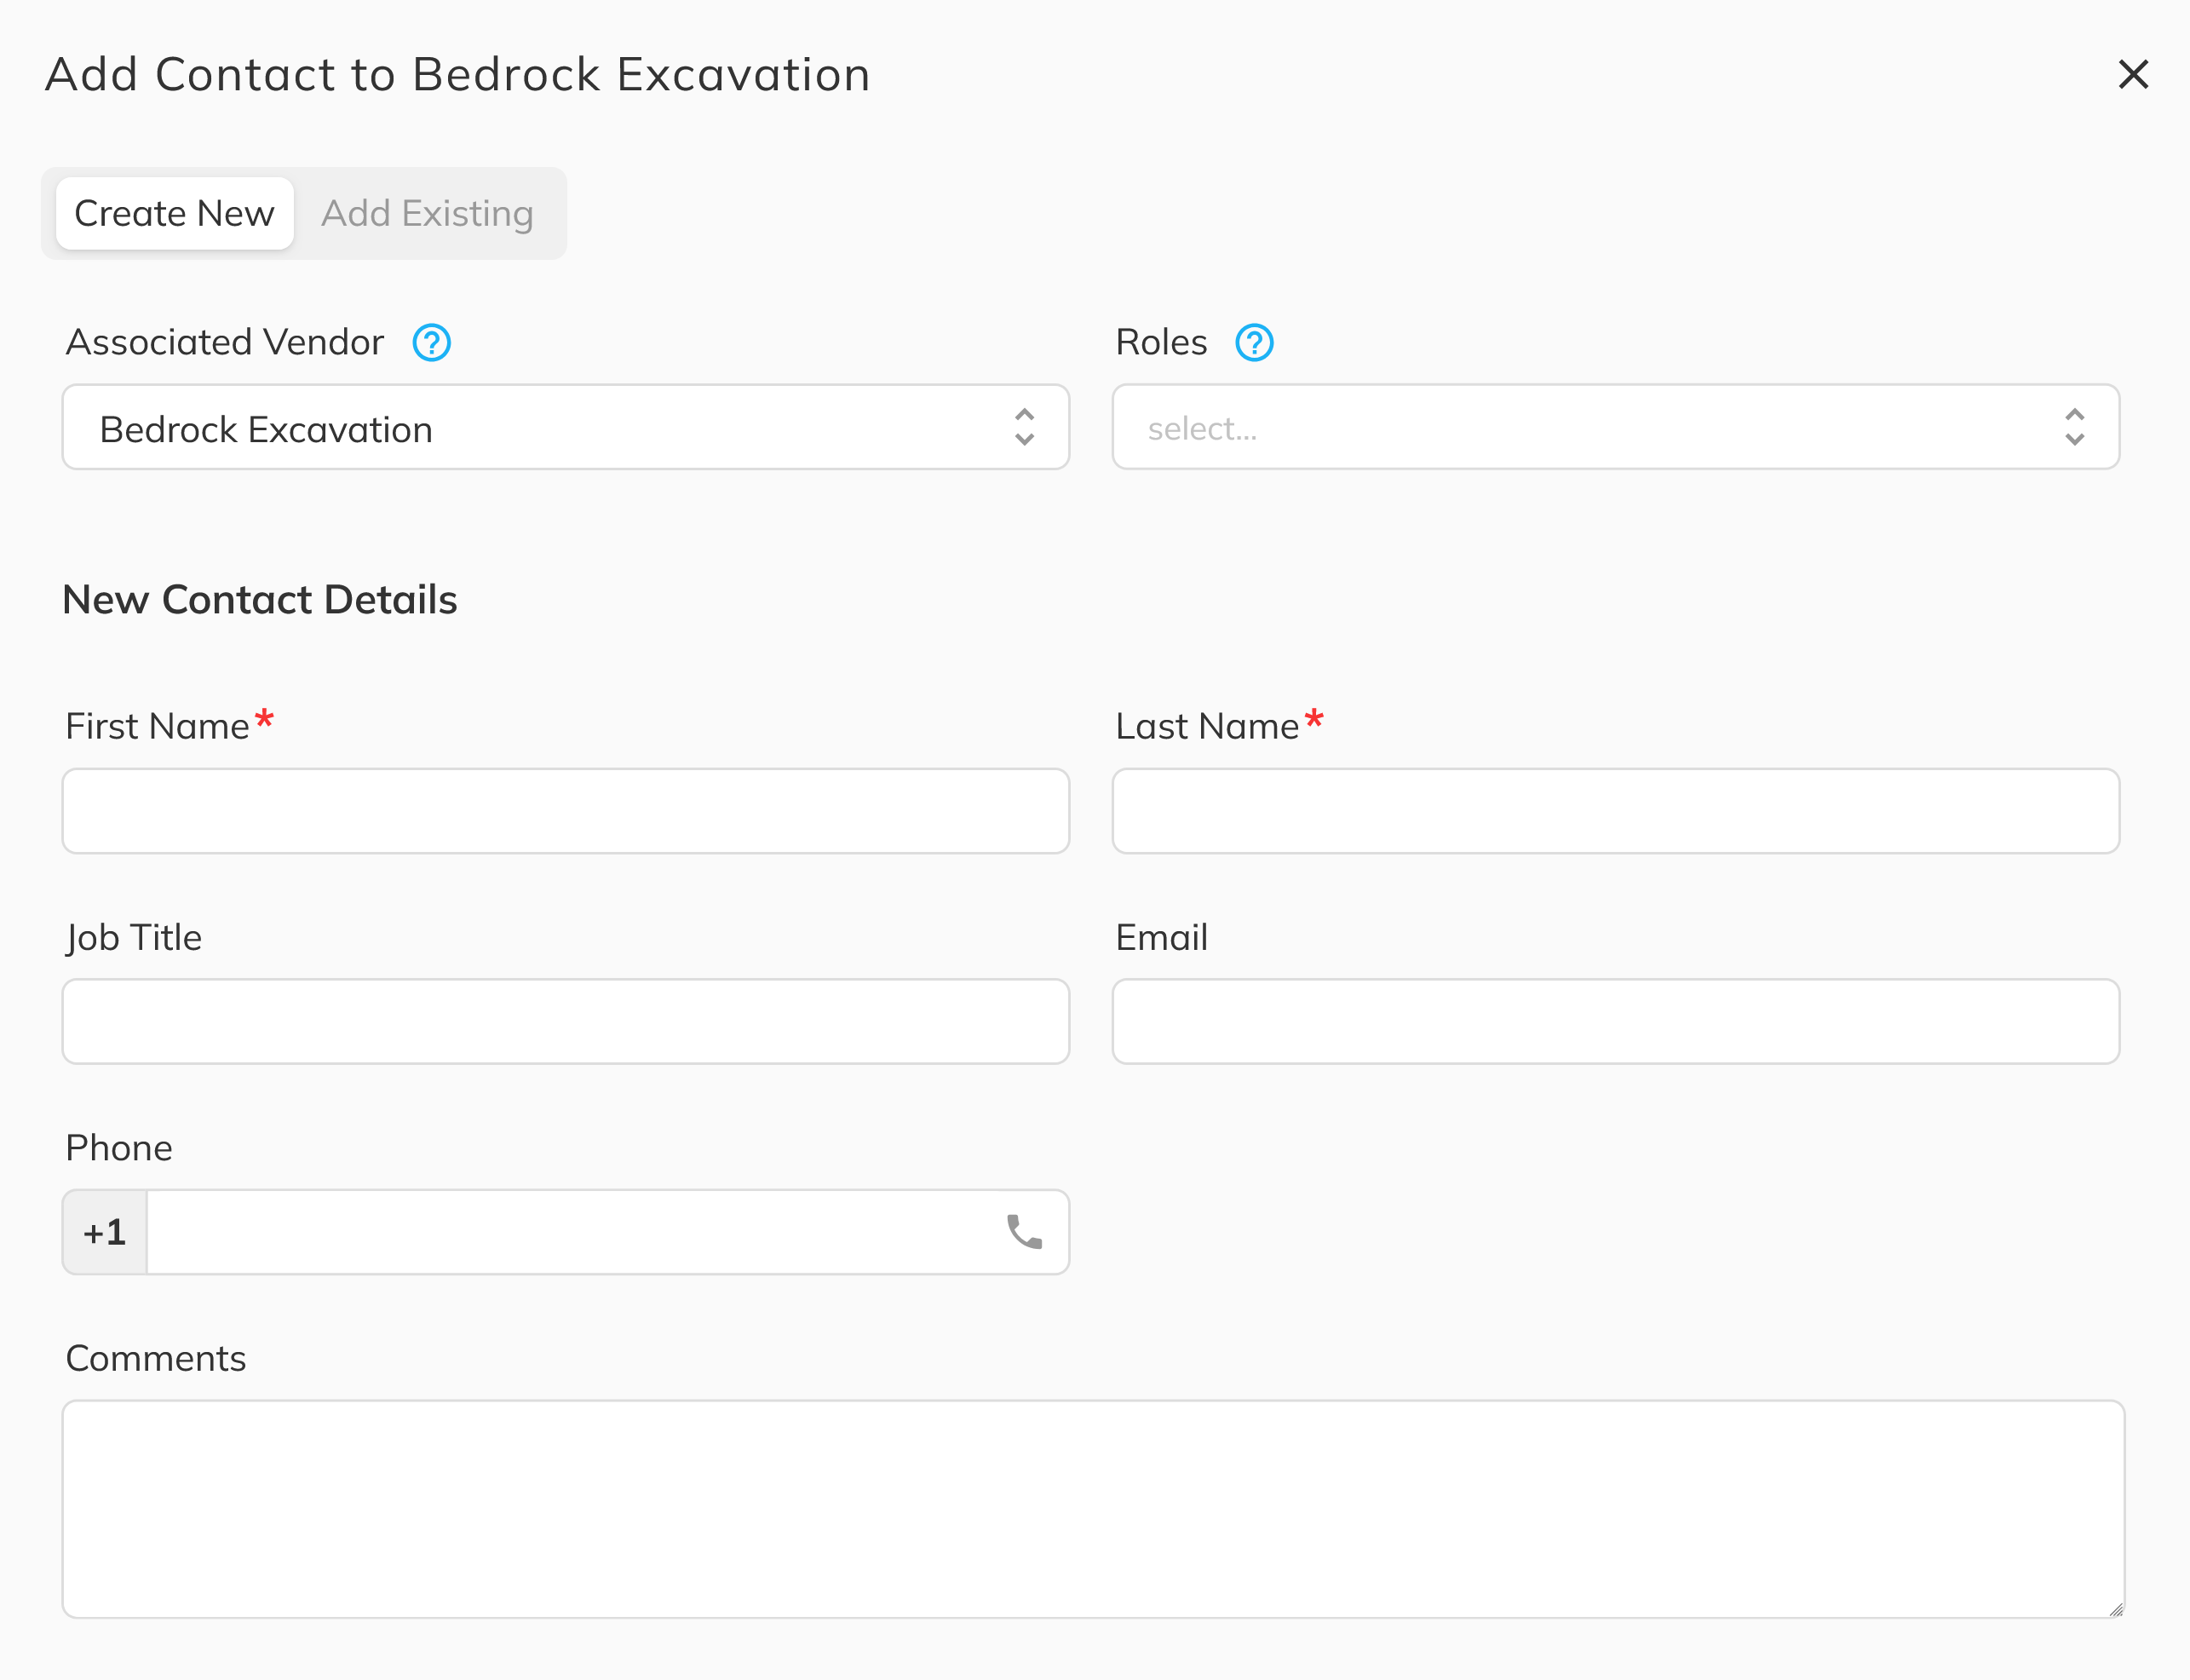
From the vendor detail panel, scroll to the Assocaited Contacts section and click Add Contact. A side panel will appear with Create New (or Add Existing to link an already-known contact). Fill in the contact form:
| Field | Description |
|---|---|
| First Name | Required |
| Last Name | Required |
| Job Title | Position at the vendor company |
| Must be unique across the system | |
| Phone | Cell or work phone |
| Comments | Internal notes |
2. Assign contact roles
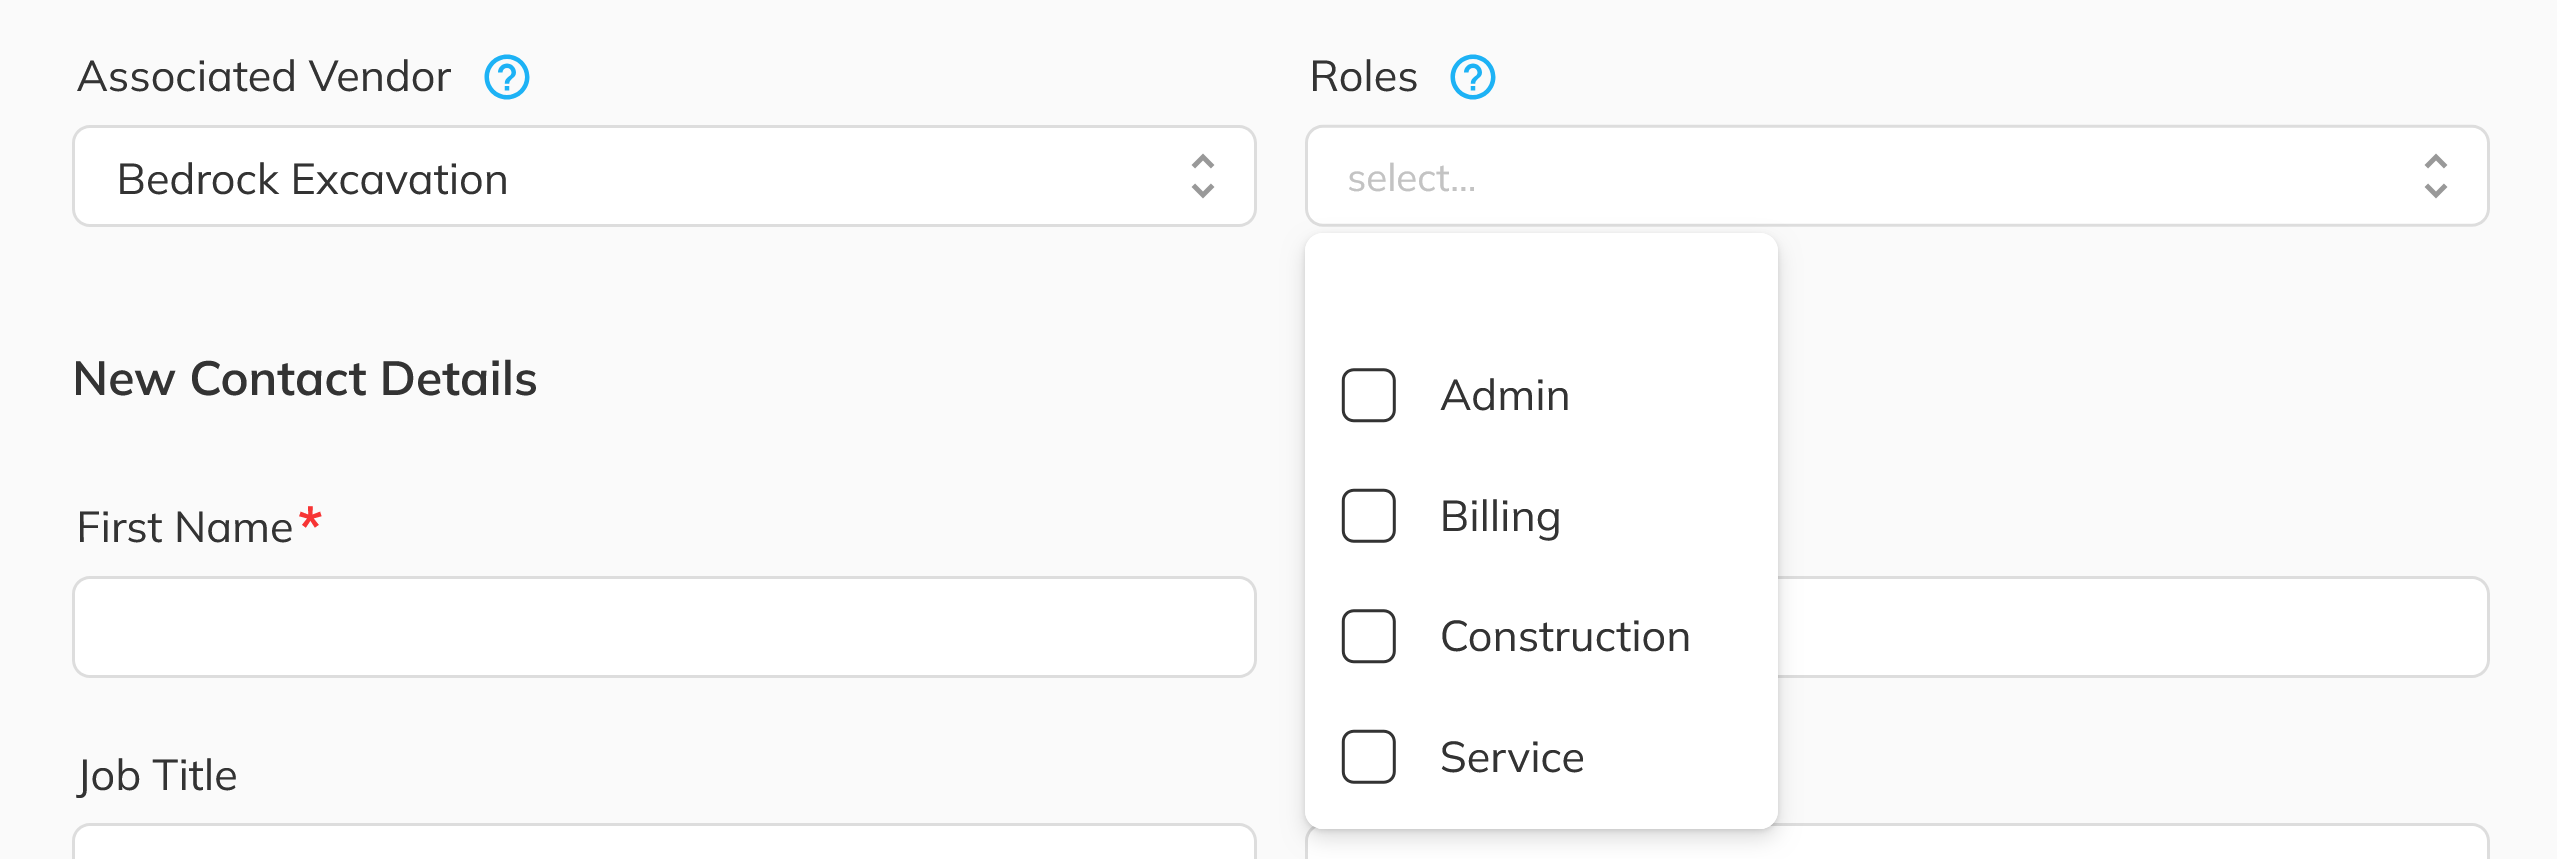
When creating or editing a contact, select one or more roles. The available roles are:
| Role | Purpose |
|---|---|
| Admin | Full access to the vendor portal; receives administrative notifications |
| Billing | Receives invoicing and payment communications |
| Construction | Primary point of contact for on-site coordination and work orders |
| Service | Handles warranty and service-related requests |
A single contact can hold multiple roles (e.g., a small vendor's owner might be both Admin and Construction).
3. How roles associate with the rest of the app
Contact roles determine defaults, functionality, and permissions across the system:
- Work Orders are sent to the contact with the Construction role by default.
- Billing contacts receive payment-related correspondence.
- Admin contacts have access to the vendor portal for managing their own company information.
- Service contacts are routed warranty and post-construction requests.
When you assign a vendor to a project and select a Primary Contact, that contact becomes the default recipient for project-level communications. Role-based routing then refines which specific person receives each type of notification.
When a vendor's personnel changes, update the contact roles immediately. Outdated contacts can cause work orders and billing to reach the wrong person.
Congratulations! You have successfully learned how to manage vendors in the Workbench—from creating and editing vendor records, assigning them to projects at the building level, organizing them with Trade and Supplier categories, and configuring contacts with roles that drive notifications and workflow routing across the app. Your vendor structure is now ready to support work orders, inspections, and operational coordination.