Property Locations, Items & Deficiency Tags
This guide walks you through the full configuration of property locations, property items, and deficiency tags in the Workbench Admin. These three elements form the backbone of how inspections are organized — locations define where something is, items define what is being inspected, and deficiency tags categorize what went wrong. Together with associations and hierarchy features like child items, multi-zone, and multi-instance, they give you precise control over inspection structure.
In this guide, we will cover:
- Creating, editing, and deleting property locations
- Creating, editing, and deleting property items
- Adding child items and understanding their purpose
- Creating, editing, and deleting deficiency tags
- Linking locations, items, and tags through associations
- Understanding multi-zone vs. multi-instance locations
- Managing link items between locations and items
How We Got Here
Your project has buildings and units ready for inspections, and you need a structured way to define the areas being inspected, the specific elements within those areas, and the types of deficiencies that may be found. Before inspections can be created with proper structure, an administrator must set up property locations, property items, and deficiency tags — then link them together through associations.
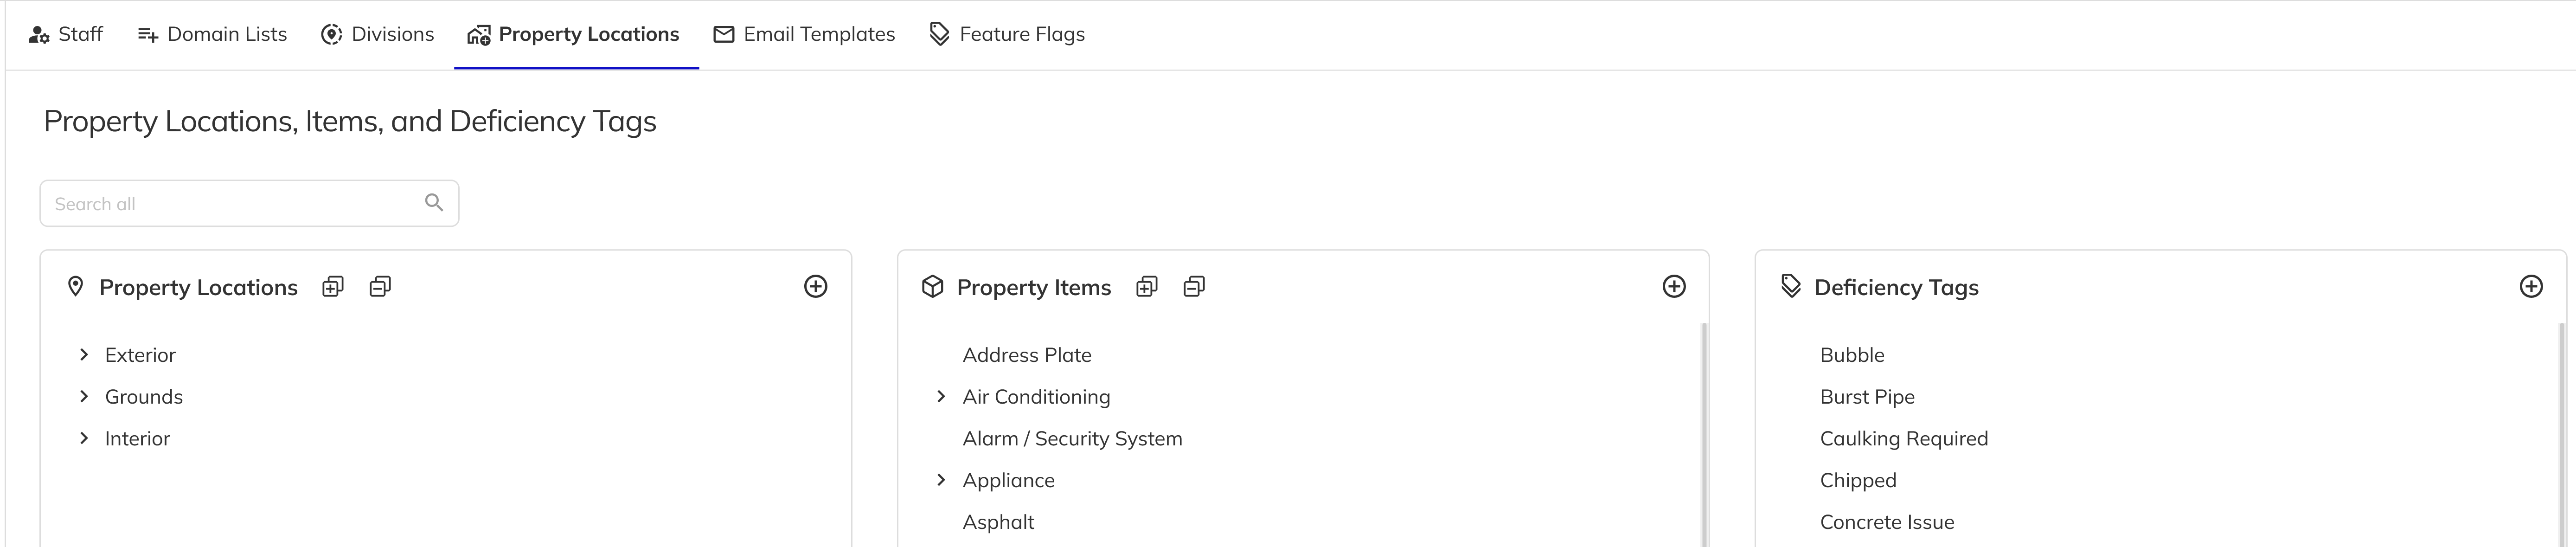
Navigate to Admin → Property Locations in the Workbench side navigation. You will see a page with three side-by-side tree panels: Property Locations, Property Items, and Deficiency Tags. A fourth Associations panel appears when you select an item in any tree.
Setting Up Property Locations
Property locations represent the physical areas within a unit or building where inspections take place — for example, Kitchen, Bathroom, Yard, or Garage.
1. Create a new property location
Click the + button at the top of the Property Locations panel. A popover will appear prompting you to enter a name for the new location. Type the location name and press Enter or click the confirmation button. The location will appear as a root-level item in the tree.
2. Add a child location
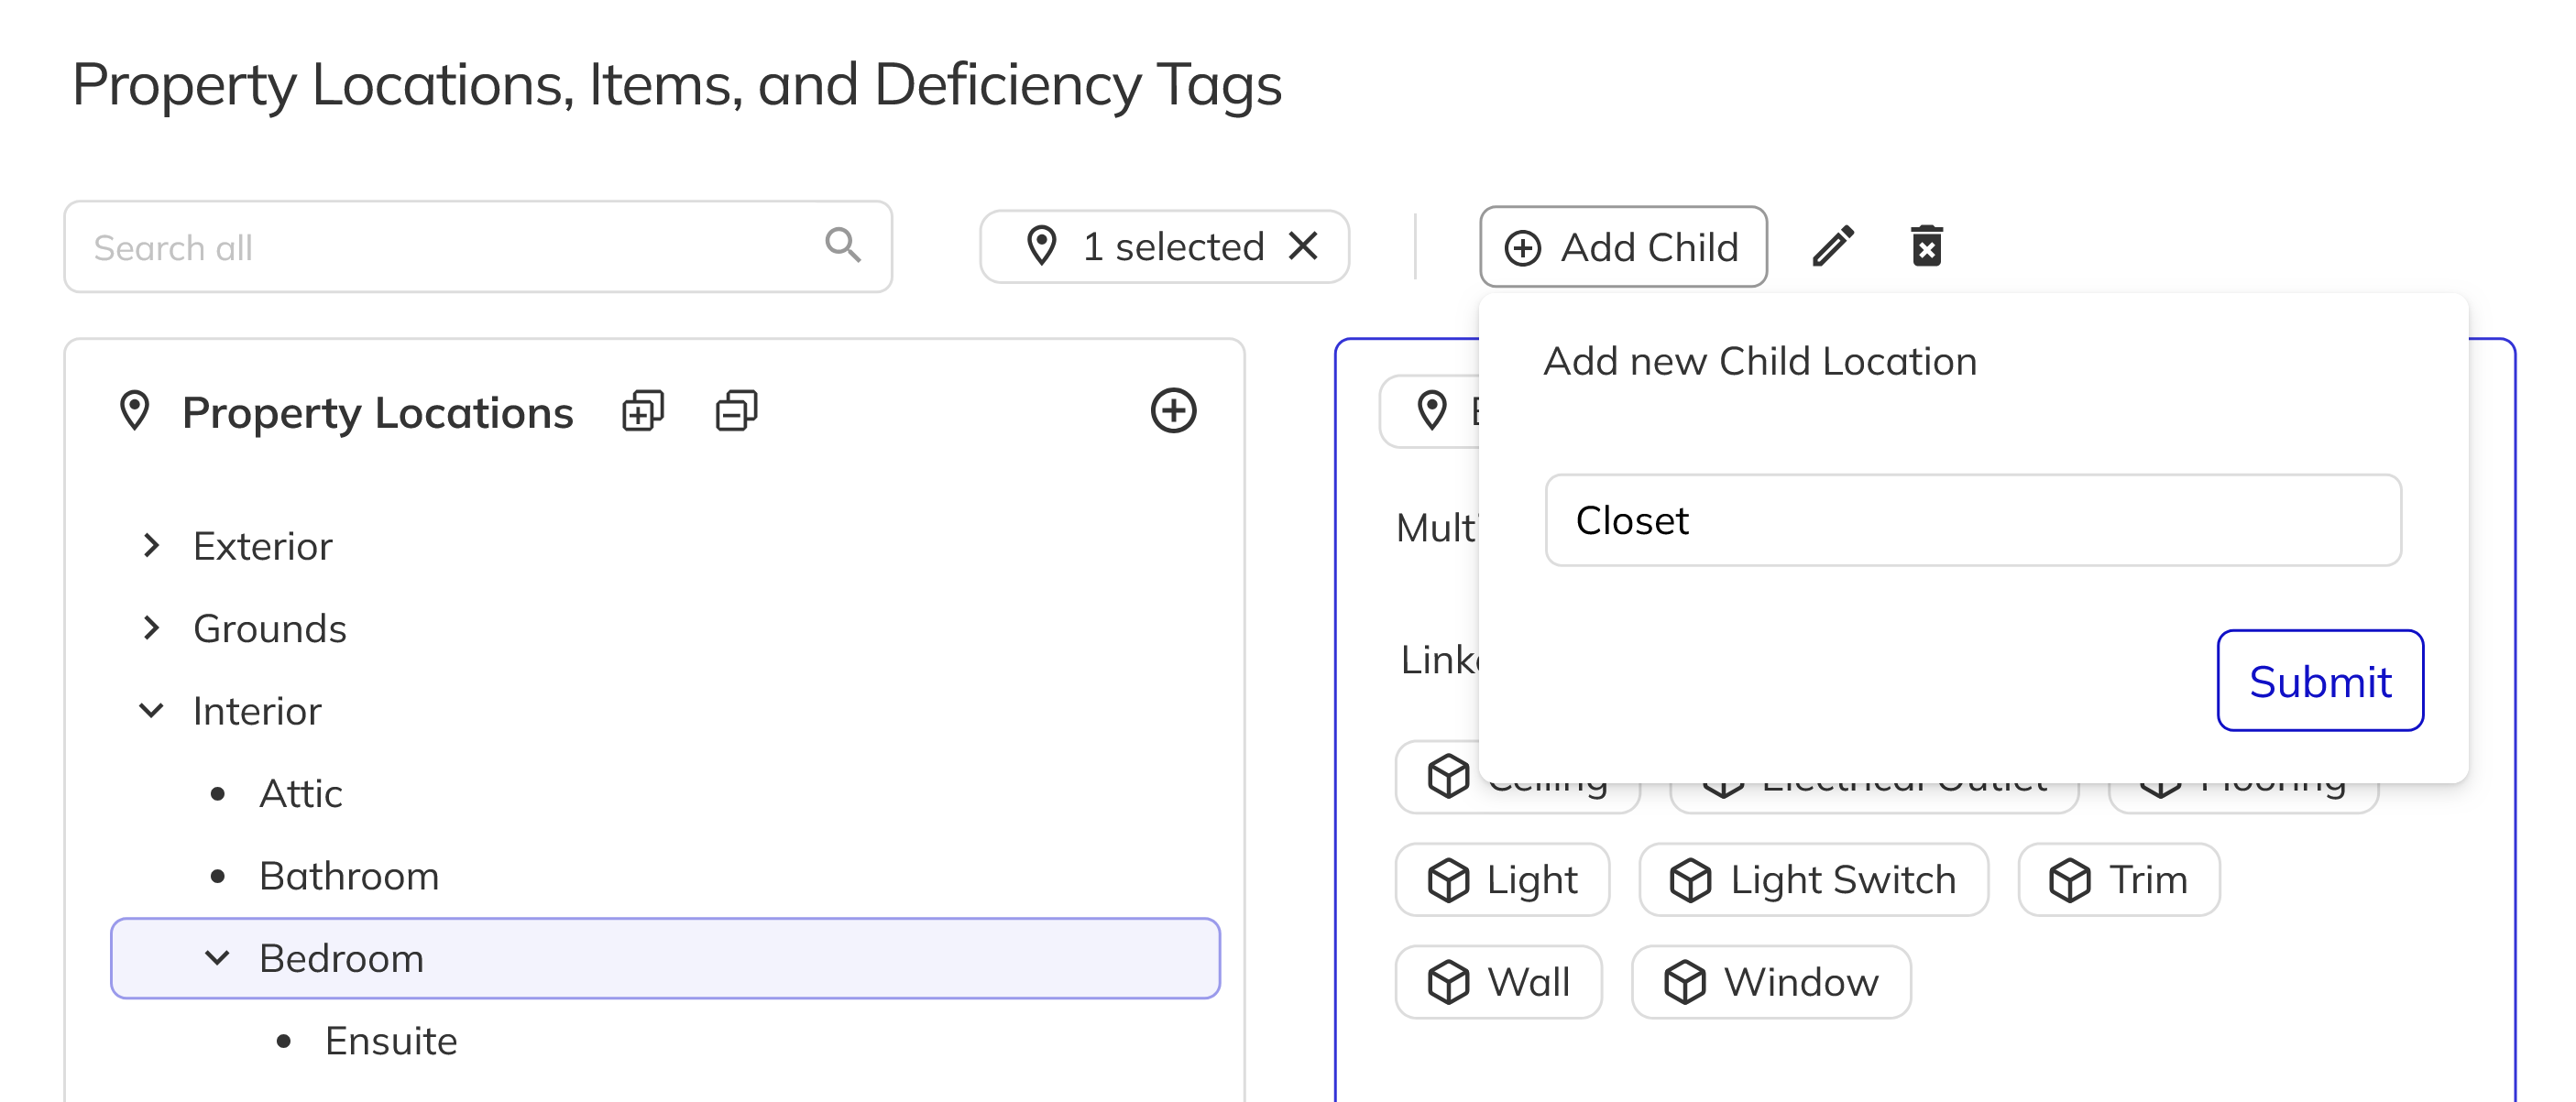
Select an existing location in the tree. The selection toolbar will appear above the panels. Click Add Child to create a nested location underneath the selected parent. Enter the child location name in the popover and confirm.
Child locations allow you to create hierarchical breakdowns — for example, "Bedroom" can contain children like "Ensuite" and "Closet".
3. Rename a property location
Select the location you want to rename in the tree. Click Rename in the selection toolbar. An edit popover will appear with the current name pre-filled. Modify the name and confirm. Duplicate names among siblings are not permitted.
4. Delete a property location
Select the location to remove and click Delete in the selection toolbar. A confirmation dialog will ask you to confirm the deletion. Deleting a location will also remove all of its child locations and their associations.
Setting Up Property Items
Property items represent the specific elements within a location that are inspected — for example, "Countertop", "Faucet", "Light Fixture", or "Paint".
1. Create a new property item
Click the + button at the top of the Property Items panel. Enter the item name in the popover and confirm. The item will appear as a root-level entry in the items tree.
2. Add a child item
Select an existing property item and click Add Child in the selection toolbar. Enter the child item name and confirm.
Child items allow you to break down broad items into specific sub-components. For example, "Plumbing" could have children like "Hot Water Line", "Cold Water Line", and "Drain". This creates a structured hierarchy that makes deficiency tracking more precise.
Important: Only root-level items (those without a parent) can be directly linked to locations. Child items inherit their parent's location associations — they cannot have their own independent location links.
3. Rename a property item
Select the item to rename, click Rename in the toolbar, modify the name, and confirm.
4. Delete a property item
Select the item and click Delete. Confirm in the dialog. Deleting an item removes its child items and all associated links.
Setting Up Deficiency Tags
Deficiency tags categorize the type of issue found during an inspection — for example, "Scratched", "Missing", "Damaged", or "Incorrect Colour". Tags are flat (no hierarchy) and can be linked to multiple property items.
1. Create a new deficiency tag
Click the + button at the top of the Deficiency Tags panel. Enter the tag name in the popover and confirm.
2. Rename a deficiency tag
Select the tag, click Rename, update the name, and confirm.
3. Delete a deficiency tag
Select the tag and click Delete. Confirm the deletion in the dialog. Removing a tag will unlink it from all associated items.
Associations
Associations define the relationships between locations, items, and tags. When you select any single item in one of the three trees, the Associations panel appears as a fourth column. The content of this panel changes depending on what type of element is selected.
Location Associations
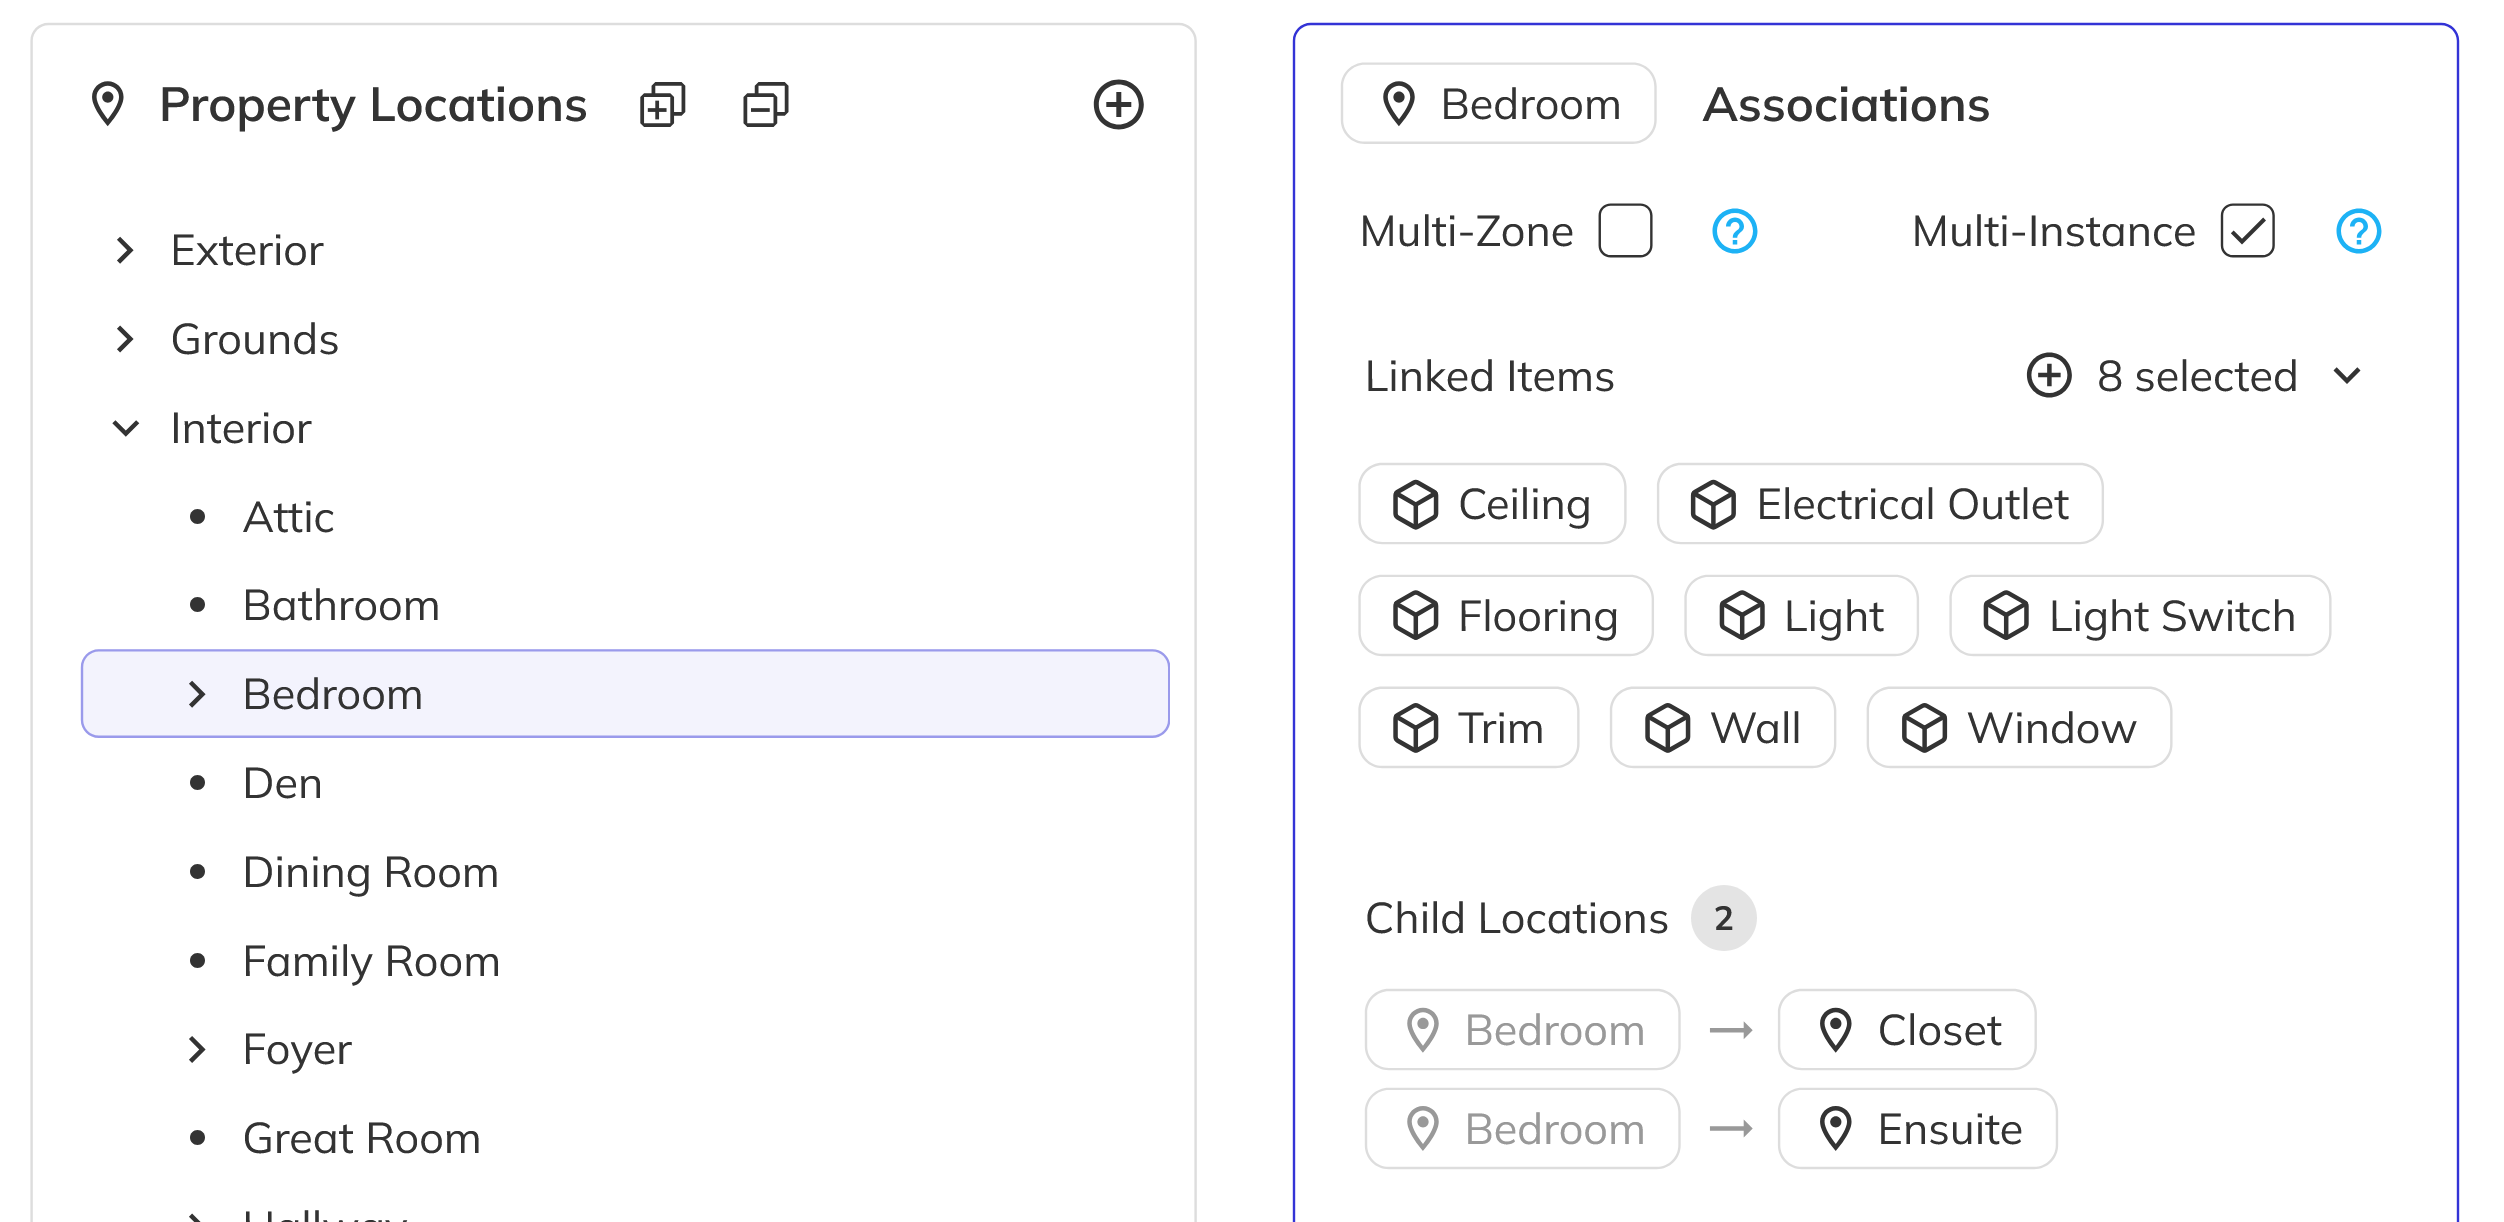
When a property location is selected, the Associations panel shows:
- Multi-Zone / Multi-Instance toggles — covered in the next section
- Linked Items — a checkbox dropdown to link or unlink root-level property items to this location
- Child Locations — a read-only view of any nested locations beneath the selected one
1. Link items to a location
Select a property location in the tree. In the Associations panel, open the Linked Items dropdown. Check the items that should be available at this location and uncheck any you want to remove.
Item Associations
When a property item is selected, the Associations panel shows:
- Child Items — read-only pills showing any children nested under this item
- Linked Locations — a checkbox dropdown to link this item to locations (only available for root-level items)
- Linked Deficiency Tags — a checkbox dropdown to link deficiency tags to this item
2. Link deficiency tags to an item
Select a property item in the tree. In the Associations panel, open the Linked Deficiency Tags dropdown. Check the tags that apply to this item.
Tag Associations
When a deficiency tag is selected, the Associations panel shows:
- Linked Items — a checkbox dropdown showing which items this tag is associated with
3. Link items to a tag
Select a deficiency tag in the tree. In the Associations panel, open the Linked Items dropdown to associate items with this tag. This is the mirror view of linking tags from the item side.
Multi-Zone vs. Multi-Instance
These two features allow a single property location to represent multiple areas or copies within a unit. They are mutually exclusive — enabling one will disable the other.
Multi-Zone
When Multi-Zone is enabled on a location, you can apply named zones to further specify where within that location an issue or item exists. Zones are global names defined under Admin → Domain Lists → Property Location Zones (e.g., "Front", "Left Side", "Right Side").
Example: A "Yard" location with multi-zone enabled allows inspectors to specify "Yard – Front", "Yard – Left Side", or "Yard – Right Side" without creating separate locations for each.
During an inspection, zone pills appear in the location card header, and a dropdown allows the inspector to select which zone applies.
Multi-Instance
When Multi-Instance is enabled on a location, you can generate multiple copies of that location within a single unit. Each instance carries the same set of items.
Example: A "Bedroom" location with multi-instance enabled allows an inspector to create Bedroom 1, Bedroom 2, and Bedroom 3 — each with the same inspection items — without defining separate locations.
During an inspection, an "Add Instance" button allows creating additional copies of the location. Each new instance duplicates the items from the previous instance.
Configuring Multi-Zone or Multi-Instance
- Select a property location in the tree.
- In the Associations panel, toggle Multi-Zone or Multi-Instance on.
- Only one can be active at a time — enabling one automatically disables the other.
Multi-Zone uses the global list of Property Location Zones configured under Admin → Domain Lists. Any zones you create there will be available for all multi-zone locations.
Link Items
Link items refers to the many-to-many relationship between property locations and property items. A single item (e.g., "Paint") can be linked to multiple locations (e.g., "Kitchen", "Bedroom", "Bathroom"), and a single location can have many items linked to it.
Key Rules for Link Items
- Only root-level items can be linked to locations. If an item has a parent (i.e., it is a child item), it inherits its parent's location links and cannot be independently linked.
- Child items follow their parent. When a root item is linked to a location, all of its children automatically appear under that location during inspections.
- Links can be managed from either side. You can link items to a location via the Location Associations panel, or link locations to an item via the Item Associations panel — both modify the same underlying relationship.
Congratulations! You now know how to fully manage property locations, property items, and deficiency tags in the Workbench Admin. You can create hierarchies using child items, link elements together through associations, and leverage multi-zone and multi-instance to handle complex unit layouts — all from a single configuration page.