Merge Fields
This guide provides a comprehensive overview of templates and merge fields in Pluto. Learn how to personalize emails and PDFs with dynamic data, collect user input with prompt fields, configure signature blocks, and leverage system template features like placeholders and buttons.
Overview: Templates and Merging
Templates in Pluto allow you to create reusable documents and emails that automatically populate with data from your sales records. Instead of manually entering purchaser names, dates, prices, and other details, merge fields pull this information directly from the system—saving time, reducing errors, and ensuring consistency across all your communications and contracts.
Why Use Merge Fields?
Merge fields provide significant value by:
- Eliminating manual data entry — No more copying and pasting purchaser names, addresses, or deal details
- Ensuring accuracy — Data comes directly from your records, reducing typos and inconsistencies
- Saving time — Generate personalized documents and emails in seconds
- Maintaining consistency — Every document follows the same professional format
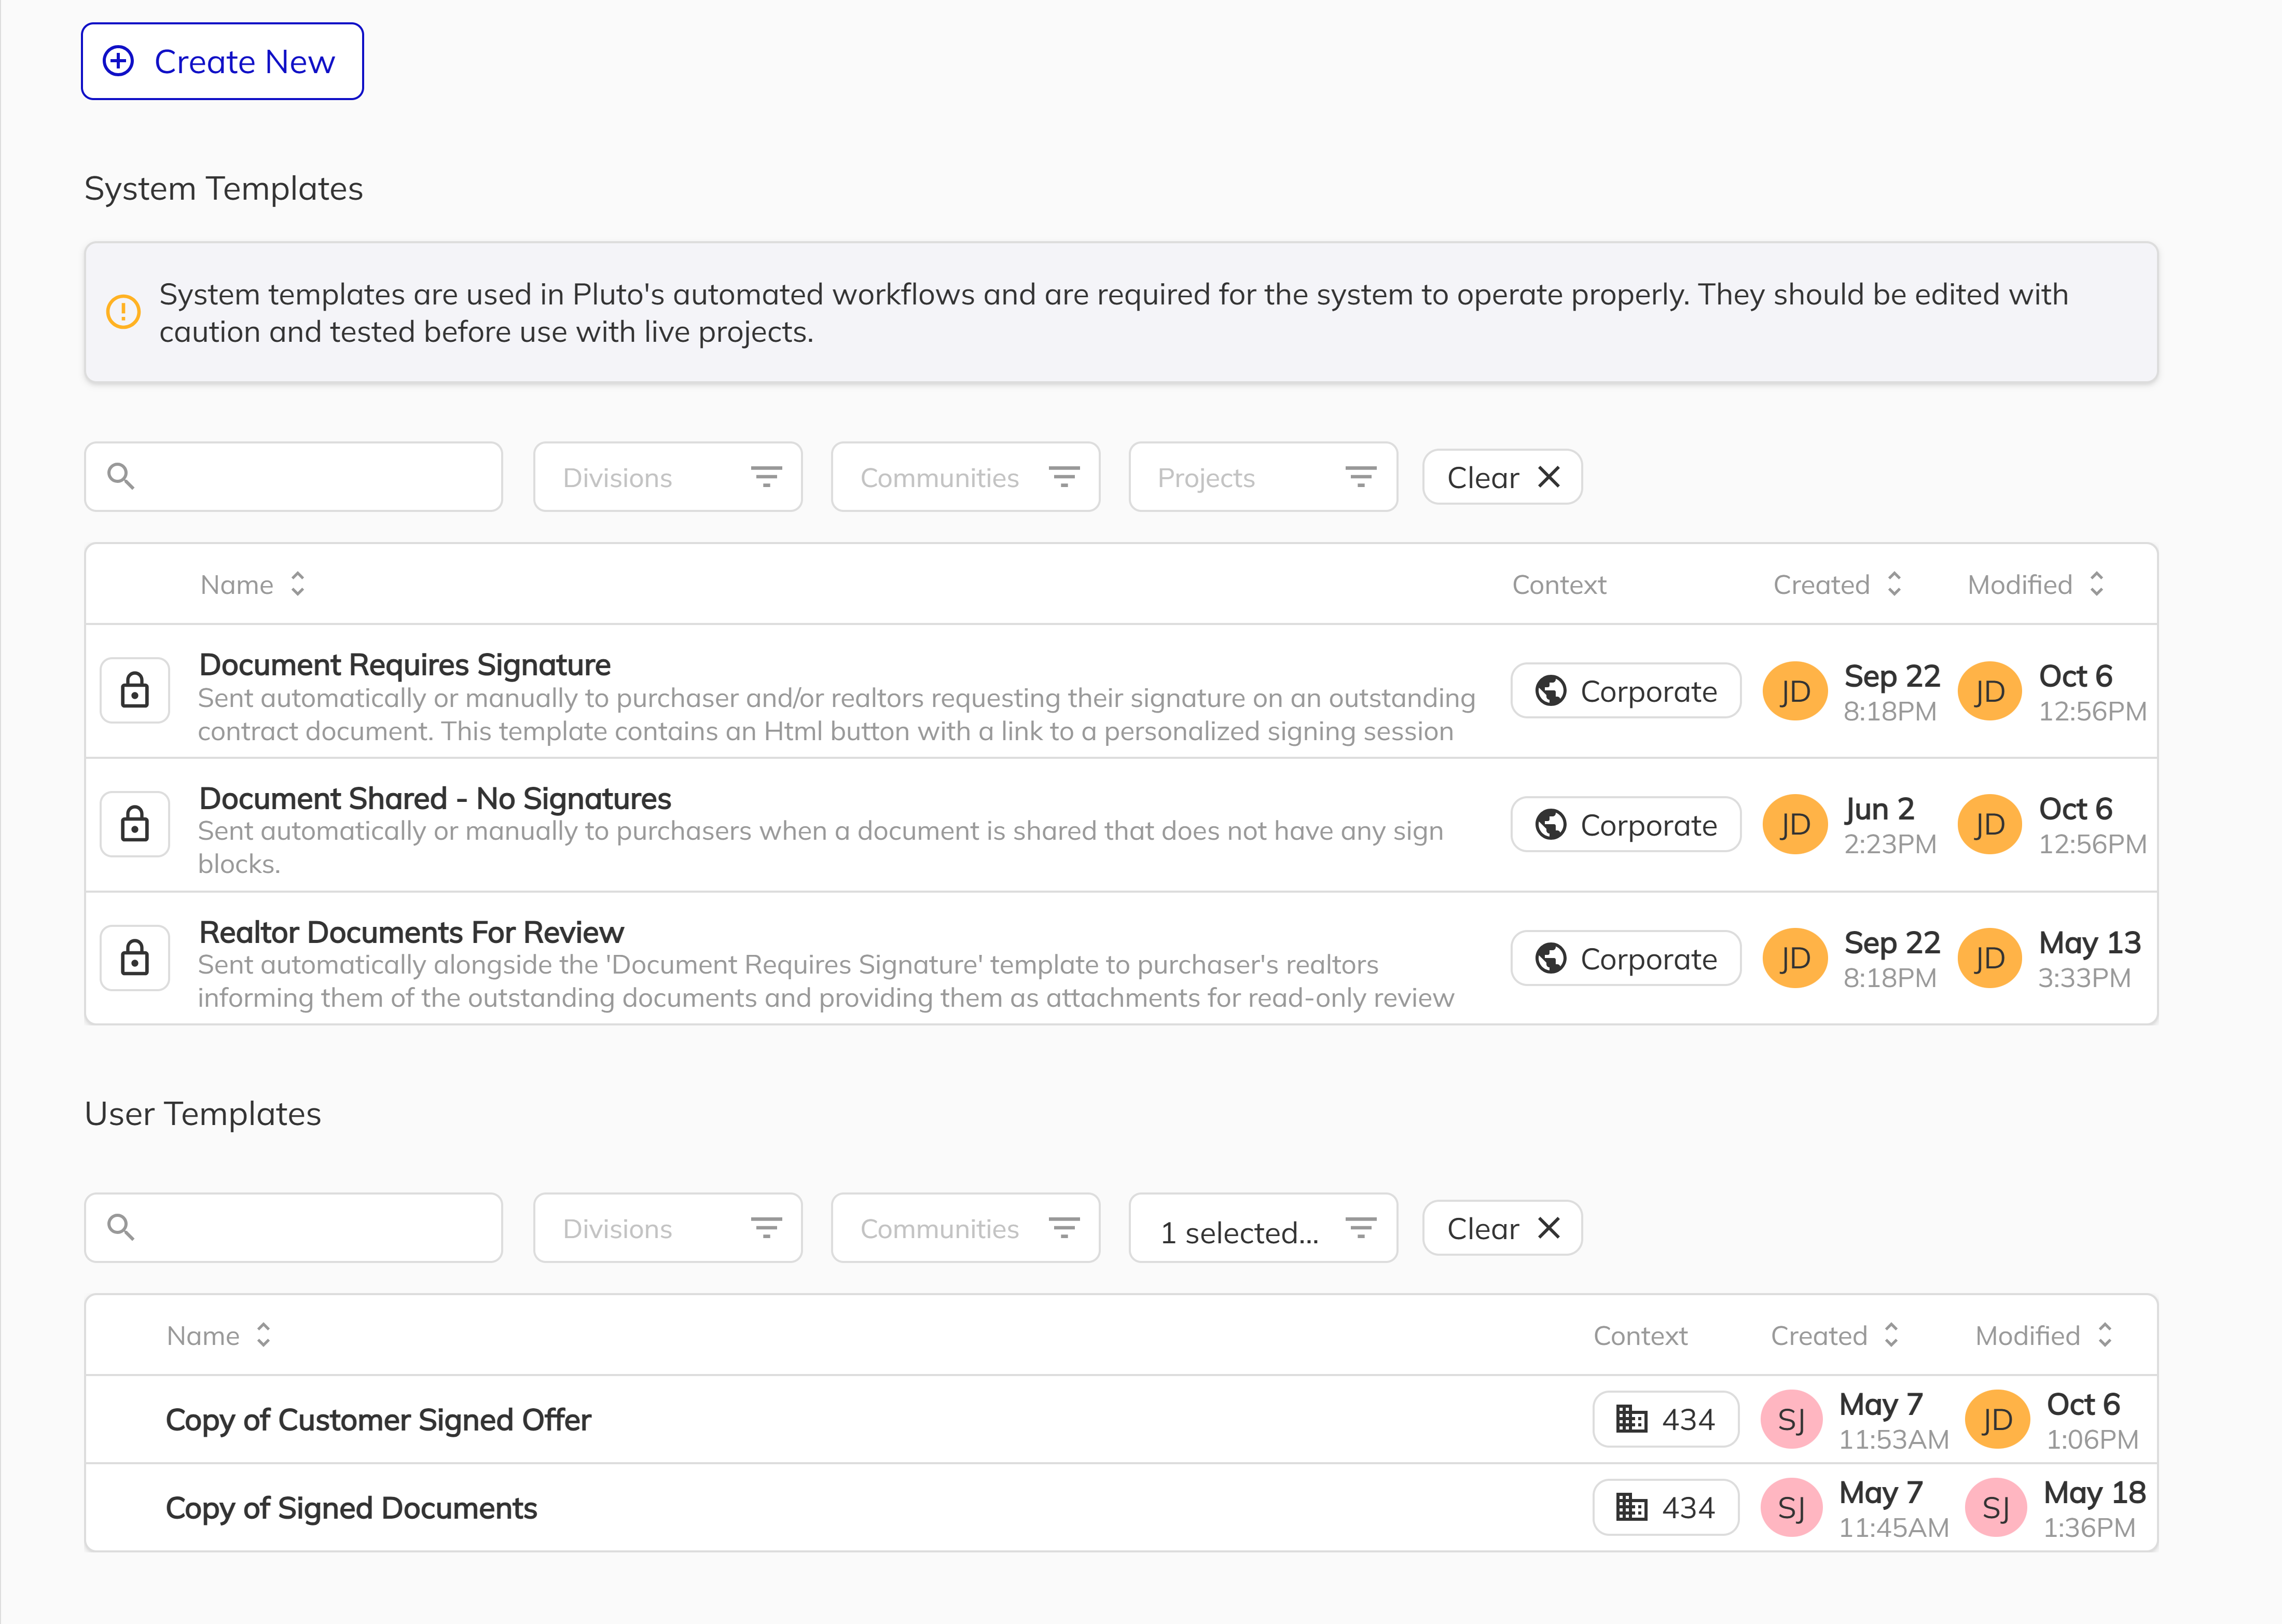
System Templates vs. User Templates
Pluto uses two types of templates, each serving different purposes:
| Template Type | Description | Key Features |
|---|---|---|
| System Templates | Pre-built templates provided by Pluto for core system functions (e.g., verification emails, change order forms, contract documents) | Can use special placeholder fields and button fields that are not available in user templates. These fields enable system-specific functionality like verification codes, dynamic option lists, and action buttons. |
| User Templates | Custom templates created by your team for your specific business needs (e.g., welcome emails, custom addenda, marketing materials) | Use standard merge fields for personalization. Cannot use system-specific placeholders or buttons. |
System templates require specific placeholder and button fields to function correctly. If you modify a system template, ensure all required placeholder fields remain in place, or the template may not work as expected. See the Placeholders and Button Fields sections for details on which fields are required for each system template.
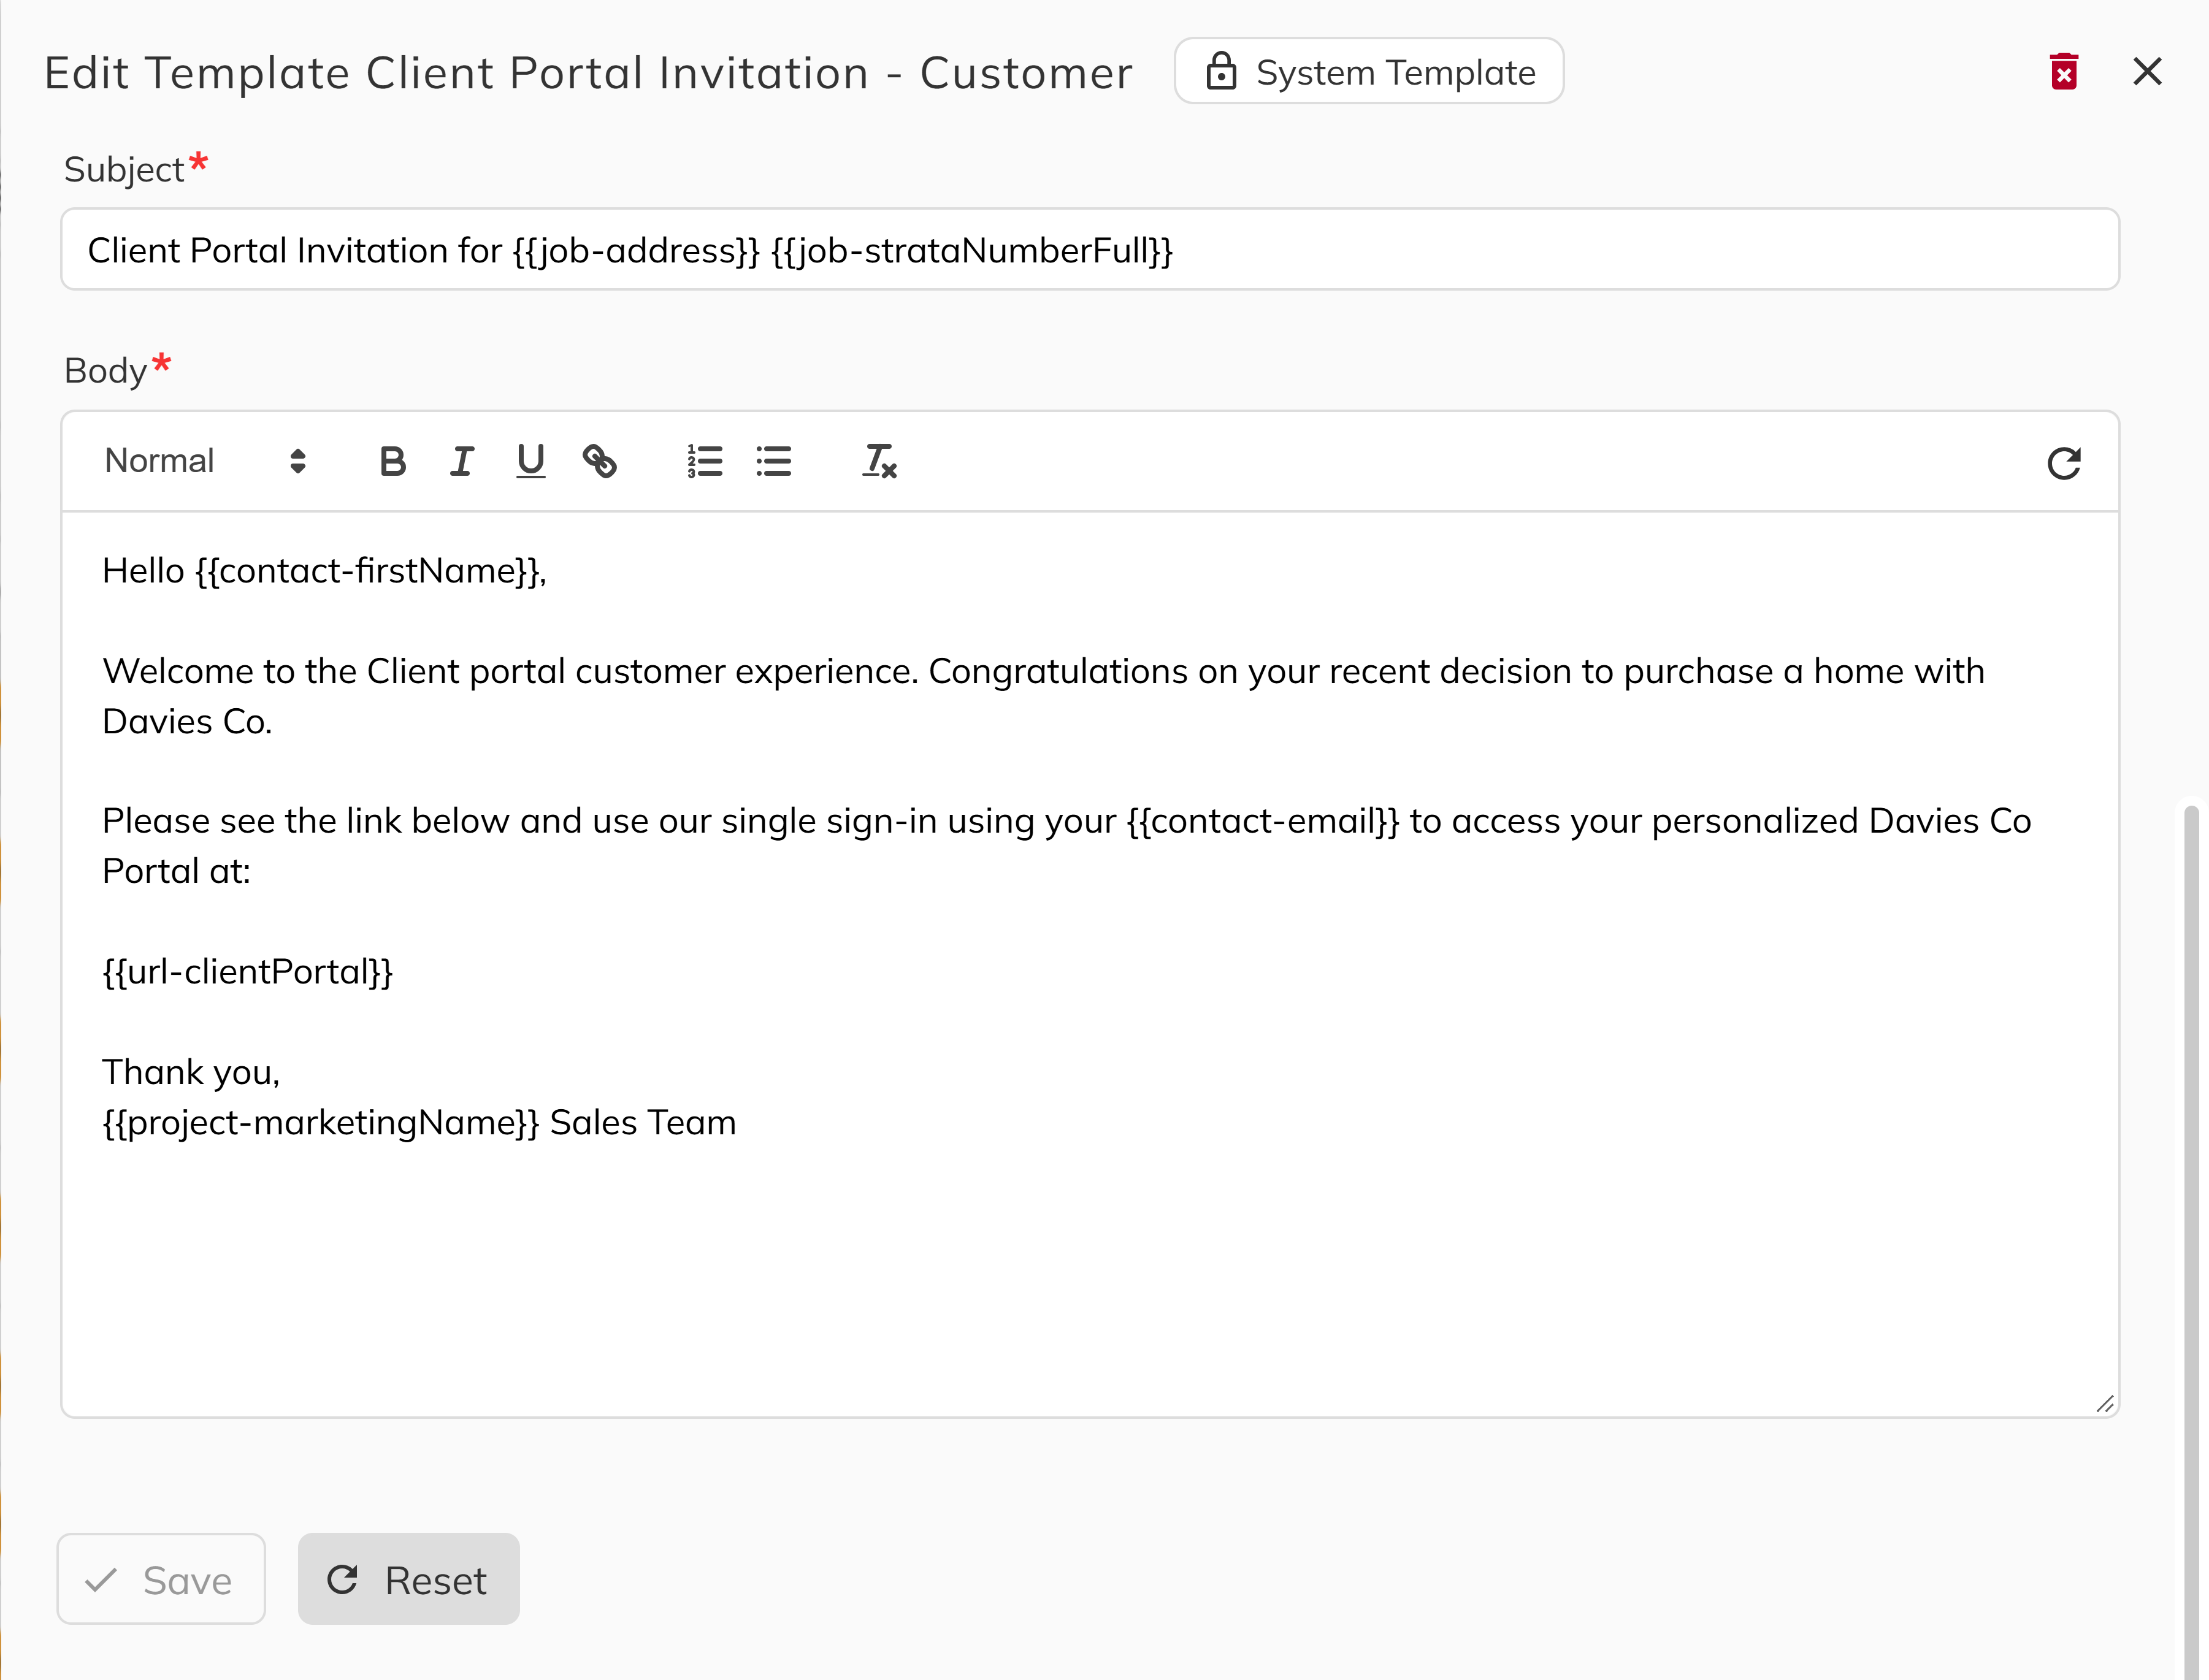
Basic Merge Fields
Basic merge fields automatically insert information from your data into emails or PDFs.
- Emails: Use double curly braces:
{{fieldName}} - PDFs: Use just the field name:
fieldName
How it works in Pluto:
When you enter or update data (such as purchaser names, dates, purchase price, or addresses) in the Pluto Sales App, that information is stored in the system. When you generate a document or email using Pluto, the merge fields in your template (like {{purchaser-1-firstName}} or job-closingDate) are automatically replaced with the actual data from your records. This ensures that every document or email is personalized and accurate, without manual copy-pasting.
Examples:
| Purpose | Email Example | PDF Example |
|---|---|---|
| Purchaser's First Name | {{purchaser-1-firstName}} | purchaser-1-firstName |
| All Purchasers' First Names | {{purchaser-all-firstName}} | purchaser-all-firstName |
| Closing Date | {{job-closingDate}} | job-closingDate |
| Purchase Price | {{job-purchasePrice}} | job-purchasePrice |
| Community Name | {{community-name}} | community-name |
Working with Lists vs. Specific Items in Lists
You can reference all items in a list or a specific item.
When working with lists (such as purchasers on a job), you can use special keywords or numbers in the field name to control which items you want to access:
- Use
allin the field name (e.g.,purchaser-all-firstName) to get information for all purchasers related to a particular job. This will return a combined result (such as a comma-separated list) of the specified field for every purchaser. - If you want information for a specific purchaser, use a number in the field name (e.g.,
purchaser-1-firstNamefor the first purchaser,purchaser-2-emailfor the second purchaser, etc.). The number represents the position of the purchaser in the list for that job.
Examples:
| Purpose | Field Name Example | Description |
|---|---|---|
| All purchasers | purchaser-all-firstName | All purchasers' first names |
| First purchaser | purchaser-1-firstName | First purchaser's first name |
| Second purchaser | purchaser-2-email | Second purchaser's email |
Note:
Not all lists support the all keyword. Some lists may only allow referencing specific items by number. Please refer to our Fields documentation to find out which merge fields do not support the all keyword.
Signature Fields - PDF Documents
Signature fields define where and who should sign or initial a PDF. The field name determines the signer and signature type.
Signer Types:
Developer— There is only one developer signer and does not need a quantifier or direction.Realtor— The buyer's realtor is the only signer type and does not need a quantifier or direction.Purchaser— Requires specifications on which purchaser needs to sign the block. If all purchasers are needed, add directions listed in the Notes section.
Examples:
| Scenario | PDF Field Name Example | Description |
|---|---|---|
| Developer signature | signature-developer | Developer signature block |
| Singular purchaser signature | signature-purchaser-1 | First purchaser signs |
| Singular purchaser initials | initials-purchaser-1 | First purchaser initials |
| Multiple purchasers' initials (down) | initials-purchaser-all-down | All purchasers initial (additional sign blocks expand down the page) |
| Singular realtor purchaser signature | signature-realtor | Realtor signature blocks |
Notes:
- Use
signature-for signature blocks andinitials-for initials blocks. - For initials, use
allto include every purchaser or a number (1 to 6) to specify an individual. - For signatures, use a number (1 to 6) to specify an individual purchaser.
- Add a direction (
left,right,down) for placing multiple initial blocks at a single location. This option is only valid when used in conjunction with theallsigners option. - The signature pattern is
[signature-type]-[signer-type]-[quantifier(optional)]-[direction(optional)]. The optional fields are only used for the purchaser signer type. There is only one developer and one realtor.
Prompt Fields
Prompt fields are used in PDFs to collect information from the user at the time of document generation. Unlike regular merge fields that pull existing data from the system, prompt fields ask the user to enter new information that may not be stored elsewhere.
Prompt Fields vs. Regular Merge Fields
| Feature | Regular Merge Fields | Prompt Fields |
|---|---|---|
| Data Source | Pulls from existing data in the system | User enters data at generation time |
| Use Case | Purchaser info, job details, pricing | Custom notes, one-time inputs, special instructions |
| User Interaction | None — auto-populated | User sees a form and must provide input |
| Example | purchaser-1-firstName | prompt-text-specialInstructions |
When to Use Prompt Fields
Use prompt fields when you need to capture information that:
- Is unique to a specific document and not stored in the system
- Varies each time the document is generated
- Requires human input or judgment (e.g., custom notes, special conditions)

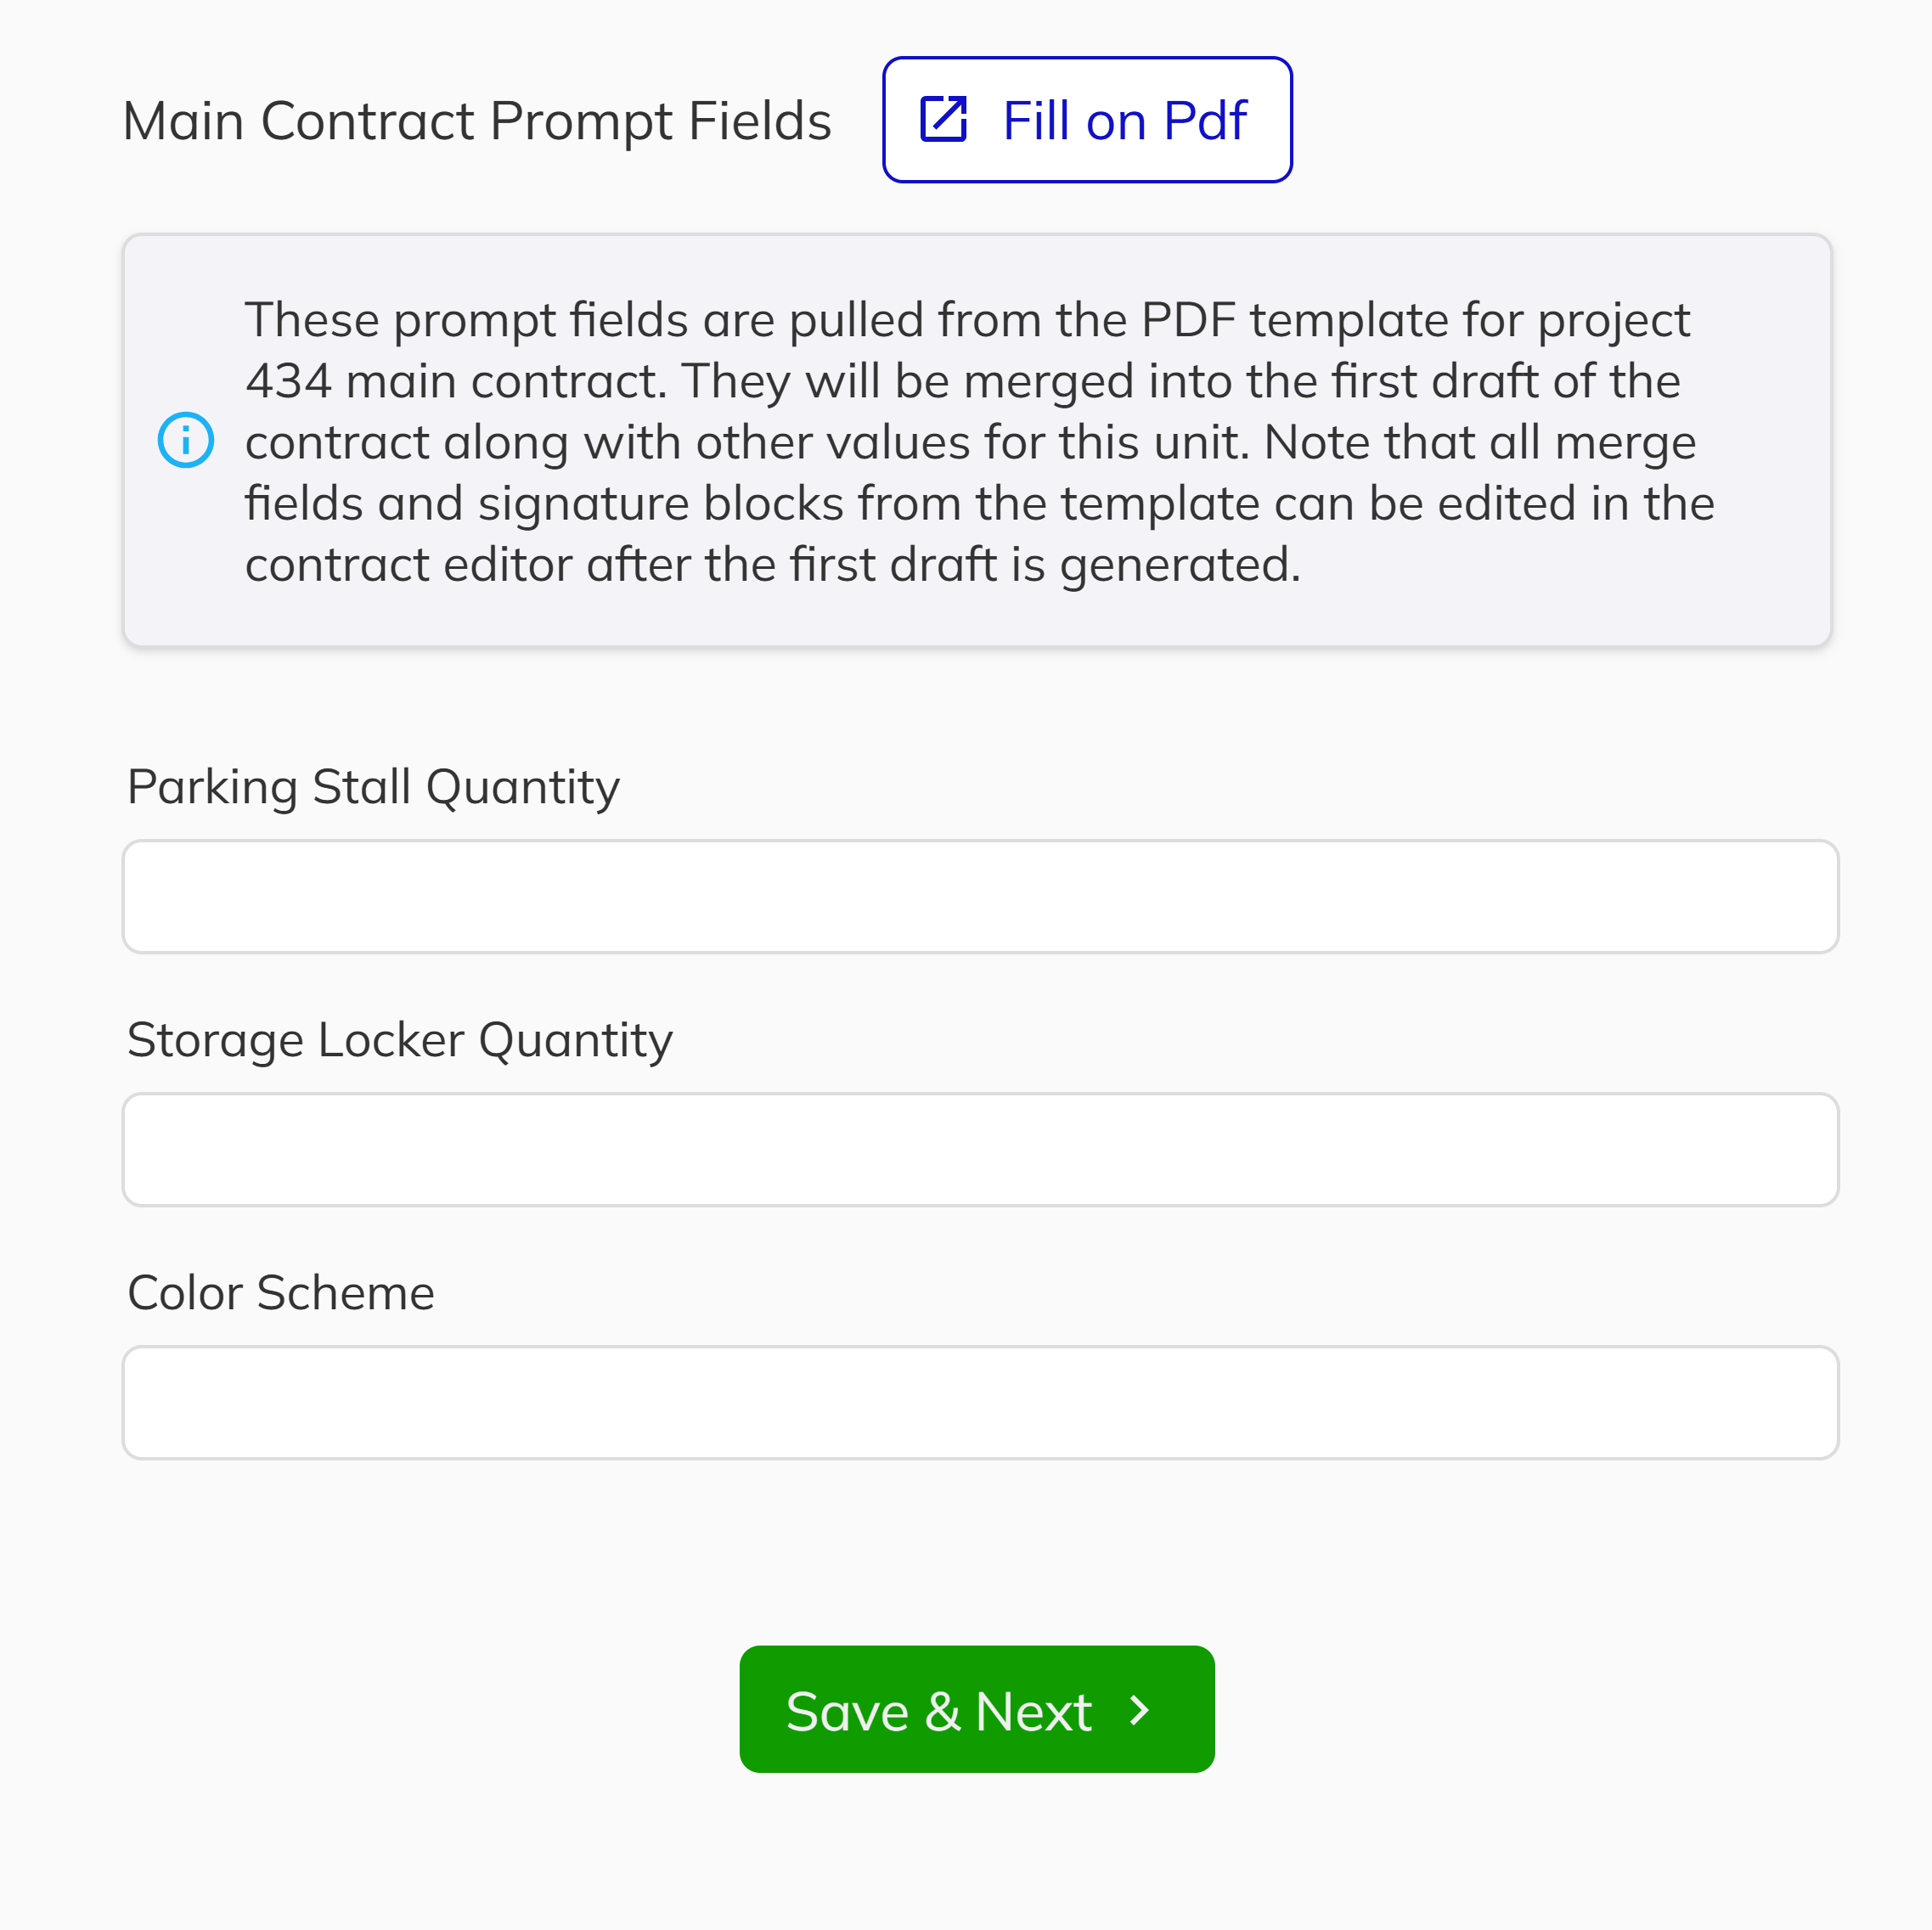
Prompt Field Syntax
Prompt fields should be named using the pattern: prompt-[type]-[fieldName]
Replace [type] with the kind of input you want:
textfor a single-line text fieldtextareafor a multi-line text boxdatefor a date pickerdatetimefor a date and time pickerbooleanfor a checkbox (true/false)
Examples:
| Input Type | PDF Field Name Example | Description |
|---|---|---|
| Single-line text | prompt-text-customerName | User enters their 'Customer Name' |
| Multi-line text | prompt-textarea-customerNotes | User enters 'Customer Notes' |
| Date picker | prompt-date-dateOfBirth | User enters 'Date of Birth' |
| Checkbox | prompt-boolean-agreeToTerms | User checks to 'Agree to Terms' |
| Number input | prompt-text-customerAge | User enters their age 'Customer Age' |
Note: Always use camelCase for having a multi word prompt title. These will be displayed to users with proper spacing (e.g., 'Customer Name', 'Date Of Birth') as the header text.
Placeholders
Placeholders are special fields that enable system-specific functionality in System Templates only. Unlike regular merge fields that pull from your sales data, placeholders are processed by Pluto to insert dynamically generated content such as verification codes, option details, and other system-managed information.
Placeholders only work in System Templates. They are not available for user-created templates. Each placeholder field is specific to its respective system template—using a placeholder in the wrong template will not work. Do not remove placeholders from system templates.
How Placeholders Differ from Merge Fields
| Feature | Regular Merge Fields | Placeholder Fields |
|---|---|---|
| Template Type | User & System templates | System templates only |
| Data Source | Your sales data (purchasers, jobs, etc.) | System-generated content |
| Availability | Universal across templates | Specific to each system template |
Placeholder Fields by System Template
Device Verification Email
| Purpose | Email Field Name Example | Description |
|---|---|---|
| Verification code | {{placeholder-verificationCode}} | Generates a new verification code and inserts it into the email |
| Code expiry (minutes) | {{placeholder-codeExpiryMinutes}} | Adds the number of minutes before the code expires |
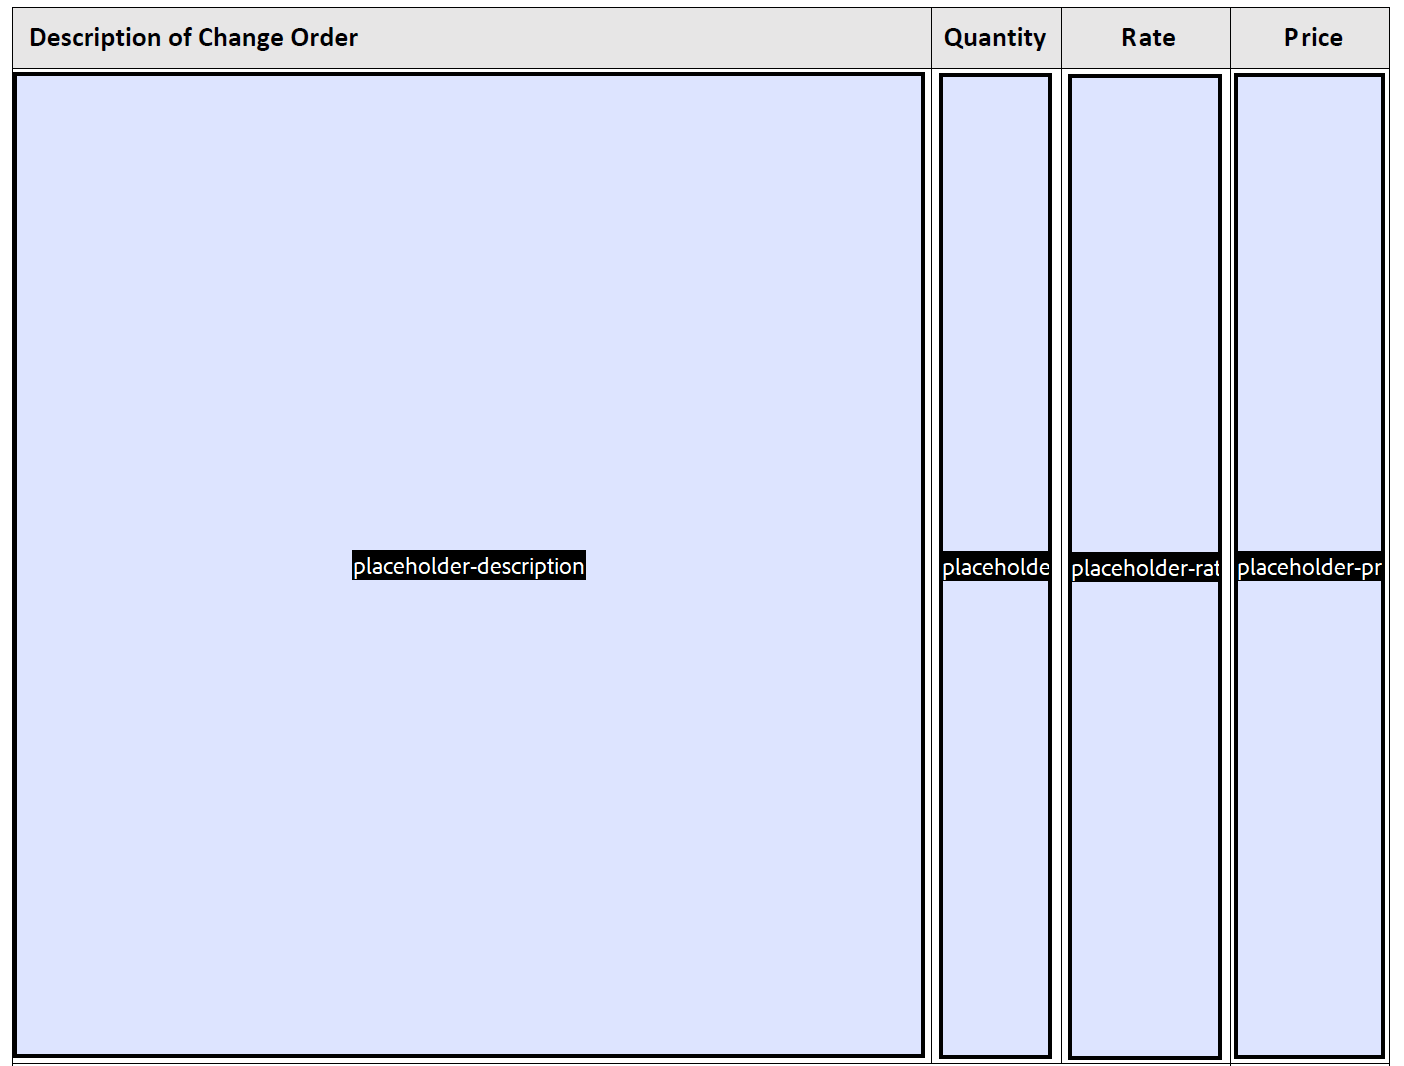
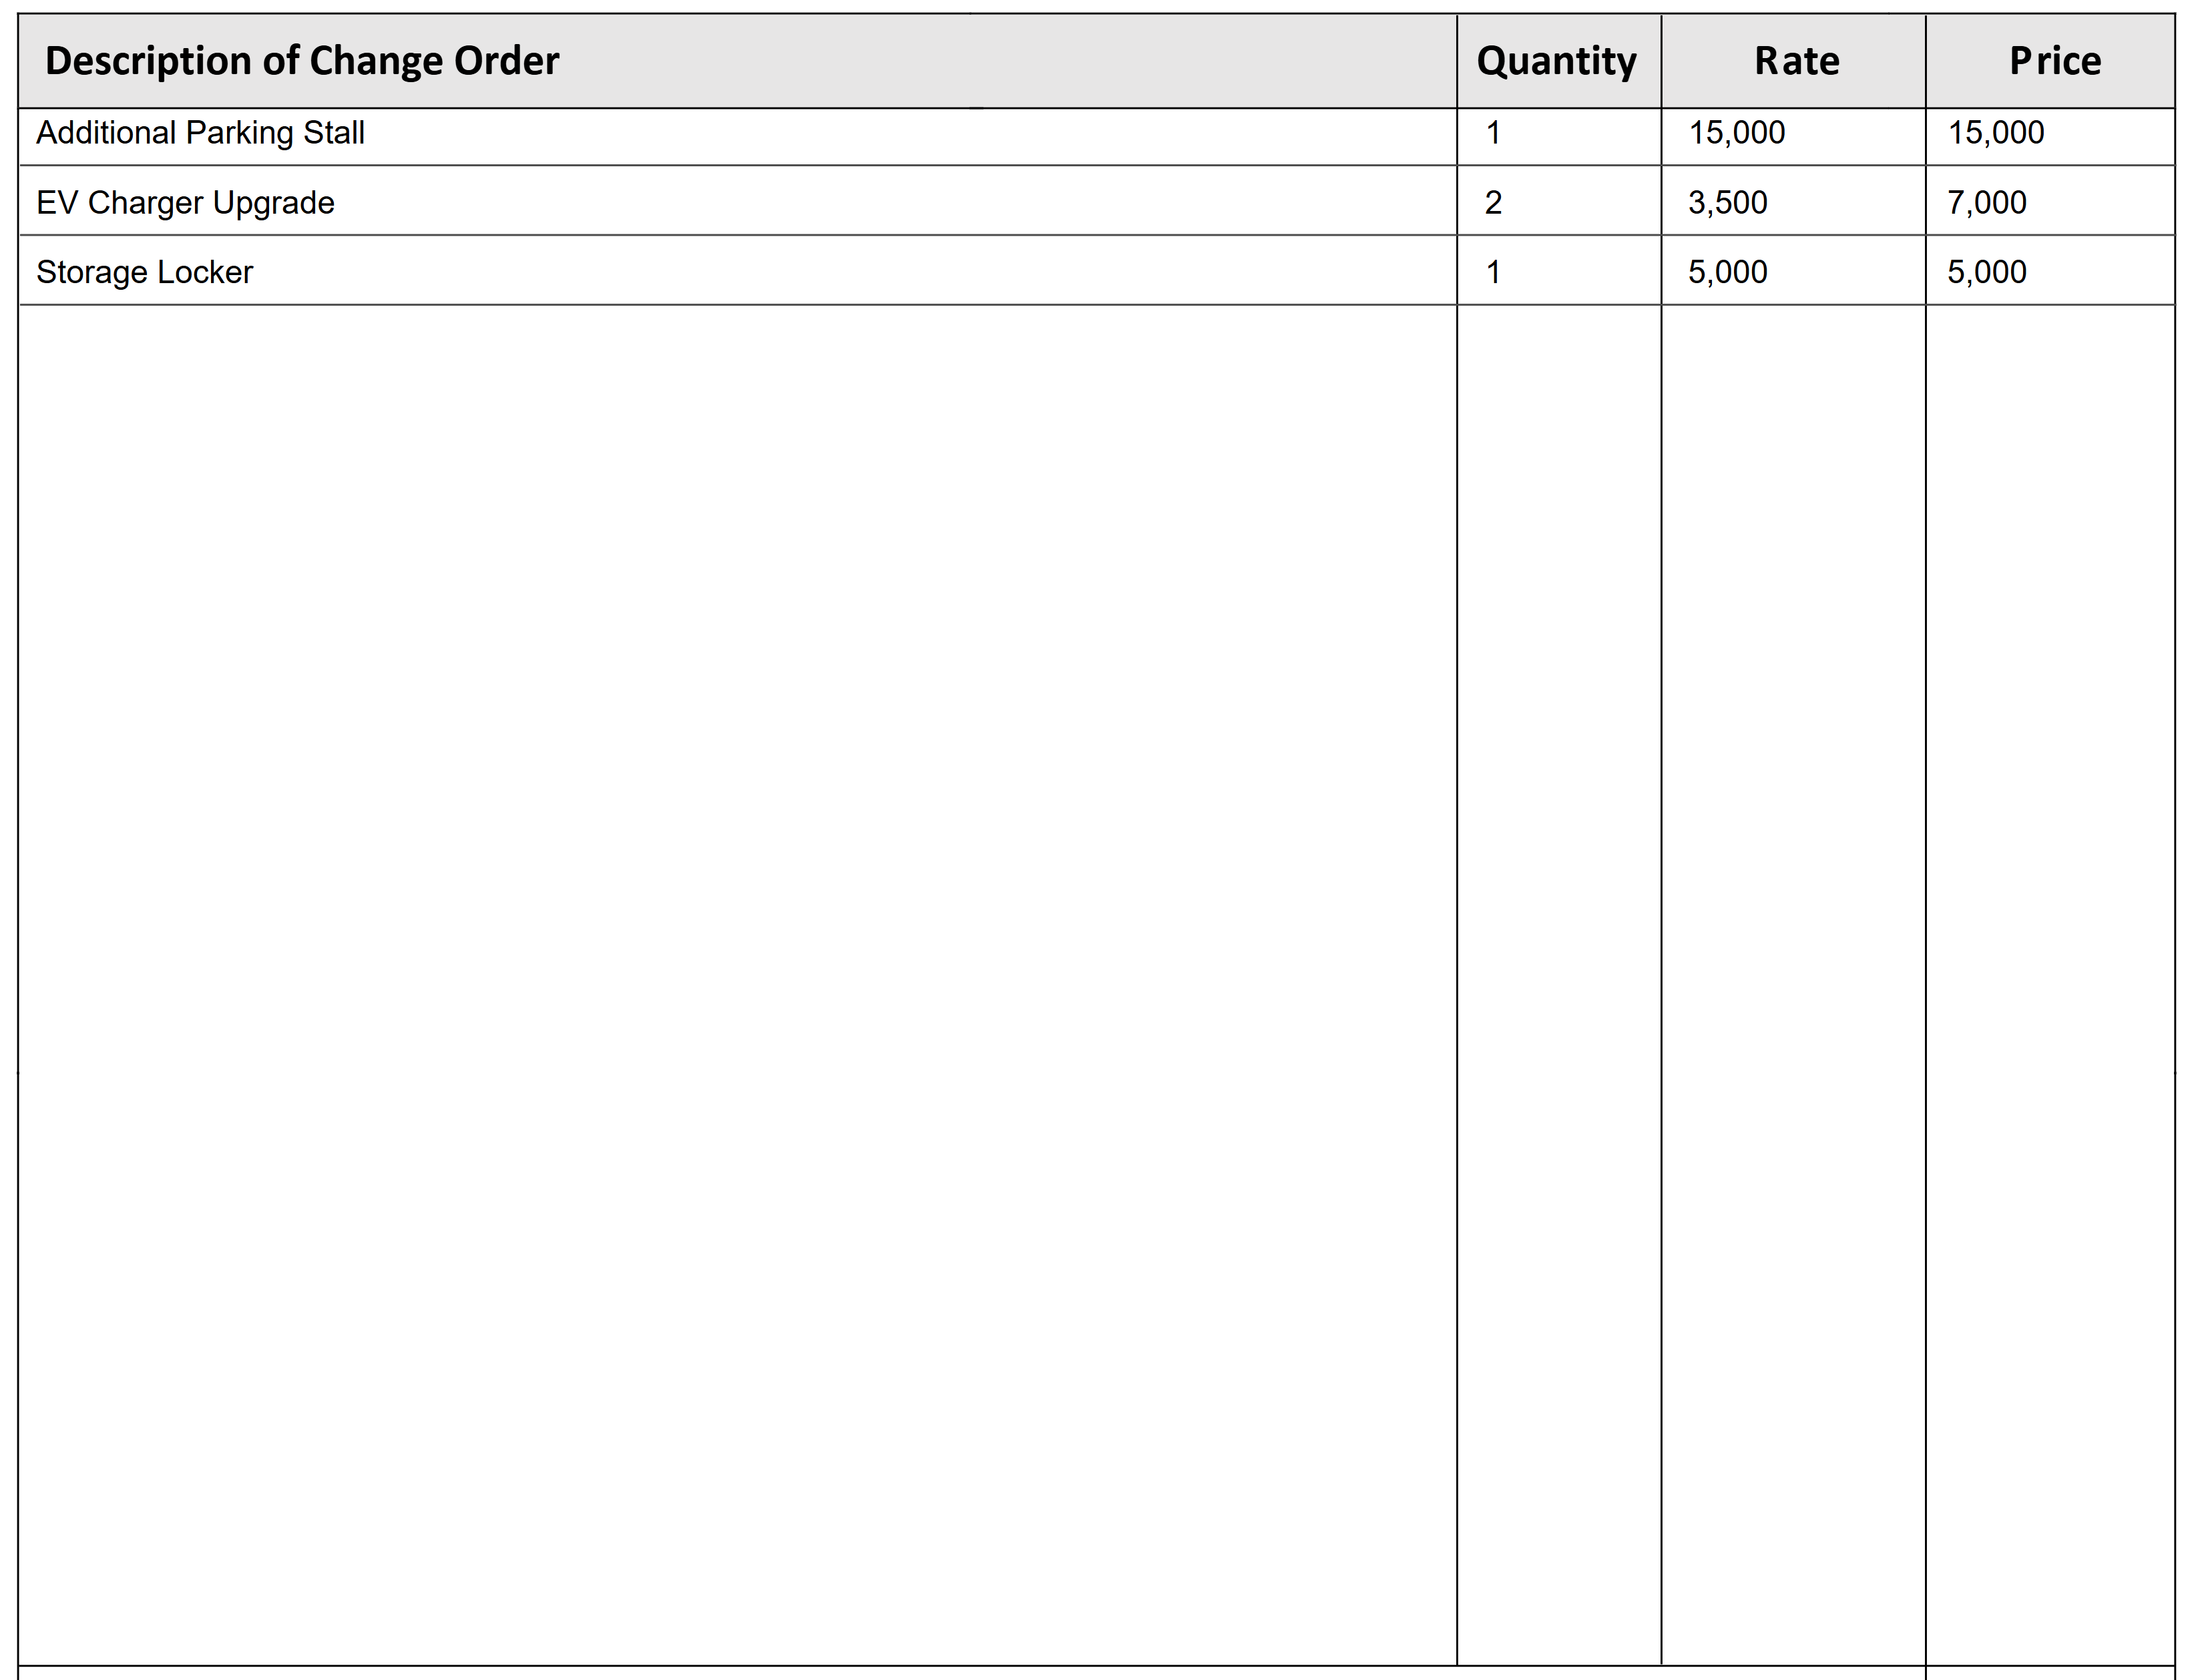
Internal Options / Change Order PDF
| Purpose | PDF Field Name Example | Description |
|---|---|---|
| Option description | placeholder-description | Displays the name/description of the internal change order option |
| Option quantity | placeholder-quantity | Shows the quantity for the internal option |
| Option rate | placeholder-rate | Shows the price per one unit of the internal option |
| Option total price | placeholder-price | Displays the total price (rate × quantity) for the internal option |
When editing system templates, do not remove placeholder fields. The system template panel in the editor will indicate whether required placeholders are present. If placeholders are missing, the template may not function correctly or may fail to generate documents.

Button Fields - Emails
Button fields insert interactive call-to-action buttons into emails that link to specific Pluto workflows or pages. These buttons are a core part of Customer Connect and other system processes.
Button fields only work in System Templates. Like placeholders, each button type is designed for specific system email templates. Using a button in the wrong template or in a user-created template will not work.
Button Field Syntax
Use double curly braces for button fields in emails: {{button-[type]}}
Available Button Types
Each button type serves a specific purpose within Pluto's system workflows:
| Button Type | Field Name | System Template | Description |
|---|---|---|---|
| Link | {{button-link}} | Various | Generic button that opens a specified URL. Can be used in multiple system templates. |
| Identity Verification | {{button-identityVerification}} | Customer Connect - Identity Verification Email | Directs the recipient to the identity verification flow where they confirm their identity before proceeding with their reservation. |
| Advanced Registration | {{button-advancedRegistration}} | Customer Connect - Registration Email | Opens the advanced registration form where purchasers can provide additional information required for their purchase. |
| View Reservation | {{button-viewReservation}} | Customer Connect - Reservation Confirmation Email | Links to the reservation details page in the Client Portal where purchasers can review their reservation status. |
Understanding Button Behavior
- System-Generated Links — When the email is sent, Pluto automatically generates the appropriate secure URL for each button based on the recipient and their specific transaction.
- Template Validation — The email template editor will indicate if required button fields are missing from a system template.
- Email Only — Button fields are only supported in email templates, not in PDF documents.
When customizing system email templates, you can change the button's surrounding text and styling, but ensure the button field itself (e.g., {{button-identityVerification}}) remains in the template for the email to function correctly.
Backfills
Backfills are special fields that are populated after the contract is created, rather than during the contract creation process. They are filled in automatically when an signature event occurs.
Current Uses for Backfills: [offerDate & contractDate only on main contract ]
- offerDate: Populated with today's date when all purchasers have signed the main contract.
- contractDate: Populated with today's date when developer has signed the main contract.
- purchaserSignedDate: Populated with today's date when all purchasers have signed.
- developerSignedDate: Populated with today's date when all developers have signed.
Example:
If you include a backfill field like backfill-offerDate in your document, it will remain empty until all purchasers have signed. Once that signature event occurs, the system will automatically populate the current date in that field.
Note:
- Backfills are useful for capturing important dates or statuses that depend on actions taken after the initial contract is generated. This ensures that the document always reflects the most up-to-date information, even if those events happen later in the process.